Thursday, March 29, 2018

I'm Told People Like Pie.

I've been uncomfortably sweaty for several days in a row now, so I guess Florida has gone straight from sorta winter to regularly scheduled summer grossness. This state makes up seasons and time zones like an episode of Whose Line Is It Anyway? I'm told it is supposed to be spring, but my taste buds were hankering for something appropriate for this level of humidity and...stickiness. Clearly this was a job for a light, fruity pie. I typically abide by the motto that "These feelings would go great with pie," so I eat it pretty regularly. What with Easter coming up on Sunday, I also wanted something a little festive. Considering I'm a grown adult (I think?), I didn't want jelly beans or Peeps coming anywhere near this pie. Does anyone actually eat Peeps? Unless you're crazy about getting cavities (hot dentist?), I just don't see the appeal. So I decided to do the adult thing...you know, juice so many lemons I could cure even the worst case of scurvy and throw them into a tart lemon cream pie. Did I say adult thing? Because it could also be a pirate thing.
Tharrr be piiiieeee.
Okay, so my pink and yellow sprinkles were inspired by Peeps, but the similarities definitely end there. This is a *perfect* Easter pie for all my fellow Catholics out there because it is completely guilt-free. How is that possible? Was it blessed by the Pope? Nope, just a little thing I call Swerve with a dash of potential blasphemy! The original Taste of Home recipe was 735 calories for one slice of pie. Even just reiterating that fact gave me a small heart attack. With some super simple tweaking, I can consume almost an entire pie for the same amount of calories. One slice will only set you back 230 calories (8 servings total). It's an Easter miracle! Yeah, I'm booking a first-class ticket to you-know-where with this blog, but considering my levity, I think this post might just give the man upstairs a good-natured chuckle. Please be benevolent... Seriously though, this pie is a heavenly balance of tart lemon and sweet cream cheese filling. It is light, airy, and packs some seriously ah-mazing flavor. It may be my new favorite way to eat my feelings.
But I am trying my best not to look like the Dough Boy.
Yep, starts with a premade crust. The lemon filling is a little labor intense, so I cut a corner here. I don't have a deep dish pie tin because no one has bought me one yet (Hi, Mom, Christmas, maybe? :-D ), and this pie definitely requires a deep dish. To prepare your crust, simply follow package directions on thawing and bake time/temp. Once cooked to your liking, set on a cooling rack to *completely* cool before putting filling anywhere near it. I'm watching you. Like Roz from Monsters, Inc. Always watching...
I just realized Mickey is blowing a raspberry at my lemon filling ingredients. Happiest mouse my a...
...ssuming you have a juicer or lemon squeezer, making this filling is easy. I have neither, so I juiced lemons by the half for so long I figured my fingerprints might have acid erosion, and I could finally pull the trigger on that diamond heist I've been planning. To make the filling, I suggest a juicer and the following ingredients:
  • 1 1/4 cups of Swerve (granular), divided
  • 5 TBS cornstarch
  • 1/2 tsp salt
  • 1 1/4 cups water
  • 2 TBS margarine 
  • 2 tsp lemon zest (about half a lemon)
  • 3-4 drops yellow food coloring
  • 1/2 cup fresh-squeezed lemon juice (about 3 LARGE lemons or 4 regular-sized lemons)
Start by dumping 3/4 cup of Swerve, the cornstarch, and salt into a medium saucepan. Slowly whisk in the water until nothing is clumpy or weird. Bring to a boil over medium-high heat, then reduce to medium heat and add the remaining 1/2 cup of Swerve. Constantly whisk until thick, about 2-3 minutes...a solid bicep workout. Remove from heat and add in the margarine, lemon zest, and food coloring. Slowly add in the lemon juice, a bit at a time, and whisk until incorporated.
Do not drink with a straw...as tempting as it may be.
 Set your sauce pan on a cooling rack and give at least an hour to cool off a bit. Go read a book or research the healing power of citrus fruits over nautical diseases online. Let this get to room temp, and then make your cream cheese filling.
I also believe in the healing power of Cool Whip.
The original recipe called for 11! 11! ounces of cream cheese. I reduced this to 8 ounces, and still had about 1/3 of the cream cheese filling left over (it is resting safely in the freezer, for now, until I finish this pie and come after it with some graham crackers). If you make a deeper pie crust somehow, you might be able to use all 8 ounces and such, but here's what I recommend for your filling:
  • 6 ounces of 1/3 less fat cream cheese
  • 3/4 cup Swerve (confectioners)
  • 1 1/2 cups of Cool Whip Free
  • 1 TBS lemon juice
  • Optional: an additional 1 1/2 cups Cool Whip Free to top the pie
Start by blending the lemon juice, cream cheese, and sugar together until a bit fluffy, 2-3 minutes. Then fold in the Cool Whip Free by hand so you don't over mix.
Pictured: photographic evidence of way too much (is this a thing?) pie filling.
Now, take your totally cooler than cool (ice cold!) pie crust and spread your cream cheese filling in it. Smooth out, but don't worry, this is getting topped. I placed into the freezer for about 15 minutes to set up because my lemon filling was still just a wee bit warm after an hour.
Smoooooooooth.
Once the cream cheese filling has set, pour the lemon filling on top. Use an angled spatula to smooth out. I tapped on the counter gently a couple times to release air bubbles. Put your pie in a cake safe and place into the fridge to completely set overnight. Waiting, the hardest part. I had a 3-day waiting/resurrection joke for this, but I'm worried I might get smited? smote? at this rate.
Maybe even smitten?
Ahhhh, sprinkles. Nothing is ever finished without sprinkles.
After waiting overnight, my lemon filling froze in the fridge because I didn't cover it properly and put it in the very back of the fridge, where apparently a Yeti that likes it extra cold lives. So, definitely place your pie in an airtight container and not in the back of the fridge. I topped my pie with 1 1/2 cups of Cool Whip Free with a 1M star tip, and of course, sprinkles. I friggin love sprinkles. I don't have a sparkly personality, so this might be how I vicariously shine.
Lemon-y fresh!
To. Die. For. Worth every ounce of lemon juice that seeped into the paper cut on my hand while preparing filling (love hurts). The cream cheese layer doesn't suffer from the weird Swerve confectioner's sugar cooling effect since this is kept in the fridge and served cool. The filling is seriously the perfect complement to the zest of the lemon layer. Eating this pie made me forget all about the premature grossness of summer in Florida...a testament to how truly light and delicious it is. It's definitely a must-have at any Easter dessert tables, so plan accordingly. You literally have three days to make this pie before Easter Sunday. I am still refraining from my resurrection joke, so I better quit before I blaspheme my way right off the internet. 'Til next time, my fellow eaters!
Enjoy your Easter. One slice at a time!

Wednesday, March 21, 2018

Baileys: Socially Acceptable after Saint Patrick's

While Saint Patrick's Day might have passed, I'm not done celebrating it because I'm still pretending to be Irish and consuming all of the Baileys. This can be a bit difficult since I don't drink anything other than a glass of white wine every Friday (how Catholic of me), so I tend to get pretty creative with my baked goods. If I can turn anything into a boozy dessert concoction that's relatively low-cal, the guilt regarding empty calories and alcohol melts away (much like my cognitive motor functions after more than one glass of wine). If you're supposed to grow out of a sweet tooth, no one told me. So I'll continue to party on, Saint Patrick's Day style, with this week's marvelous recipe: a cheesecake. But not just any cheesecake. A Baileys Salted Carmel cheesecake. And not just any Baileys Salted Caramel cheesecake. But mini Baileys Salted Caramel cheesecakes. Individual little servings of boozy perfection. Because at the end of the day, aren't we always celebrating something? It may not be Saint Patrick's Day. Maybe you're celebrating a birthday. An anniversary. The sheer fact you made it through the day without throat punching anyone (this is typically why I reward myself with dessert). Whatever the reason, it's always dessert season.
Small, adorable, and full of Baileys. Just like me.
These tasty little handheld cheesecakes are positively simple to make, and, wait for it...under 250 calories. I made 20 mini cheesecakes at 214 calories a piece. Technically, you could eat two and still be eating fewer calories than a slice of any other kind of regular cheesecake. I am nothing if not steadfast in my conviction to make dessert taste amazing and not require an extra hour of Jillian Michaels workouts. In the case of these cheesecakes though, the suffering would be totally worth it. These beauties are beyond decadent. I thought I'd have a hard time not eating them five at a time, but they are super rich, silky, and one will satisfy your cheesecake and/or Salted Caramel Baileys lust (even if you are extremely Irish). I found and adapted this recipe to fit a cupcake pan...because seriously, who has four mini spring form pans? I don't even have one regular-sized spring form pan. Rich people and cheesecake enthusiasts. Geesh.
Wait, there's definitely more.
I broke the instruction portion of this blog into three parts: crust, filling, and ganache. Let me take you on a magical journey with my words, people. To make the crust, you'll need:
  • 10 low fat graham crackers (I used cinnamon...it was delightful). Pulverize these to a fine crumb with a food processor or the tried and true plastic bag/rolling pin combo
  • 2 TBS cocoa powder
  •  3 TBS Swerve granular sugar replacement (there's zero cooling effect with this type of Swerve, unlike the confectioner's variety)
  • 3 TBS butter, melted
I made the crusts in my mini food processor (rich people, geesh). I turned the graham crackers into a fine pulp (power!!) and then added in the cocoa and Swerve, giving a good mix. I finished off by adding in the melted butter until the crust mixture was completely wet.
The color of these crusts makes me wish I could tan. Not Irish, just super pale.
Preheat your oven to 350 and line two muffin tins with 20 cupcake liners. Take about 1.5-2 TBS of the crust and dump into each liner. I used a shot glass (fitting) to smoosh the crust down and even it out. Bake your crusts for 8-10 minutes until tanned but not burnt (the exact opposite of what happens to my skin after 8-10 minutes in the sun). Let these rest on a cooling rack and lower your oven temp to 325.
Mmm, Baileys. I'm not sure how you're supposed to drink it since I hate coffee, but boy do I love eating it!
To make the filling, you need:
  • 3-8 ounce packages of 1/3 fat cream cheese
  • 3/4 cup granular Swerve
  • 3 eggs
  • 1/2 tsp vanilla
  • 1/4 cup light sour cream
  • 1/4 cup Salted Caramel Baileys (I promise, we'll add more booze in phase three)
Start by mixing the cream cheese and sugar together until fluffy. Add in each egg, one at a time, blending well between each addition. I scraped the bowl between each. Then add in the vanilla, sour cream, and sweet, sweet boozy goodness. Mix well. I used a tablespoon to scoop about 3 tablespoons of filling into each crust cup.
Can you guess which pan was purchased at Walmart? Bet you can...
 Fill most of the way full and smooth out the batter a bit with the back of the tablespoon. Bake for 18-22 minutes, until the tops are set but not tanned (I have no reference to my paleness here. Just don't burn the cheesecakes).
I need a foundation in this shade. Seriously.
Let your cooked cheesecakes cool on a cooling rack COMPLETELY before even thinking about the ganache. Pour yourself a glass? of Baileys and whatever Baileys goes with when it isn't in food, savor, bide your time, sing karaoke, whatever. Just don't touch these until they're room temp. Leave them in the muffin tins!
As promised: more Baileys.
Finally, take 1/2 cup of semisweet chocolate chips, and set aside. Bring 1/2 cup of Baileys to a boil in a small saucepan. Remove from heat and whisk in the chocolate chips until completely smooth. Don't burn your chocolate. Take it off the burner or face the consequences of bitter, bumpy chocolate. Boo. Not cool.
Chocolate, like my writing, should be smooth. Or something close to that.
Take a regular spoon, dollop one heap on top of your completely cooled (seriously, have I driven this point home?) cheesecake, and spread out to form a nice thin layer of ganache. Repeat for the remaining cheesecakes.
And now, we wait.
Waiting is, quite frankly, always the hardest part of baking anything. I actually put my ganached cheesecakes (still in the muffin tin) into the fridge to set overnight. The ganache sets up quite nicely, with just a minimal amount of tackiness to it, so don't stack these when you store them. I placed mine into two ziplock baggies and laid flat in the fridge to keep. One of those ziplock baggies went to work with me, 1. Because it's spring break, and at museum, you need to imbibe booze to survive travel seasons somehow. And 2. Because I would definitely eat all 20 of these without any form of guilt. I was saving myself from...myself.
You can see why that was necessary.
I enjoyed these immensely. My biggest complaints about cheesecakes are there usually aren't enough servings (problem solved) and that I can't just dig in and eat it with my hands (this problem occurs more frequently than you'd think). By revolutionizing cheesecakes to mini handheld forms loaded with tons of booze, I'm giving the Cheesecake Factory a run for its money. These really are delicious. The cheesecake filling is light with a nice hint of Baileys and caramel, the crust boasts excellent texture and smooth flavoring, and the piece de resistance--the ganache--is to die for. It balances rich chocolate and a bite of Baileys beautifully. I was silent for a full two minutes after I finished eating one because I wanted my taste buds to remain locked in flavor heaven. Irish or not, these are a dessert you have to experience, any time of the year. Or day for that matter. You can totally have Baileys for breakfast. In coffee. Or with cheesecake muffins. Dream big. 'Til next time, my fellow eaters!

Thursday, March 15, 2018

Time to Eat Your Greens

Not gonna lie, y'all...Saint Patrick's Day totally snuck up on me this year. Usually I've already baked and digested so much green food by this time in March I feel honorarily Irish. I was ill-prepared for how short February was, and I totally fell off my game because of it. Then I was a little occupied with all things purple last week for bonafide reasons, and due to my inherited preference for said color, I kind of forgot things were supposed to be turning green. I'll take this moment to also blame Florida (it's what I do) because the entire region has been green since January, so it threw off my groove. Beware the groove. I wanted to make it up to my extremely (proven by 23andMe) Irish husband, so I came up with a dessert we actually hadn't eaten yet for Saint Patrick's Day...which between my 8,000 Guinness, Baileys, and Shamrock Shake variations was no small task. I wonder if kissing the Blarney Stone would provide me with the gift of new dessert ideas instead of the gift of the gab, which, let's face it, I am totally already shamrocking. Running quickly away from that terrible joke, let me debut my first of two 2018 Saint Patrick's Day dessert entries: pistachio sugar cookie bars with cream cheese frosting!
May you live as long as you want and never without dessert -An extremely (proven by 23andMe) French take on an Irish proverb by yours truly.
Oh yes, they're green. They're so green, they make most green vegetables embarrassed to be the same color. While I did lighten these up to make them healthier, I can promise you it's not through zucchini or kale trickery. As if enchanted by the magical properties of a leprechaun (god, I'm so sorry, but I'm filled to the brim with terrible Saint Patrick's Day puns this close to the holiday with no other outlet), a 9x13 pan of these will only set you back 219 calories for one ample-sized bar (15 servings total). I must admit the magical properties that made this possible were Swerve's two varieties of sugar replacement. And butter. All of the butter.
And a significant amount of pudding.
I found this recipe and adapted it to play around with Swerve's granular variety after testing out the confectioner's variety last week. To make these bars, I used:
  • 3/4 cup butter at room temp (to reduce calories even more, replace with unsweetened applesauce)
  • 3- 1 oz. boxes of Jell-o sugar free pistachio pudding mix (mix only)
  • 1/2 cup Swerve granular sugar replacement
  • 2 eggs
  • 1 1/2 tsp vanilla
  • 1/4 tsp almond extract
  • 2 cups flour
  • 1/4 tsp baking powder
  • 1/8 tsp salt
  • Optional (but festive!): green gel dye
Preheat your oven to 350 and line a 9x13 tray with Parchment and spray with cooking spray. In a stand mixer, blend your butter and Swerve together until fluffy (3 minutes). Add in each box of pudding mix, one at a time, mixing well before each addition. Add in your eggs, extracts, a few drops of gel dye, and blend well. In a small bowl, blend the flour, baking powder, and salt together. Dump half the mix into the wet ingredients and blend. Add the rest of the dry mix until just incorporated. The dough will be stiff since this is a cookie batter.
And green. Did I mention it would be green?
Turn the dough out into your prepared pan and use your hands to press out evenly. I finished up by rolling a glass around the pan a few times to smooth things out. Bake at 350 for 15-20 minutes. I was in the middle of doing other things (read: not paying attention) and let these bake for a full 20. They were definitely overcooked in my opinion. I prefer a soft cookie, and these were rather firm. Nothing a little microwave action couldn't fix (more on that later), but these bars should definitely be soft, so err on the side of less time. I'd say no more than 18 minutes max if you like a firmer cookie bar. My oven is possessed by an evil spirit that lies about what temperature the oven really is, so things cook much faster than they might in your normal, non-demonic oven. Do the Winchester brothers make house calls for oven exorcisms?
A little less green and "Angry Hulk" in appearance after baking.
Once finished baking, let your cookie bar cool completely in the pan on top of a cooling rack before even thinking about frosting. Did you know that 99% of cooking fails could be prevented if people allowed their baked goods to cool before frosting? That legitimate fact that I totally did not just make up should convince you it's worth the wait to frost these babies.
Ahh yes, Philadelphia, city of brotherly love and cream cheese.
To make your frosting, gather up:
  • 4 oz. 1/3 less fat cream cheese
  • 1/4 cup room temp butter
  • 2 1/2 cups Swerve confectioner's sugar replacement
  • 1 tsp vanilla
  • 1/2 tsp almond extract
  • 2 TBS skim milk
  • Optional, but again, fessssstiiiivvveeeee: green sprinkles
  Start by blending the cream cheese and butter until fluffy. Add in half the Swerve, the extracts, and one tablespoon of skim milk. Blend well, then add in the remaining Swerve and last tablespoon of skim milk. Frosting will be thick, but still easy to spread.
Like buttah.
 You can call it a day here if you're thinking there's too much green on these bars already, but at this point, just take it the extra mile and garnish with pretty green sprinkles:
It could be none more green.
 Be sure to add the sprinkles quickly after you've frosted, before things start to set. Since these have cream cheese in them, I made them live in the fridge to help firm up the frosting before cutting into 15 squares.
Square...ish.
 This. Frosting. Dear sweet Lucky Charms this frosting is yummy. I talked last blog about the "cooling" York Peppermint Patty feeling after eating frosting with Swerve in it. I since read their blog, tried a few things, and we've greatly reduced this sensation. I want my cookie bars warm, so I heat them in the microwave for 30 seconds to soften the cookie base--in doing so, heating up the bars cuts the cooling sensation down significantly. Since I wanted to use butter and not applesauce for the bars, I opted not to use half Swerve/half powdered sugar for calorie count. But in the future, I think this would almost completely erase that sensation. Again, it doesn't taste bad or weird, it's just not something you're expecting when you take a bite of a non-mint dessert.
Look at that frosting-to-bar ratio. Mmmm.
The pistachio cookie flavor mixed with the cream cheese frosting is savory meeting sweet in all the right ways. Warmed up, these bars are positively irresistible. You could probably keep these covered at room temp to keep the cookie bar soft, but I think everything is trying to kill me, so I opt to keep a cream cheese frosting in the fridge. My idea of living dangerously is using milk one day past its expiration date. What I lack in edginess, I make up for in baking and sass. My Irish husband is super pleased with these bars, and that's what matters most. I won't be drinking any green beer Saturday because I'll be too busy double-fisting these pistachio cookie bars. There's simply no room for beer when I'm busy turning the contents of my stomach green with delicious, pistachio-laden sweets. I can't drink like the Irish, but I will eat most green things (except for you, peas--tiny little orbs of nastiness). I promise to bring a booze-filled, totally not in any way green dessert to you next week. Enjoy your Saint Patrick's Day! 'Til next time, my fellow eaters!
I mean, I've definitely made greener desserts.

Monday, March 12, 2018

A Cake Fit for a Viking

Fathers teach their daughters many important lessons in life: how to change a flat tire, why you should never date a musician, and the importance of rooting for your sports team, among many, many other things. As someone who comes from a long line of Vikings fans that bleed purple and gold, by proxy, I also learned how to cope with loss, sadness, anger, and bargaining thanks to the birthright passed down to me by my father. While being a Minnesota Vikings fan has its ups and mostly crushing downs, more than anything, we appreciate being a part of an extremely fervent fan base. Since my dad and stepmom were coming down for a visit just a week shy of his birthday, I knew exactly what I needed to do: bake a birthday cake fit for a Viking. And thus, this extremely purple and yellow beauty was born...
Skol, baby!

It had been 
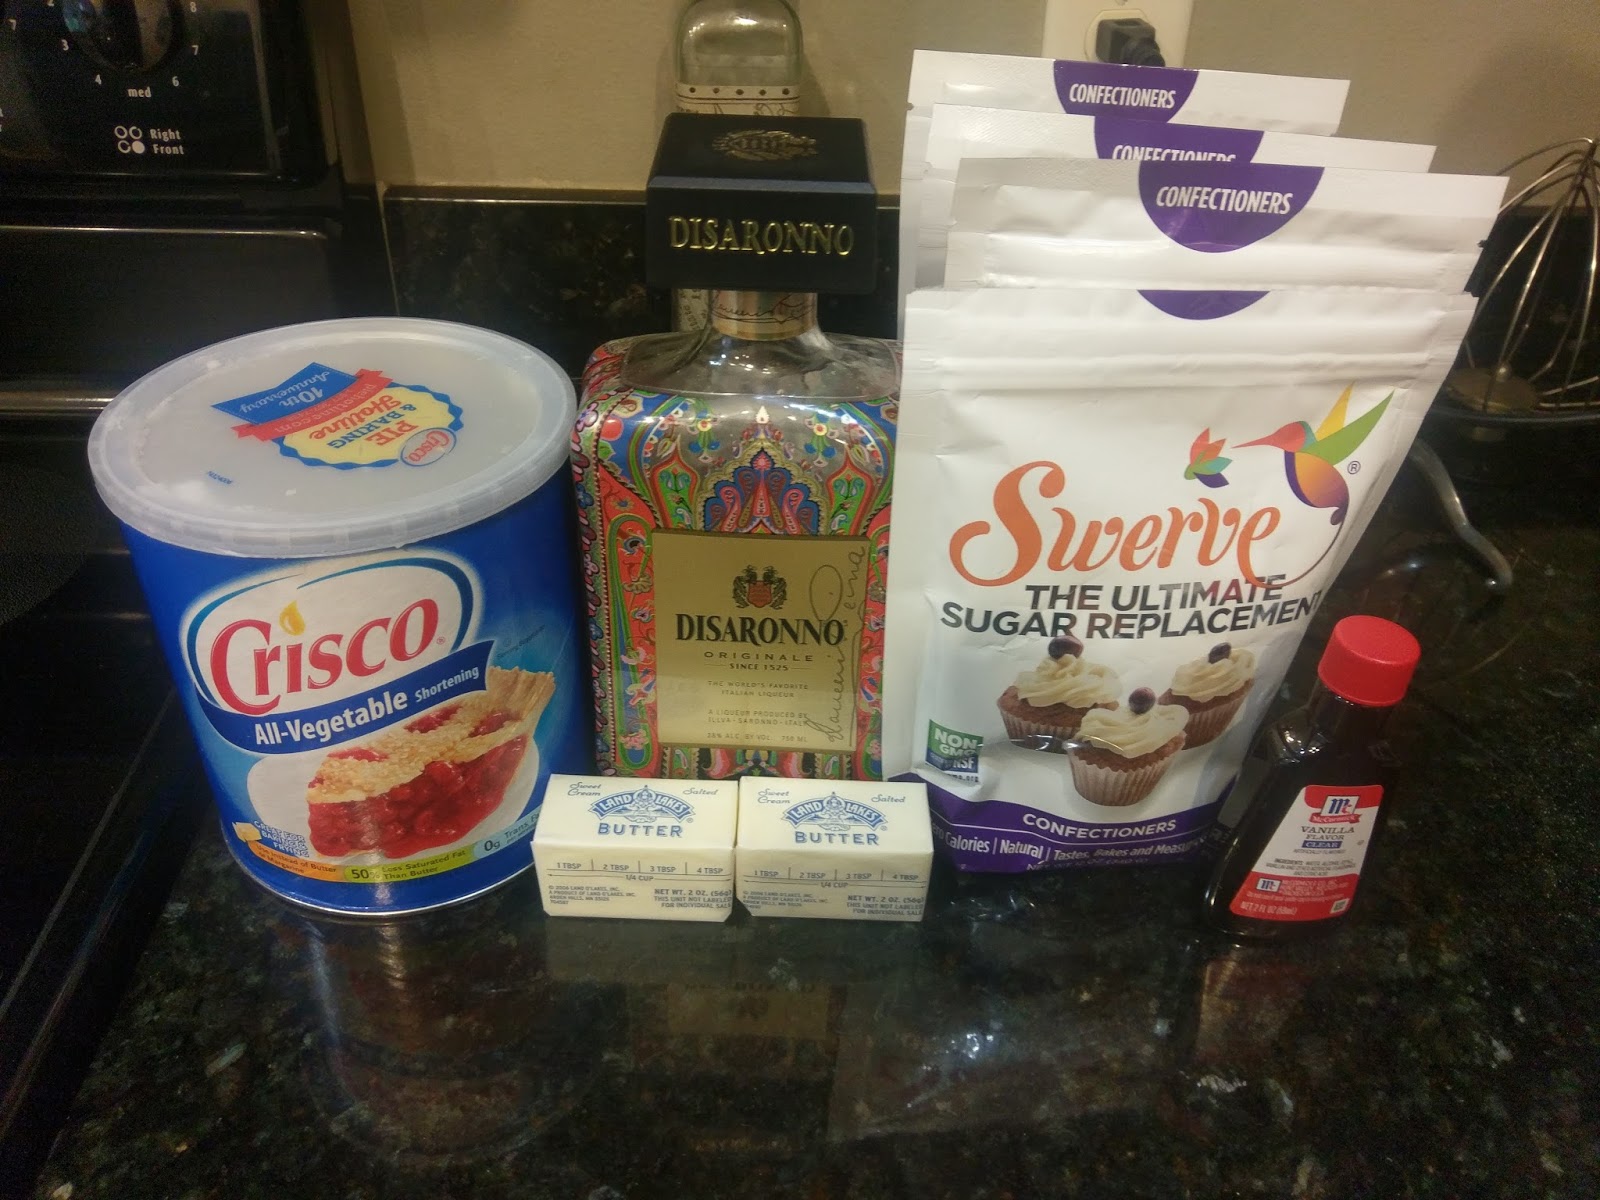
a while since I made a buttercream transfer (like almost two years), so I am pretty proud of how this cake turned out. Most importantly, my dad positively loved it, and while he usually grins when encountered with any kind of cake (it runs in the family), the look of sheer joy when he saw this was merit enough. I had to work ahead of time, so I also mastered the art of freezing and preserving cake rounds, buttercream transfers, and frosting--tips and tricks I shall gladly share with you on this blogging adventure today. I also tried a brand new sugar substitute in my frosting: Swerve. This powdered sugar replacement cut one slice of cake down from well over 650 calories to a mere 373 calories (14 servings total). I added most of a bottle of Disaronno to the cake and frosting, so this accounts for the majority of the calories. I'm obsessed with yellow amaretto cake and matching buttercream frosting. I'd apologize, but I'm not even remotely sorry.
Pictured: the holiday bottle of Disaronno from 2016 that finally met its end.
I did my usual method of hijacking a box cake mix to make it decadent and bakery-level yummy (we all agreed I could've lied and claimed this was made from scratch because it was so decadent, but I'm a notoriously terrible liar...I'm lazy and lying requires way too much effort and energy). To make the cake alone, you need:
  • Yellow cake mix
  • Eggs called for on the back of the box plus one additional egg
  • Substitute the oil for butter, double the amount, and melt it
  • 1/2 cup of milk
  • 1/2 cup of Disaronno
The recipe called for 1 cup of water, so I used half milk and half Disaronno to substitute and yield a denser, moister cake. I preheated my oven according to package directions and prepared two 8-inch rounds with Parchment paper, cooking spray, and bake-even strips.
They're even purple.
I've been using these for a few cakes now, and I absolutely love them. They really do help even out the cake batter. I hardly had to level these cakes because of the bake-even strips. I soak them in cold water for 10 minutes, wring them out a bit, then fit them to my pans. I pour my batter in, bake my cakes in the middle rack of the oven for 30 minutes, and bam, golden, even bake.
Thank you, Wilton.
 Once finished baking, let your cakes rest in the pan on a cooling rack for 10 minutes. Then gently remove from the pan and allow plenty of time to COMPLETELY cool on the cooling rack. Like to room temp or below. I then leveled my cakes to ensure they'd fit together perfectly since this was going to be a naked cake, and frosting couldn't hide much of anything (as a woman who 1. Appreciates a good cover-up, and 2. Is incredibly clumsy, this technique is still slightly terrifying in concept). I wrapped each round separately in three layers of plastic wrap and placed each round into a Ziplock freezer bag. These lived in the freezer for five days before we ate them, and no one even knew. Until now, I guess. Still completely soft and melt-in-your-mouth amazing. I will definitely use this technique to freeze cakes again.
This Crisco is also probably from 2016.
To make a buttercream transfer you can smooth out, you need a lot of Crisco. Crisco is positively terrible for you, but damned if it doesn't make a pretty crusting buttercream. I ended up making WAY more frosting than I needed by like twenty ounces, but if you wanted to crumb coat a cake and frost it completely, this would've been the perfect amount. For a naked cake with a small buttercream transfer, I could've cut it down by half. I used:
  • 1 stick of room temp butter
  • 1 1/2 cups of Crisco
  • 3 12-once bags of Swerve powdered sugar
  • 1 tablespoon of CLEAR vanilla extract
  • 5-6 tablespoons of Disaronno
Blend together the Crisco and butter until soft and fluffy. Add in one bag of Swerve, the vanilla, and a tablespoon of Disaronno. Blend on low until mostly mixed. Add in another bag of Swerve, three tablespoons of Disaronno, and blend until mixed. Add the final bag of Swerve and remaining two tablespoons of Disaronno. The frosting will be very thick, so feel free to add in more Disaronno if you want an easier to pipe frosting and/or just really love Disaronno (definitely both). I split up my frosting, dying one large bowl purple, a tiny glob black, and split the remaining frosting, dying one bowl yellow and leaving the final bowl white. Then I gathered up Wilton 2, 3, 5, and 12 round tips fitted to piping bags with couplers to easily change out tips as needed. I outline a very detailed step-by-step with buttercream transfers, setting up images on Parchment paper, tips, tricks, and more here, so excuse me while I cruise through these instructions without reinventing the buttercream transfer wheel extensively.
After affixing my stenciled image onto a clear cutting board with some tape, I used my black frosting with a #5 tip to outline my viking horn. I used a small paintbrush as needed to smoosh down the frosting and ensure everything was connected, there were no gaps in the frosting, etc. I froze this for one hour, which was not long enough. It budged around on me a bit in the following steps, so in hindsight, should've frozen it for several hours.
I came in with my yellow frosting coupled with a #2 tip to fill in the very narrow yellow band. I used a #12 tip to fill in the white, switching to a #3 tip in the smaller grooves. Once again, I used a paintbrush to push the frosting down and rid and areas of gaps. In doing so, my black frosting moved a bit, so definitely take your time to freeze between colors.
Then I took a #12 tip on a bag of purple frosting and slowly traced my circle outline and around the viking horn, coming back in with a paintbrush to smooth any gaps.

After each round of frosting, I held my transfer up to the light. Any areas that appeared thin or I could see through directly needed help with more frosting and the paintbrush to smooth it in.
I finished my purple border, and carefully smoothed as much as I could to even the layer out before freezing this for three hours.
Then I came in for the final touch and covered the horn with a thin layer of purple frosting so that my transfer would sit evenly on my cake and not sink in anywhere. I froze this for 5 days with it double-bagged in Ziplock freezer bags. I removed the tips from all of my frosting bags and placed them into a large Ziplock and into the fridge. My leftover purple frosting fit into a Tupperware and also lived in the fridge.

But not before admiring my handy work, of course.
Fast forward five days...
 I successfully managed to unwrap all three layers of cling wrap from each cake round without (entirely) losing my mind! I removed all my frosting from the fridge that morning to make my cake that afternoon. I prepared an 8-inch cake round with a small glob of purple frosting in the middle, and flipped one cake round upside down and placed it centered on top of this frosting glob so it wouldn't budge. I filled a piping bag with purple frosting and a 1A tip and created a border around the outside edge of my cake. I came back and swirled in frosting in the middle, and used a hot angled spatula (I just ran it under hot water and wiped it dry) to smooth out the frosting layer without applying too much pressure or causing the frosting to spill over the edge/border I had created.
Like a giant Vikings Oreo.
 I took my second round and placed it (also upside down) gently on top of my frosting layer without applying too much pressure. I used my angled spatula to create a crisp, smooth line of frosting in the middle by placing it horizontally on the frosting line and spinning my cake table around without moving the spatula at all.
Super clean lines for the win!
I refilled my #1A bag with purple frosting and repeated for the top layer so my buttercream transfer had something to adhere to. Speaking of, I nabbed my transfer out of the freezer at this point, and centered it on top of my cake before removing the Parchment paper. Things will look very rough and bumpy at this point. For once in your life, this is actually normal. Let your transfer sit out for 15 minutes before coming back in and smoothing out with the Viva paper towel trick. This is like giving your cake a 20-year age rewind (if only this worked on people, too). 
But I'll take that it works for cakes amazingly.
Could be frosting, could be a bag of my blood. A true Viking fan never tells.
I wanted a border to finalize things after smoothing my transfer out, so I fitted a large piping bag with a #1M tip and placed my remaining yellow bag of frosting and purple bag of frosting in it together. I piped out a bit of frosting on a paper towel until both purple and yellow came out at the same time.
I then piped simple stars around the edge of the cake.
Which was fun, festive, and left me with a ton of frosting. May have piped some out of the bag and into my mouth, but again, a Viking fan never tells.
I kept my cake in a cake safe at room temp. The cake itself tasted flippin' amazing, because yellow amaretto cake is still my jam. Now, let's discuss the Swerve frosting. Swerve does this weird thing after you take a bite when things taste perfectly sweet and just right...then along comes this cooling sensation (think: biting into a York Peppermint Patty). It didn't really bother anyone, and we certainly ate the hell out of this cake, but I did think it bore mentioning. I guess because what Swerve derives its sweetness from has this property when it is not dissolved in liquid or heated up that causes a cooling sensation on your taste buds. I think this would go perfectly with a chocolate cake with peppermint or mint frosting, to be honest. However, the cooling covered up the Disaronno flavor in my frosting too much, so that was disappointing. But I was also able to eat a boatload of cake because of how much it lowered the calories, so I'd say all is fair in love and baking and eating said baked goods. I definitely will use Swerve again, but I will cut it in a ratio with regular powdered sugar. Using it in an actual cake or pie where it will get dissolved in liquid will negate that effect anyway, so really this would just be for frosting purposes. Bottom line: Swerve is delightfully strange and a great replacement for regular powdered sugar in small amounts. Other bottom line: my dad loved his cake, and we had an amazing weekend showing them around Floribama. I mean Northwest Florida. It really is the same thing though.
Pictured: my dad about to apply the family principle of licking things to claim them as your own. My sister's favorite method.
As with all family trips, it went by too quickly, and so did the cake. Only two slices remain, and they both look equally terrified their existence will end each time I walk into the kitchen. They're not wrong. But I was incredibly happy to be able to provide my dad with a birthday cake that was next-level Viking decorated. Perhaps one of the greatest lessons I've ever learned from my father was that actions definitely speak louder than words, and being able to give him this cake was one of the best ways I could think of to say "thank you."..for everything. 'Til next time, my fellow eaters. And, SKOL!
Yes, I even have yellow candles. The fandom is strong. And pretty. Could you imagine how ugly a Packers cake must look? ;-)