Tuesday, October 27, 2015

Prepare to Be Terrified by Cuteness!

My only problem with Halloween is that there simply isn't enough time, enough space in my fridge, or stretchy enough pants for me to make all the spooktacular desserts that I want to stuff my face and the face of others with. I want to be able to make desserts so gross that people may or may not be afraid, very afraid. After all the fun I had with the bloody brain cupcakes last week, I considered myself on a Halloween high hover...I suppose you could say I hopped on my broomstick to conjure up a few new spells. You really can't be too surprised at this point that I'm going to be making multiple blog posts about multiple Halloween desserts...this is coming from the woman that gave you a bajillion dessert ideas for Saint Patrick's Day after all. When I love a holiday, there is no half-assing it. I am only a whole-asser. Alternatively, remove the -er and flip those around to find another accurate description of me. I decided back in August (seriously, I'm only a little crazy) that I wanted to make a graveyard cake for Derek and I to have at the house. From that idea spawned a dessert so terrifyingly cute that you won't even care if it haunts you for the rest of your days:
Aww, how morbid and adorable.
I know, not nearly as gross and ghastly as bloody brain cupcakes, but I had a darn good time coming up with silly tombstone ideas after marathoning The Addams Family, Addams Family Values, and Hocus Pocus the day prior. See, Halloween even has the best movies...I'm not sure why I still have to sell this so hard to you. Cheesy chick flicks for Valentine's Day? Sappy feel-good films for Christmas? Who needs them when you've got the all-time love story of Gomez and Morticia and the family solidarity of the Sanderson Sisters (added bonus: everything Bette Midler does). Sure there's a lot of darkness and brooding, but cake has been scientifically proven to cheer people up. I'm basing this science off of how happy I feel when I'm eating cake, but that's still proof somehow.
Again with the cheating! What am I? A coach for the New England Patriots?
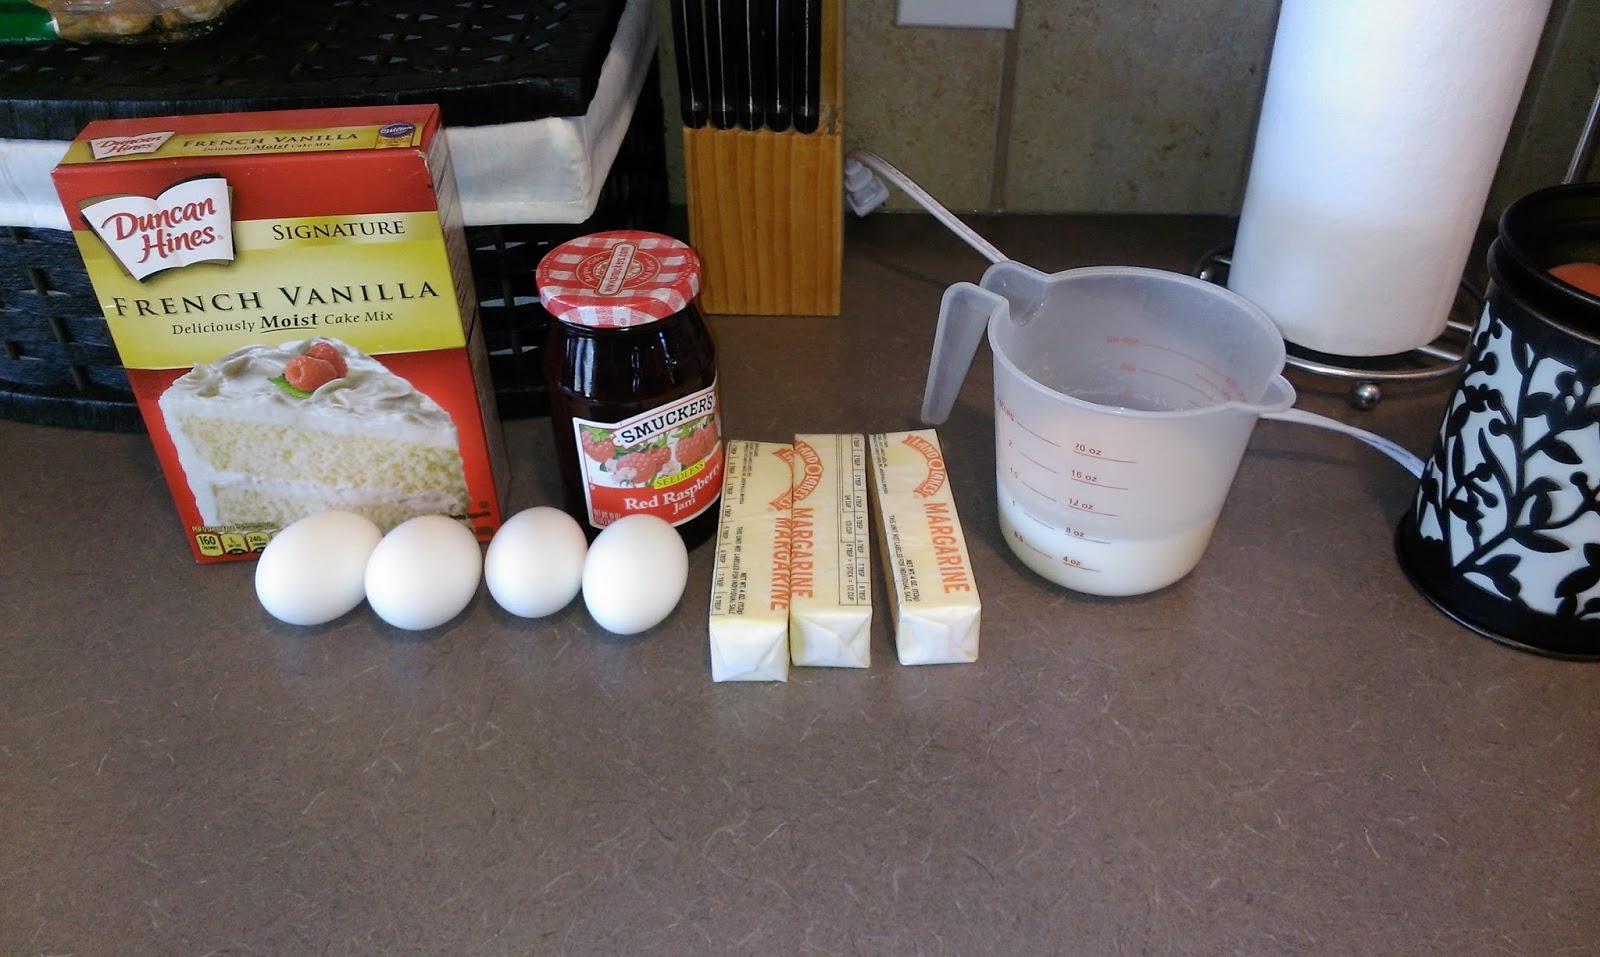
I have actual other-people-proof that my method of cake jacking a box cake mix will trick everyone you know into believing you made your cake completely from scratch. When I cheated with the braincakes last week, people at the party did not believe I made them from a box and simply jazzed them up a bit following the formula you see above (and I have told you about numerous times). So seriously, it works! If you're feeling lazy, things don't have to taste lazy, and that's a win in my book. I followed cooking instructions on the box and made my languid marble cake (completely the opposite of my from-scratch-for-paying-customers marble cake). It felt right to go lazy with a graveyard cake...there's not much activity happening amongst tombstones after all, and I didn't want to kill myself by working to hard and end up in an actual graveyard. Death by caking...such a shame.
My favorite part of making a marble cake is the plopping,
followed by the swirling. From ew to ah.
It's like a cake Rorschach Test. I'm seeing waves. Of cake.
Once done baking, I allowed my cake to cool in the fridge while I proceeded to get marker all over my left hand. Not only do I get to die seven years prematurely to right-handed people, but I also get to smear marker on my hand until the day that happens.
I measured out my cake and then drew out how I wanted my fences to look based on those measurements.
I used a non-toxic marker since I knew I wanted to pipe chocolate on top of my stenciling without killing myself. I'm sure I could've attempted to draw out my cemetery sign backwards and flipped the paper over, but simply remembering how to spell cemetery correctly in the first place was hard enough. While the marker dried, I gathered my remaining fun ingredients:
This included white and chocolate melts, tiny ghost cupcake toppers, tombstones, the best Halloween candy in the world (suck it, candy corn- candy pumpkins for the win), and grape stems. You read that correctly. Not pictured: crushed up Oreo's to use as dirt. Bonus: you get to eat the filling before crushing!
 While my cake continued to cool, I decided to get a little silly and come up with some tombstones. My husband gets to take credit for the great tombstone tribute to Young Frankenstein (if you can't pick it out, we can't be friends).
I almost wrote out a Jon Snow tombstone and then thought, 'Too soon.'

You may have been wondering about the grape stems. Well, my brilliant little head decided a grape stem coated in chocolate would make an excellent dead tree.
And my brilliant little head was right. I melted chocolate according to package directions and simply dipped the stem and set out to dry on a paper towel.
I then poured the rest of the melted chocolate into a piping bag fitted with a #3 tip. I piped over my fence drawing very carefully and let it rest for a bit. While it was resting, I melted a little bit of white chocolate in a piping bag. I snipped the tip off and piped out little hands on my Parchment sheet. Once I could CAREFULLY move the sheet of Parchment paper with a cookie tray underneath, I placed it in to the fridge to harden. Things will be hard enough to handle when you can slide a small spatula underneath to lift the chocolate off the Parchment. Now that all the little touches were complete, it was time to make my chocolate buttercream frosting.
I do order Crisco in Costco size! Thanks for noticing.
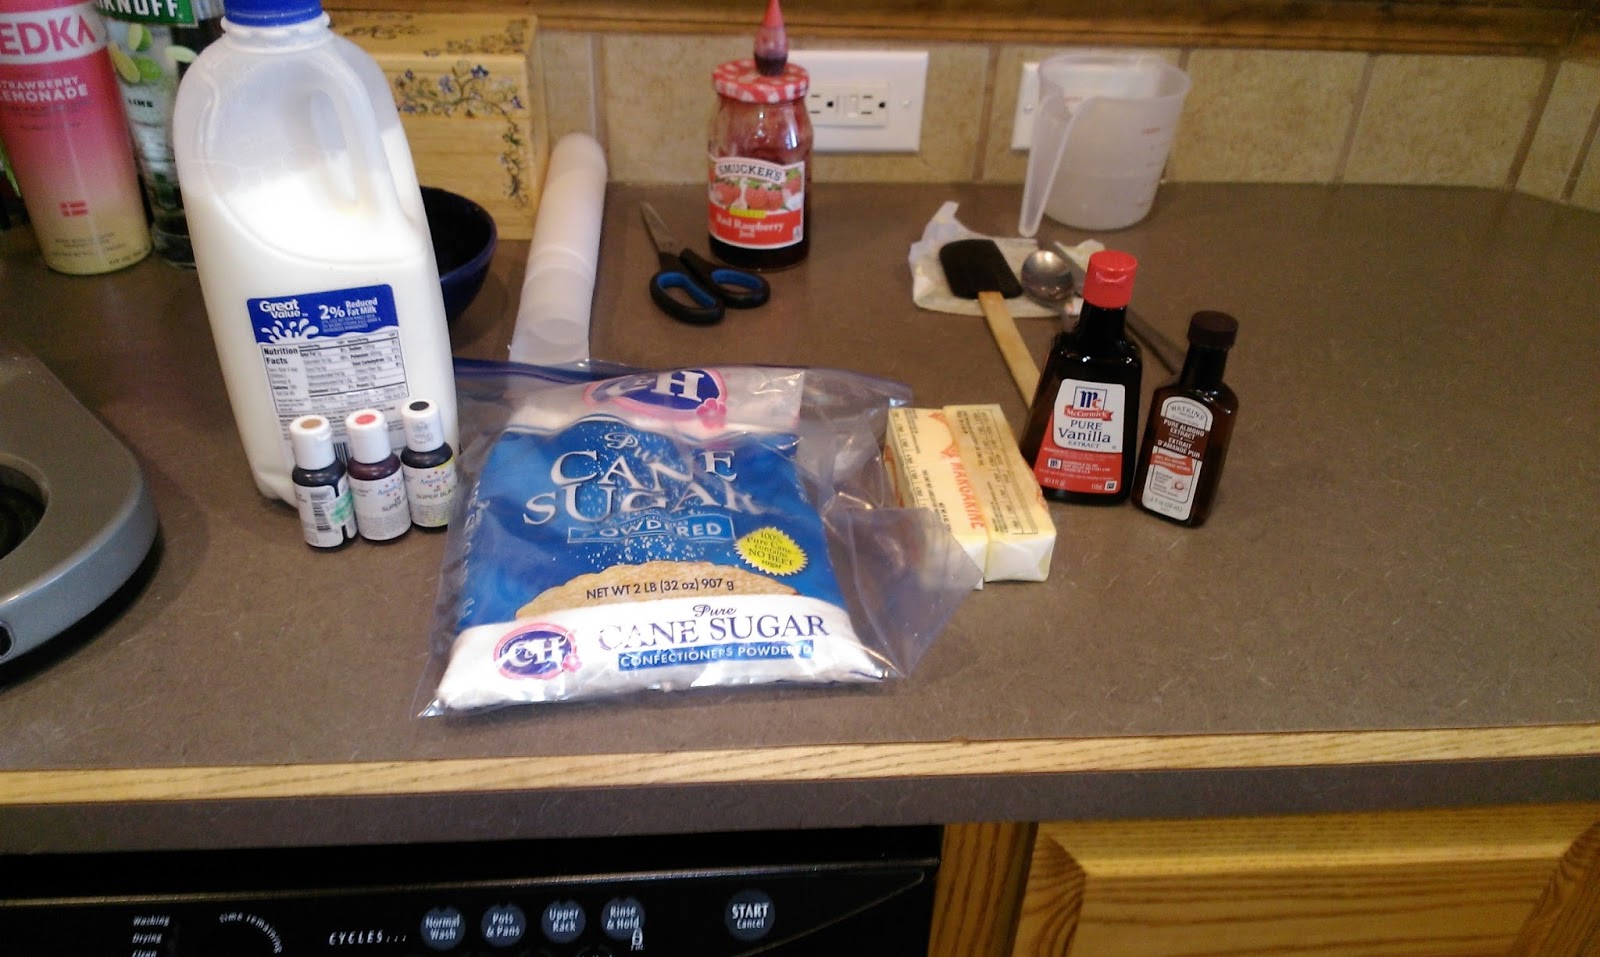
You need:
  • 1/2 cup of softened butter
  • 1 cup of Crisco
  • 2 tsp of vanilla
  • 3/4 cup of cocoa*
  • 6 cups of powdered sugar
  • 6 tablespoons of milk or heavy cream 
*You could use 1/4 cup of Hershey's Special Dark cocoa and 1/2 cup of regular for a dark chocolate frosting.

Blend the butter and Crisco for three minutes until fluffy. Add in the extract and cocoa and blend slowly. Then add in two cups of sugar and two tablespoons of milk. Blend, scrape down the bowl, and repeat this part two more times. Crumb coat the cake and place in the freezer for 15 minutes. Place the final frosting coat on and freeze again for 15-30 minutes. This frosting WILL work with the paper towel trick. But I was going for a graveyard and not a chocolate masterpiece, so I skipped the paper towel smoothing for an uneven terrain look.
To decorate, I started by firmly, yet somehow also gently, placing my tombstones and tree into the thick frosting layers.
I placed three pumpkin candies in front of the tree to give it some support. Then I hid my restless spirits and sprinkled Oreo dirt on a few graves. Barry D. Alive seemed like a glaringly obvious choice for fresh dirt...and my set of skeleton hands! I sprinkled a few bones on the fresh dirt piles for Al B. Back and Ima Goner.
I'm into Halloween, but I'm not a heathen, so my cake needed a nice border or I wouldn't be able to rest. I filled a piping bag with my leftover frosting fitted with a #21 tip to make small stars.
A-like-so.

Then I SO FREAKING CAREFULLY IT HURT ME INSIDE placed each little section of fence into the frosting. I've never even held a baby as gently as I held these pieces of chocolate fence. Mostly because chocolate is more important to me than babies, but whatever.
Not gonna lie, a couple of my fence pieces still broke even with my tender loving care. But in an accidentally on purpose moment that I'm still going to take credit for, the broken fence pieces just added to the overall decor of a rundown graveyard. It works.
Excuse me while I marvel at my creativity.
I'm in love with this cake. I haven't even cut in to it TWO DAYS later because I just enjoy looking at it in the fridge so much. It fills my tiny little black heart with glee. I'm going to have to get my husband to cut into it, or we'll still be looking at it in it's whole glory until Christmas. I'm sure it will taste as delightfully sinful as it looks, thus making this another crowning achievement in my book (my book is small, okay?). I don't have children (much like Mary Sanderson, I can SMELL them, but I don't want them), but this would be a really fun cake to make with children, should you both smell them and yet still have them. Make it a family affair so your spouse can come up with creatively awful and hilarious tombstone ideas. See? Halloween is so about love and family...in it's own twisted way, of course. Al B. Back on November 1 with my final Halloween masterpiece. Have a Halloween so magnificently macabre that it haunts your dreams! 'Til next time my fellow eaters!
Every time I see the Justin Pieces tombstone, my brain reads it as Justin Bieber. Wishful thinking, I suppose.

Saturday, October 24, 2015

There's a Little Zombie in All of Us

When most people think of holiday baking, it's all fruitcakes, fudges, and gingerbread houses. When I think of holiday baking, it's all ghost cakepops, sugar skull cakes, and Nightmare Before Christmas birthday cakes. Clearly when I don a festive holiday hat, it has horns on it. When I sing holiday tunes, it's usually the theme from the Addams Family. And when I decorate my home for the holidays, children run screaming in the opposite direction. Halloween is my lifeblood, and each year I try to outdo myself on all things spooky and wicked (the latter comes relatively easy for obvious reasons...spend five minutes in the Clovis Walmart and new forms of torture just come springing to life in your imagination). So this year I asked myself one very important question when I was coming up with baking ideas: on a scale of 1-10, how gross can I make something look while still getting people to eat it? I was delighted to settle on a solid 8.5 and went for broke. And thus, the bloody brain cupcake was born:
Did you just gag a little? Then my work here is done.
There were points during the decorating of these cupcakes where I was cackling with witchy glee and then just full on evil laughing once finished. Strangely enough, my evil laugh and my regular laugh are strikingly similar. It shouldn't be too hard to transition into my evil laugh full-time after I've completed world domination, so that's a plus. I am still taking applications for minions and underlings, however. I did cheat some (what evil genius doesn't?) and just made these cupcakes from a box mix using the cake-jacking method of adding in an extra egg, using butter instead of oil and doubling the amount, and using milk in place of water. I was more focused on the creation of repulsive decoration and less on taste. Can you blame me? Duncan Hines has had my back too many times to turn away now. Never forget where you came from!
But I suppose I can't be that evil if I'm sharing my trade secrets.
Naturally I had Halloween cupcake papers on hand. I couldn't call myself a Halloween enthusiast if I didn't.
 Once baking my cupcakes according to package directions, I let them cool off on a cooling rack in the fridge because I was extremely impatient...but not before ogling how perfectly domed and sized they all were. I am super horrible at getting my cupcakes to all be the same size and not extremely large or way too tiny. Goldilocks would hate me. Somehow this recipe that was supposed to make 24 cupcakes only made 21. I guess I had to sacrifice three cupcakes in order to get 21 perfect ones. Worth it!
You know what really sucks? Trying to fill a squeeze bottle with jelly. My kitchen is permanently coated in raspberry jelly now.
No bloody brain cupcake would be complete without blood. Obviously. Sometimes I really need to turn overly-spelling-it-out teacher mode off, but I don't know how. My blood was simply seedless raspberry jelly mixed in a bowl until smooth. You need a COMPLETELY cool cupcake before filling though.
Filling is a sinch! Sink the tip of the squeeze bottle into the cupcake and fill to your heart's content.
I applied moderate pressure to the squeeze bottle and once the filling was noticeably spilling out the top, stopped.
About 3/4's of a jar of raspberry jam will fill 21 cupcakes. Save the remaining jelly for later. Phase two of reaching evil baking genius has been completed. Now, on to phase three and making of the frosting!
You noticed the vodka in the background, didn't you, you sly little minx? You're also not surprised at all, are you?
I made my standard almond buttercream for the brain base. You need:
  • Two sticks (1 cup) of softened butter
  • Six cups of powdered sugar
  • One tablespoon of vanilla
  • One teaspoon of almond extract
  • Three-four tablespoons of milk or heavy cream
  • Brown, red, and black gel dye
 Mix together the butter and two cups of sugar until you've got a nice lumpy base. Add in the extracts and one tablespoon of milk and mix. Scrape down the bowl then add in two more cups of sugar and one more tablespoon of milk. Add in the remaining two cups of sugar after scraping the bowl and the remaining milk (I used all four tablespoons for easier piping). Once the frosting is mixed, add in one drop of red dye, one drop of black dye, and three drops of brown dye. This magically calculated formula (also known as "winging it") yielded a perfect brain matter color. Now it's time to create brains. Delicious, tasty braaaaaiiiins. I made it halfway through this blog without a zombie reference. I'm feeling pretty good about myself.
Once you've placed half of your frosting into a piping bag fitted with a round open tip (I used a #12), start by piping a single line down the center of the cupcake to separate your brain's hemispheres. I can get scientific, thanks for noticing. Then simply pipe a wavy line partially on top of the middle line to boost up your frosting and give your brain a dome shape.

You can continue to pipe that same line further over on the cupcake, all the while continuing to just zigzag and make wind-y lines. Some of them I continuously piped, others I stopped and used a completely separate second line. I liked the continuous line look better. Simply repeat the process on the other side of the cupcake.
And you, too, can feel like your very own Dr. Frankenstein. POWER!!!
A field of brains. Knowledge is power (and yummy), after all.
You could call it a day here and have boring gray brains for dessert, but I felt as though the grossness factor was a mere four without making stuff even bloodier. I was also testing out my skills as a creator here, you know, so if the zombie apocalypse ever happens, I'm able to trick the undead into eating my cupcake brains instead of my actual brains because they just look that good. Plus a zombie full of cupcakes is going to be a lot easier to run away from. These are the things I pontificate about (had I been born with less of an active imagination, I may be solving global warming or the bacon shortage or something important. Eh.).
Yes, now we've achieved 8.5 on the grossness scale.
To splatter blood on your brains, first stick all your frosted cupcakes into the freezer for 30 minutes. Once the frosting is solidified and can be touched without causing any damage, you're ready to get messy. Take a small bowl of the raspberry jelly and dilute it with a few drops of water. Mix in some red food coloring for maximum gore and find a small paintbrush. Get creative and fill in whatever nooks and crannies you want to by brushing the jelly onto the frosting. You don't need to put a lot on if you don't want to. You also don't need to use much pressure when brushing so the brains don't get flattened. No one wants to eat a brain that looks like its been met by a Mack Truck. And there you have it...a cupcake that looks so gross you won't want to eat it. But you will anyway because it's still a cupcake, and no one can resist a good cupcake.
Even when it's oozing blood.
I'm hoping people will be brave enough to eat these at the costume party we're attending tonight. If not, my husband and I will be consuming mass quantities of brain matter and loving it. We sampled the cupcake I cut in half for blogging purposes (the things I do for you people), and I am happy to report that I will henceforth be covering everything in seedless raspberry jam (except steak; we've been over this before). It is tart, sweet, and perfectly blended with the French Vanilla cake and utterly complementary of the almond buttercream...I'm starting to think those zombies have the right idea because brains are delicious. 'Til next time, my fellow eaters!
Brains in surplus...I could've become one rich lady if the Wizard of Oz Scarecrow was real.

Tuesday, October 6, 2015

Still Trying to Survive the Blue Bell Shortage...

My husband and I will be celebrating our fourth nananiversary tomorrow, so naturally I asked him what type of dessert he wanted me to bake to celebrate (you know, so I can keep my status as 'solid choice' wife material on lock). He immediately decided upon ice cream sandwiches. I was at first very excited and then extremely sad because we STILL HAVE NO BLUE BELL IN NEW MEXICO. I am barely scraping by at this point. So much so that when we head out to Dallas next week, we will be loading up a cooler full of half gallons to bring home with us. I am nothing if not devoted to my preferred brands. I mean, I may single-handedly be keeping the Banana Boat sunblock industry in play right now, no joke. So the thought of having to make ice cream sandwiches with anything but Blue Bell hurt me, but love sometimes causes us a little bit of pain, so I powered through and made some delectable ice cream sandwiches with my favorite M&M cookie recipe and Breyer's French Vanilla ice cream (shudder).
The perfect ratio of cookie to ice cream has been achieved!


I know, last week I was all, "Oh we're saying goodbye to summer with spiked root beer float cupcakes" and this week I am all, "Oh hey, ice cream is good, right?" Here's the thing about me and ice cream: it is real, and it is deep. It could be 12 degrees outside and snowing like crazy and I would still think it was the perfect time to go pick up some Dairy Queen...they are named Blizzards for a reason, aren't they? There is never a bad time for ice cream. Just man up and eat it while wrapped in your favorite blanky if it's too chilly outside. Besides, two cookies sandwich the ice cream in this case, so you have a warm, edible handle to hold on to. I think I've done a fantastic job of demonstrating why ice cream sandwiches are an appropriate choice for October, so let's get to the good part, shall we?
I bought way too many M&M's, but then I realized this wasn't actually a problem.
I have a tried-and-true cookie recipe that I have been using for a few years now. These cookies stay soft and moist for weeks because of one simple little ingredient: Jello pudding; thus proving that Jello can, in fact, be good for more than just adding booze to (although still a solid usage in my opinion). I send these cookies to Derek when he is deployed, to family members for various holidays, etc. They hold up fantastically, so I figured they would make an amazing base for ice cream sandwiches and stay soft after freezing. Move over thin, boring chocolate sandwich cookies (not you, Oreo's, you're cool), I'm about to make the magic happen. Here's what you need:
  • 3/4 cup butter at room temp
  • 3/4 cup packed brown sugar
  • 1/4 cup sugar
  • 1 teaspoon of vanilla
  • 1 room temp egg
  • 2 cups of flour
  • Half a 3.4 ounce packet of  Jello vanilla instant pudding  (this is 2 heaping TBS)
  • 1 teaspoon baking soda
  • Dash of salt
  • 1/4 cup of chocolate chips
  • 3/4 cup of M&M's (I used plain, but any other kind would work depending on your preference)
Start by mixing together the butter, sugars, vanilla, and egg until nice and fluffy. This usually takes about 3 minutes on medium/high. Add in a cup of the flour, mix well, and then add in the final cup. Mix together before adding in the pudding, baking soda, and salt. Finish up by mixing in the chocolate chips and M&M's. This recipe makes 24 cookies total.
Okay, it actually made 25. But one did not last long in this world before being eaten.

Use a cookie scoop to scoop heaping mounds onto Parchment-lined trays. Shape into rounds and place extra M&M's on top if you'd like them to be pretty. I go the extra mile there because eating pretty desserts actually does taste better. Science! Or extreme narcissism, but whatever. Cover up the trays with plastic wrap and place into the freezer for at least an hour or two. This will help the cookies not spread out and get too thin when baking. We want those ice cream sandwiches to be thick and tasty...and not at all reminiscent of a thin Communion wafer.
I'd probably go to church more if they just gave me cookies instead.

Once frozen, preheat your oven to 350 and remove the dough mounds and Parchment paper. Spray the pans with cooking spray and cook eight cookies on one cookie sheet for 11-12 minutes. Things won't spread out any since the cookies are frozen, so just look for golden edges to check for doneness. I flattened my cookies out a bit by gently pressing down on them after I took them out of the oven to give them a better shape for sandwiching. Let the tray cool down a bit before placing back into the freezer and bake the two remaining rounds of cookies on two more greased trays. You want the cookies to be solid when making the ice cream sandwich so you can apply pressure and squish down the ice cream, hence the freezing for about a half an hour because a warm cookie would just fall apart. Now, let me continue to blow your minds with a handy trick for making ice cream sandwiches!
The trick isn't actually cup stacking.

It's cup filling.
 If you place your ice cream into a plastic or paper cup, you give it the desired round shape needed for an ice cream sandwich. I only had plastic wine cups (because, hi, have you met me?), but small plastic cups would work best. All you need to do is pack it down into the cup and place back into the freezer to harden. I did this while my cookies were baking.
I have Popsicle sticks, so these almost went a whole different route.
I decided to stay true to the course and hacked away instead.

Once my cookies were done and frozen, I took each plastic cup out and cut it open with scissors and placed it on a cutting board. Then I cut the logs into 1/2 inch thick pieces to place in between two cookies, and an ice cream sandwich was born! I'm not drunk with power...just tipsy.
Can you blame me? They just look tasty.

But not nearly festive enough for October...enter the spooky sprinkles.

Since Halloween is undisputedly my favorite holiday, everything in my home has been on full creepy tilt since October 1st. Needless to say, I couldn't just let these ice cream sandwiches sit there looking all Fourth of July Americana. I had to make them spooky, and this is where the sprinkles came in. I realize you might be thinking that sprinkles are the least terrifying thing in the world unless you drop a jar full of them in your kitchen because you'll be cleaning up the aftermath for decades, but my sprinkles even had GHOSTS in them, so they were scary without the threat of a sprinkle grenade situation. Once my sandwiches were assembled, I simply rolled them in a bowl of sprinkles and placed back on a covered tray in my freezer.
I know, I have a serious Halloween problem.

Y'all...my husband is my idea man for a reason. These things are amazing even though they were made with nary a trace of Blue Bell. I might have died of pure bliss if they had been made with it, so perhaps I should thank the cruel fates for keeping my ice cream out of reach. These sandwiches are so easy to assemble, and yet they taste like something concocted at a Cold Stone Creamery. You get the Cold Stone experience at home without all the weird singing employees and the actually having to be in public-ness of it all. If that isn't a win for you, you're probably reading this off stolen WiFi in a coffee shop because you just can't get enough of having strangers around you. I'm gonna back away now and go cuddle with my dogs like a proper introvert. 'Til next time, my fellow eaters!