Monday, January 21, 2019

Everything Is Better with Syrup

Breakfast is not only the most important meal of the day, it is also my favorite because breakfast is as close as I can get to eating dessert first thing in the morning and still have it be socially acceptable. Pancakes? Waffles? Crepes? Sweet, delicious, and all have one thing in common: they taste best when drizzled with heaping amounts of maple syrup. God bless the (I assume Canadian) person who took one look at a maple tree and just knew it was hiding the delicious nectar of the gods within it. I love maple syrup...I've been known to "accidentally" pour too much on my French toast, causing it to ooze on over to my bacon and eggs, covering them substantially in a pile of sticky sweetness to compliment their saltiness. Like I said, closest I can get to dessert first thing in the morning. I decided if I can have dessert for breakfast, why not have breakfast for dessert? And in true Canadian fashion, I wanted to make sure my breakfast dessert was absolutely drenched with maple syrup.
Because maple syrup is magical. Cures any and all illnesses, although you might want to fact check that.
As someone with (French) Canadian heritage, there are three things I hold in extremely high regard: Tim Horton's, hockey, and maple syrup. You can bet if there was a Timmy's within a 50-mile radius of me, I'd be eating this maple syrup cake topped with cinnamon streusel and maple syrup buttercream along with a heaping pile of Tim-Bits while watching Hockey Night in Canada. This cake is like eating the lightest, fluffiest stack of streusel-topped pancakes drizzled with pure Canadian maple syrup. I am absolutely gaga for this recipe, and to top it all off, it's only 310 calories a slice (no stack of pancakes can make the same claim). This recipe yields one 9x13 cake with 16 total servings, and I would be willing to fight a grizzly bear (just not a moose) for the last slice.
It's so good, I'm considering buying my maple syrup in bulk so I can make it at least once a month. Potentially to have for breakfast or dessert because versatility is important to me.
I know, I waited for the good part: common pantry staples make the cake itself come together in absolutely no time flat. After vertical layer cakes, meringue-topped cakes, and all the other crazy concoctions I've baked up in the past few months, making a simple 9x13 cake seemed like a reward for all that hard (tasty) work. To make, you'll need:
  • 1 box of vanilla cake mix
  • 3 egg whites
  • 6 ounces diet creme soda
  • 6 ounces pure maple syrup (you could try sugar free syrup as well to lower calorie content even more)
Mix all of the ingredients together in a stand mixer on medium-high for 2 minutes while you preheat your oven to 350/325 for convection baking and grease a 9x13 pan. Turn your prepared batter into the pan and bake about 28-30 minutes until done. You'll know it's ready to come out of the oven when your house smells like Canada.
The smells of syrupy goodness.
 Let you cake cool in the pan for 10 minutes before turning out onto a cooling rack to cool completely before frosting. While your cake cools, keep your oven at 350/325 for convection and make your streusel.
Brown sugar Swerve is now a thing!!! Rejoice, sugar-free people!
Streusel is something I had actually never made before, and I now consider it dangerous to know it's so quick and easy to make. Swerve now has a brown sugar version, and this changes everything. I am definitely going to figure out how to make toffee with it, along with a thousand different cookie recipes. To make the streusel, mix together:
  • 6 TBS melted butter
  • 1 tsp cinnamon
  • 3/4 cup of flour
  • 3/4 cup of packed Swerve brown sugar 
Stir these ingredients together by hand in a medium bowl until everything has come together.
Like so.
 Things will be a little crumbly, but that's normal. Spread your streusel out on a Silpat (just buy them, they're life changing) or Parchment-lined baking tray. Bake the streusel for 6 minutes at 350, then remove from the oven and set aside to cool completely. Once cooled to the touch, crumble it up into finer pieces.
Some larger chunks make for a pretty texture (and taste) when topped on the cake.
Now we come to the part of the story where everything went wrong. I wanted so, so badly to try to make a maple syrup Swiss meringue buttercream. I knew my cake was going to be sweet, even more so with the streusel on top, so I wanted to go away from a traditional American buttercream that is 10000% sweetness. I tried multiple times, but I could not get my meringue to whip up with the addition of the maple syrup, so after wasting like, a lot of eggs and all the pure maple syrup I had, I turned to the pantry to do my least favorite thing in the entire universe: improvise.
Seriously...I sketch out every cake and write out every recipe in full before baking.
Getting thrown a curve ball happens to even the best bakers (I know, I watch the Great British Bake Off), but I was still extremely sad to have to revert to a typical buttercream...especially since I ran out of the "hard stuff," a.k.a., all my pure maple syrup. Since I guzzle syrup like normal people guzzle water, I typically use sugar free Hungry Jack so I don't add an extra 13,000 calories to my waffles every weekend. I decided to give it a go and used:
  • 1 - 12 ounce bag Swerve confectioners
  • 1 cup of regular powdered sugar
  • 1 cup of butter at room temp
  • 4 TBS sugar free Hungry Jack syrup
I whipped my butter, which, unlike my eggs in my failed meringue, got light and fluffy, before adding in the Swerve and two tablespoons of syrup. I mixed well before finishing with the last two tablespoons of syrup and the cup of regular powdered sugar to cut the "cooling" effect Swerve confectioners has on its own. It's a very sticky, albeit incredibly delicious, frosting, and using the sugar free syrup definitely helped keep it from getting way too sweet when added in with everything else. I had quite a bit of frosting leftover, and I'm pretty sure that's going on top of English muffins from now until the sad day when it runs out.
It was all I could do to not dive in with a shovel.
 I didn't crumb coat this cake since I wasted so much time trying to make meringue happen and just wanted to eat a dang slice, so I took a thick amount of frosting and spread it on with a large angled spatula on top. To help smooth it out, I ran my spatula under extremely hot water before taking a few swipes on top to even everything out. I did this again with a small angled spatula to cover all the sides of the cake.
"Shell-o, is it me you're looking for?"
I originally intended to pipe an interlocking "V" border, but since this buttercream was nowhere near as firm as a Swiss meringue, trying to get a clean line from something this sticky and soft was virtually impossible. Instead I went with a tried and true shell border with the help of a #21 Wilton tip. The classics are classic for a reason, after all.
And they are so very complimentary to the streusel.
My shell border ended up being the perfect basin to hold in all my streusel, so there's something to be said for happy accidents. Once I piped my border all around the top and bottom edges of my cake, I took my crumbled streusel and dusted it on top of my cake, pressing it down to affix it to the frosting.
Bonus: you can lick your fingers once you're done with this part!
Ta-da! That's it...super simple decorations, but it looks absolutely scrumptious. And it is.
Back off, she's mine!
I woke up in the mood for a slice of this cake, although I resisted somehow because I realized ending my Monday with it would be way more rewarding than starting my Monday with it. Besides, Tuesday seems like the perfect day for breakfast cake anyway. The cake itself is so rich with maple flavor but still extremely light and fluffy. A forkful with frosting and streusel added in will transport you to another plain of existence (located approximately somewhere in British Columbia, Canada). I'm not saying you should put maple syrup on everything, but you should put maple syrup on cake for sure. This is definitely going down in my book as one of the best Kate Bakes Cakes original recipes, and I am so very glad we still have 14 more slices to fight to the death over in my house. 'Til next time, my fellow eaters!
I mean, check that cake to streusel action. Coffee cake wishes it looked this fine.

Monday, December 3, 2018

Seasons Eatings

I was combing through my previous December bakes and found a startling number of peppermint desserts. Consider me basic in both fall AND winter, apparently. There's only so many ways you can mix peppermint into desserts, and I've pretty much done all of them. This meant it was time for my least favorite thing in the world: stepping out of my minty-cool comfort zone and finding a new flavor to deck the halls with. Needless to say, the answer was booze. I mean, isn't always? I decided to bake with an old favorite: Rumchata. Now, if you've never had the pleasure of drinking Rumchata, let me set the scene. Remember pouring yourself a giant bowl of Cinnamon Toast Crunch cereal as a kid, letting it get a little soggy (R.I.P. roof of mouth), and by the end, you'd be left with this ultra creamy, cinnamon milk goodness? Yep--that's exactly what Rumchata tastes like. I figured cinnamon + booze = acceptable holiday offering. 'Tis the season to be boozy, fa la la la la la la la *hiccup.* I knew I also wanted to decorate in a winter theme because quite frankly, it may be the only winterscape I view in Florida (Hi, it's 69 degrees today, and I am sweaty and upsetty).
For my Florida readers, this is not a beach cake. It is a winter cake. Winter is a season generally marked by cold weather, immediately following Autumn, another season that, never mind, you don't need to know this. You'll never experience either.
Topped with white chocolate snowflakes and cool-swirled meringues, this blue ombre Rumchata cake with Rumchata buttercream frosting is TO DIE FOR. It's boozy, but not in an, "Oh boy, my throat is on fire," kind of way. A forkful of this cake starts off with a vanilla flavor and is followed by a creamy hit of cinnamon Rumchata goodness that lingers just right. I also added some extra cinnamon to the buttercream to take it over the top. It is soft, it is flavorful, and it is so moist thanks to the booze. I always find boozy bakes cook out the alcohol, leaving rich flavor and a moist cake behind (cake hangovers are far superior). This is a 3-tiered, 6-inch round cake with 12 servings, at only 341 calories a slice sans meringue or snowflake. Adding in those extra elements will total out to 356 calories a slice (oh yes, they are most definitely worth it). Trust me, this cake, frosting technique, and snowflake technique are INSANELY EASY. Meringues on the other hand...well, keep the Rumchata bottle handy, cause you're gonna need it...
I had no idea Rumchata came in bottles this small. Would've been useful information in college.
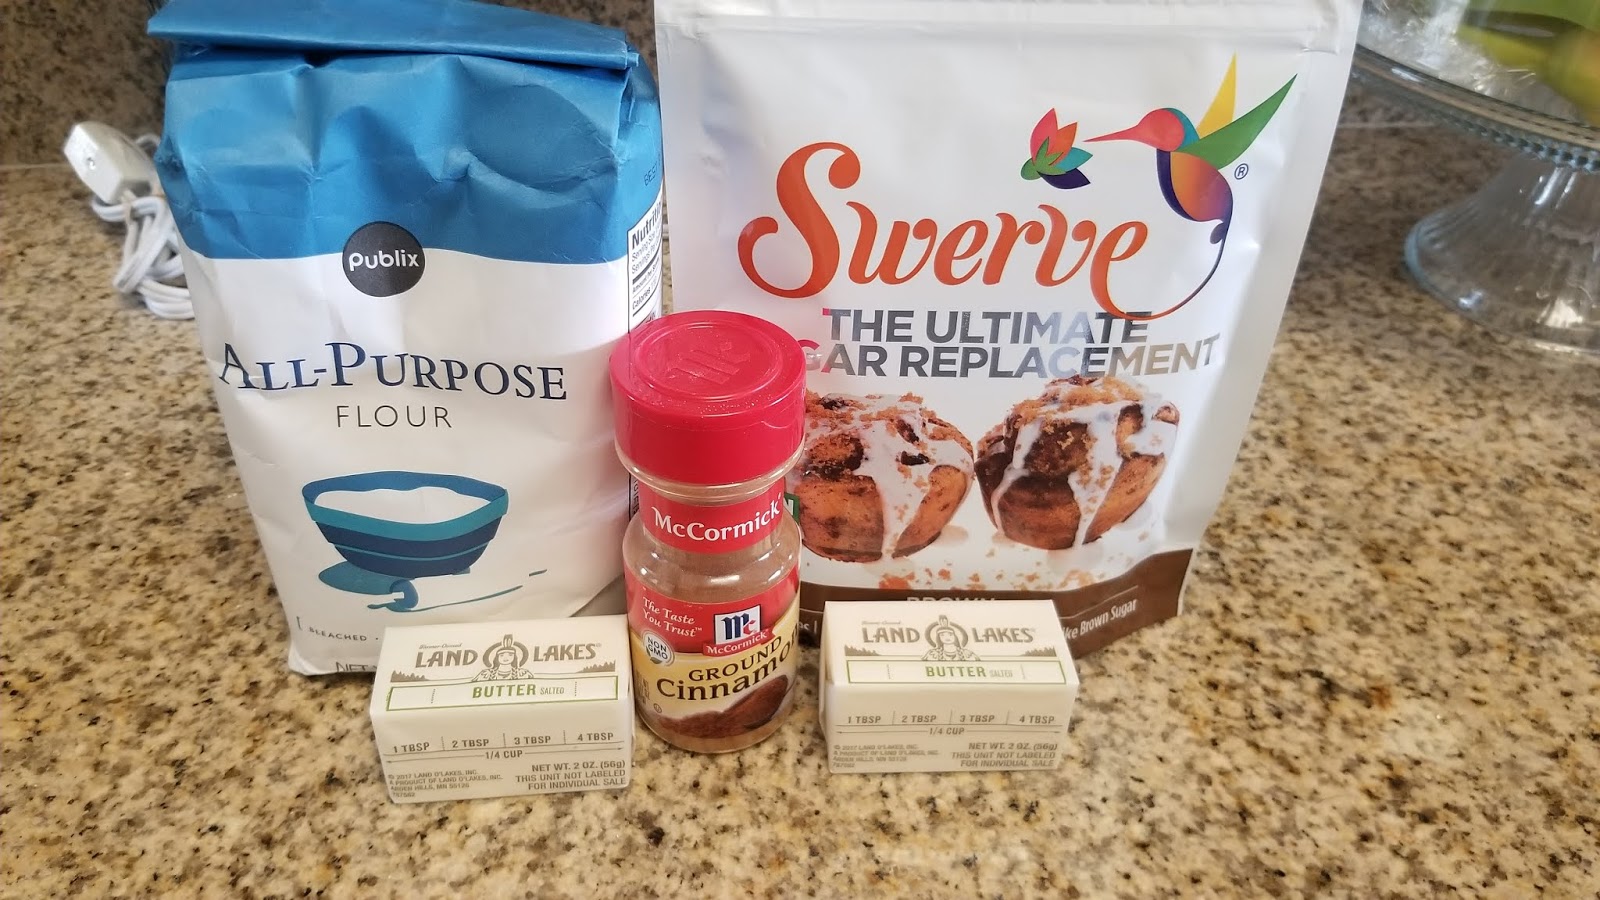
The base of this cake starts out with a box mix, and it stays pretty straight forward. You need:
  • 1 vanilla cake mix
  • 3 egg whites
  • 4 ounces of diet creme soda
  • 8 ounces of Rumchata
Now, you could forgo the soda and use all Rumchata, but it will definitely cost you in the calorie department since Rumchata is basically cinnamon sugar in liquid form. Whip up your egg whites on medium-high in the bowl of a stand mixer until fluffy, 3-4 minutes. Preheat your oven to 350 and prepare three 6-inch round cake pans with bake-even strips and cooking spray. Once your whites are fluffy, add in the cake mix, soda, and liquor. Blend on medium-high for 2 minutes, then evenly pour the batter into your prepared pans. Bake for 25-28 minutes, and then let the cakes cool in their pans for 5-10 minutes on a cooling rack. Turn these out of the pan and onto the racks to cool another 10 minutes before wrapping in plastic wrap and letting freeze for several hours (boozy cakes are sticky, so this will help when you frost your cake later). You can make your snowflakes and meringues while you wait. Because it will take you 17 hours, a phone call to a priest, and a lot of cursing to get these meringues made.
Have I scared you? Good. Use that fear.
Let's start with the easy and quick snowflakes. I Googled "snowflake piping template," copied and pasted the image into a Word doc, resized a few, and printed out. I set my templates under some Parchment paper and grabbed about 1/3 of a bag of white chocolate melts, melting in a large bowl in the microwave according to package directions. I poured my chocolate into a piping bag fitted with a #3 Wilton tip. I let this cool off for 5-10 minutes, so I could handle the chocolate without burning my hands too much. I piped out a bunch of snowflakes by tracing over my templates, but I still had a ton of chocolate leftover, so I free-handed stars and other little quirky designs. You only need like 6 snowflakes to decorate the cake, unless you're taking a hard pass on the meringues, then go snowflake crazy. Once piped, let these rest while you make your meringues; alternatively, if you're terrified of making meringues, let these sit on the counter for an hour or so before handling. Use a small angled spatula to gently lift off the Parchment and place on your cake.
Tiny but adorable. Super easy to make, so definitely don't skip this part!
Now, my next move was to make meringue. I studied several blog posts, websites, and baking videos. I felt confident I could do this. I'm also super into Pavlovas, and I need to know how to make meringue in order to eat my desired number of Pavlovas per year (I'm guessing about 50). I could still be studying how to make meringue, and it never would've properly prepared me. Much like earning the love of a good man, walking in 6-inch stilettos, or driving a manual transmission--you just have to go all in.
I mean, how hard can cracking three eggs be, right? Oh past, naive Kate...
Meringues are simple enough where ingredients are concerned:
  • 3 egg whites at room temperature
  • 1/4 tsp cream of tartar
  • 1/2 tsp clear vanilla extract
  • 3/4 cup of Swerve granular
I HIGHLY recommend going to view this video and extremely lengthy blog post about how to make a decent meringue. I could spend at least 6 blog posts detailing this process, but I have an entire cake to go eat, so go check that out and get my CliffNotes version here. Basically, you whip your whites, tartar, and vanilla on medium high until the whites begin to get stiff. Then, while the mixer is still running, dump in the sugar very slowly, allowing it to become fully dissolved before adding in any more. When you have extremely stiff peaks forming in your bowl (i.e., you can stop the mixer, pull up the attachment, and the meringue stays perfectly put on it, you're there).
Piping can be a bit tricky, but I am here for you.
I preheated my oven to 215 and lined a large baking tray with Parchment. I then fitted several piping bags with (from left to right) an Ateco #869 tip, a #1M tip, a #2D tip, and a #32 tip. I painted the piping bag with the Ateco #869 tip with 4 stripes of blue gel dye, then plopped some meringue in. I then piped large mounds (seen in blue and white below), before taking plain white meringue, making some stars and large mounds with my 1M tip and some roses with my 2D tip, and then dyed what I had leftover with a tiny drop of blue gel dye and put it in my bag with my #32 tip and piped smaller stars and swirls.
I was so full of hope.
Before everything went wrong, looking back, I could've easily prevented some disasters from happening (hindsight is a cruel mistress). I should have put my meringue in the fridge to keep it firm while I piped with different tips. My roses were last, and my meringue was not as cold, so these completely lost their shape in the oven and turned into blobs resembling dog poo. I also did not need to cook these anywhere nearly as long as I had found in my meringue studies. My oven cooks very, very hot, so I should have pulled the plug around 40 minutes; I was terrified to open the oven door and check on them though, and the oven light didn't show signs of burning, but by the time I hit 60 minutes and turned the oven off, my smaller pieces were tanner than I have ever been in my life. Thankfully, the bigger meringues were only slightly tanned, so they made the cut.

You really need a watchful eye with these because the second they all *look* done, turn your oven off, crack open the door, and let your meringues continue to fully cool in the oven and finish up. Next time, I know to pay closer attention to the timing. But burnt or not, the pieces I didn't use on my cake still tasted absolutely delicious. For science!
Thanks for saving the day, tiny Rumchata bottle.
 Thankfully, frosting this cake is an absolute breeze, even if it looks time consuming with the end result. Honestly, it took me 5-10 minutes from start to finish/assembly to fully frosted. The magic of piping bags, baby. For the frosting you need:
  • 4 ounces of 1/3 fat cream cheese at room temp
  • 1/2 cup of butter at room temp
  • 1 tsp clear vanilla extract
  • 1/4 tsp cinnamon
  • 3 TBS Rumchata
  • 2 cups powdered sugar
  • One 12oz bag of Swerve confectioners
Blend the butter and cream cheese for 2-3 minutes, until fluffy and fully mixed. Add in the vanilla, cinnamon, one TBS Rumchata, and the 2 cups of powdered sugar. Blend on medium-low until just mixed, then add in the Swerve and last two TBS of Rumchata. Blend fully until you have a nice consistency for piping. Divide your frosting into thirds. One third will stay white, one third will get a few (3-4) drops of blue gel dye, and the final third will get about 6 drops of blue gel dye.
You want a gradual color change, nothing too intense.
  Place each of these colors into their own piping bag fitted with a #12 round tip. Now, get your cakes out of the freezer and place one layer face down on a cake plate.
This is the opposite of the Target logo.
I wanted a neat surprise inside of the cake, but not one as time consuming and crazy as another damn vertical layer cake (I came, I saw, I conquered, I ate). So I took my white frosting, piped out a few circles on the outer edge of the cake, then took my lighter blue and piped a few circles on the middle of the cake, and then took my darkest blue and piped the middle. Then I took an angled spatula and smoothed out:
Like a delicious bullseye.
I took another layer of cake, placed evenly on top of this, and repeated my swirled filling. I took my final layer, placed it face down on top of this, and then got ready for an easy ombre frosting job.
I swear I was not drinking the Rumchata when I did this.
Basically, starting at the bottom of your cake and working your way up, pipe out several lines of dark blue on the bottom cake layer, several lines of light blue on the middle cake layer, and pipe white lines on the last layer and the top of the cake. This takes like 2 minutes. You don't have to be exact, it doesn't have to look good, you just need a nice thick layer around the cake.
The best baking tool you could ever buy is obviously the bench scraper, because it can take you from hot mess to totally flawless in one swipe. Like the cake equivalent of a beauty blender.
I placed a bench scraper parallel to the side of my cake, pressed it gently into the side, and turned my cake table slowly. After a full rotation around my cake, I cleaned off excess frosting from my scraper, and took another pass. I repeated this a third time and all my colors had been blended together nicely. I used an angled spatula to smooth the top of the cake and then, because I have a real problem with Florida's lack of seasonally-appropriate weather, added sanding sugar to the top to look like snow. It will be the only snow I see this month, guaranteed.
The weather outside is frightful(ly hot), but Rumchata cake is so delightful...
I then grabbed some snowflakes, stars, and a few meringues and gently pressed them into my cake to achieve my desired look, or as I'm calling it, "What I wish it looked like when I stare out my window."
Instead, I shall settle for "What it looks like on my plate."
I love the cute little pop of color the frosting layers on the inside of the cake have. I am definitely going to use this technique again on the future to add some flare to the inside of a cake the easy way.
Looking at this cake makes me feel so cold inside. I love it.
It may not ever dip below freezing here in Florida, but thanks to baking, I can fake it until I make it to Tahoe in January. I'm prepared to freeze my entire butt off, and I could not be more excited about the prospect. I just want to be an environment that makes my cold little heart feel right at home, what can I say. Aside from my near meringue meltdown, I had a ton of fun getting in to the season baking and decorating this cake. But anything filled with tons of booze generally helps liven up the holiday spirit anyway. Peppermint is great, but Rumchata is next level holiday goodness. It's simple to make, and the flavor is anything but. It's buttery and smooth, sweet but not too sweet (yes, this is a thing), and the Rumchata lingers on your tongue like Rumchata was made to do. It's definitely a cake that will give you a holly jolly Christmas. 'Til next time, my fellow eaters!
I can almost remember what it feels like to not be a muggy hot mess when I look at this cake, and that's the greatest gift of all.


Wednesday, November 14, 2018

A Lesson in Pumpkin Spice


Up until like four days ago, I was still wearing shorts and flip flops on a regular basis because Florida doesn’t believe in fall. Imagine my delight when a “coolish” front finally pushed through and plunged temperatures into the mid-60s (Floridians refuse to go outside for anything under 70 degrees) with gray skies and plenty of rain. This is my weather—the cooler days without sunshine and plenty of clouds. If it’s raining to boot, I am in my happy place, probably doing one of two things this weather is perfect for: curled up with a book and a dog or working on puzzle while listening to “I’m Only Happy When It Rains” by Garbage. If you’ve known me longer than five minutes, you know this is my favorite band. So as a nerdy pluviophile with great taste in music, these rainy, cold days (it’s 50, hallelujah!) are my comfort weather days. And you know what goes fantastically with comfort weather? Comfort food! Say hello to my only* pumpkin creation of this extremely brief fall season: chocolate pumpkin cupcakes with cinnamon cream cheese frosting and chocolate leaves.

*My husband is not a basic white girl, so he only likes pumpkin spice in moderation. I was afraid “irreconcilable differences” might get thrown around due to my desire to put pumpkin spice in literally everything for the entire month of November. I refrain from over pumpkin spicing for the sake of love.
I wanted a cupcake that had a subtle pumpkin flavor...I guess you could say what I was going for was the opposite of walking into a Starbucks and getting punched in the mouth by a pumpkin spice latte from a barista with mermaid hair named McKenzie, who's wearing leggings as pants and definitely draws hearts over the 'i' anyone's name. I wanted the flavor to slowly wash over the tongue--hints of pumpkin intermingled with chocolate and finished off with a burst of cinnamon cream cheese silk. No offense to anyone named McKenzie, but I was going for "high class pumpkin spice" here. And it was definitely achieved. I can't believe I had never thought to combine chocolate and pumpkin before--much like peanut butter and jelly, these two flavors go together like absolute magic. Nothing's overpowered by pumpkin, just enhanced by it. Seriously, this recipe is so easy and so quick, you really just have to try it yourself to have a full "fall flavor" experience. As usual, saving the best part for last, this recipe makes one dozen cupcakes--each only 200 calories a piece. Which as you know, means I eat them one in each hand. Classy.
Only 5 ingredients from releasing your inner basic-ness...
 You could easily double this recipe for 24 cupcakes, but since I happened to have half a chocolate cake mix leftover from my Halloween cake, and I definitely did not need to eat two dozen cupcakes (I think), this amount was perfect for me while my husband is away for most of the week. To make the chocolate pumpkin cupcakes, all you need is:
  • 1/2 box of chocolate cake mix
  • 1 egg white
  • 5 ounces diet creme soda
  • 1 tsp pumpkin spice (seriously, it's the perfect amount--don't over do it!)
  • 1/2 cup of canned pumpkin
Preheat your oven to 350 (my fancy new oven does convection baking, so 325 if you have that feature), and mix together all ingredients in your stand mixer for 2 minutes on medium high. Line a muffin tin with cupcake wrappers and gently spray with cooking spray. I only had Halloween cupcake liners on hand, but the color scheme worked perfectly for my tri-colored swirl frosting. Small miracles.
Small, pumpkiny miracles.
 Take a cookie scoop, grease with cooking spray, and plop a scoop and a half into each cup. Tap your tin gently on the counter to release air bubbles, then place into the oven for 15 minutes, or until a toothpick comes out of the center of a cupcake clean. Set your tin on a cooling rack for 10 minutes, then remove the cupcakes from the pan to finish cooling on the rack. Cupcakes cool in record time, so make your frosting and leaves, and they'll be ready by then.
And so worth the wait.
 Making the leaves is probably the most time consuming portion of this endeavor. Since Autumn, or as Americans call it, "Fall. Because leaf fall down," is all about those gorgeous changing of colors, you really should take a few minutes to pipe out some stellar foliage. Unlike real leaves, these are edible, and therefore, worth your time.
Ah, the maple leaf. When piped with chocolate, it looks more like a pot plant. Lesson learned.
 I used *Parchment* and not wax paper in the end for this. But first, I found some leaf templates I liked online, printed them out, and then placed Parchment paper on top of the printouts, so I could easily see the lines I needed to trace.
Told you. That's definitely a pot leaf.


Take 1/3 cup of semisweet chocolate chips and melt on 50% power in the microwave for 1 minute. Stir until smooth, then load into a piping bag fitted with a #3 round tip. Carefully pipe over the templates on your Parchment paper. I made a few extra in case of breakage. Try to make thick lines so your leaves aren't too fragile. I ended up getting to eat my extra leaves because I miraculously was able to leave these alone to set for the proper amount of time while I made my frosting and piped my cupcakes. Seriously...don't touch them once you've piped out the chocolate for at least 20 minutes. Then only gently lift the Parchment sheet and place it in the fridge for your leaves to finish setting, another 15 minutes. Out of sight, out of mind while you make frosting!
Okay, way more than five ingredients here, but worth it for the fall vibe.
For the frosting, you'll need:
  • 4 ounces of 1/3 fat cream cheese at room temp
  • 1/4 cup of butter at room temp
  • 1 cup of Swerve confectioners
  • 1 cup of powdered sugar
  • 1/2 tsp vanilla
  • 1/2 tsp cinnamon
  • 1 TBS skim milk
I chose to go with cinnamon cream cheese to in order to not pumpkin spice the hell out of my cupcakes, but you could easily swap the cinnamon with pumpkin spice to live up to your Ugg-boot-wearing, vests-with-everything fall potential. I also find the 1:1 ratio of Swerve to powdered sugar gives the best flavor without the cooling effects of Swerve but still with very low calorie content. This frosting is so perfectly flavored and autumnal that it mentally transports me to the fall section of Hobby Lobby with every bite. I'm afraid to *actually* go to Hobby Lobby because I know they're already playing Christmas music even though there's another flipping holiday between now and then...ahem. I digress.

Mix together the cream cheese and butter until well blended, then dump in the sugars, vanilla, and cinnamon. Mix well and add in milk as needed. You want a stiff consistency, and since the cream cheese is so silky, it won't take much milk for perfect piping consistency.
It doesn't seem like much in the recipe, but it makes a Chipotle-burrito-sized amount of frosting, as seen here, with my poor weak hand about to give way under its weight.
Making the three-toned color effect is actually super simple. You need some food-safe paintbrushes (read: paint brushes you've never used with actual paint), red, orange, and yellow gel dye, and a 1M piping tip. Fit a piping bag with your tip, then take turns painting a line of red, a line of orange, and a line of yellow on the inside of your piping bag, being sure to use a different paint brush for each color. I had two stripes of each color (6 stripes total) in my bag, then I carefully loaded up my frosting and piped out a small amount to get the colors going.
Then swirl, swirl away.
I piped a traditional swirl with my 1M tip, allowing all three colors to show up on each cupcake, and giving me a place to put my leaves.
Halloween cupcake liners, you the real MVP.
Each cupcake will have a unique color swirl as the frosting works its way over the dye and out of the bag. I love multicolored frosting because of this. It's like owning a favorite pair of pants in 5 different colors. Same style, but so many possibilities. Magic! ...now we know for sure I've earned my basic white girl-ness without a doubt. I am not proud of the number of colored jeggings I own.
The most maple-y, least pot leafy one of the bunch.
 Once you've frosted and your leaves are TOTAL DRY TO THE TOUCH, take an angled spatula and gently lift the leaves off of the Parchment paper one at a time, placing each on top of a cupcake with the help of the spatula. Don't touch with your fingers, or you will definitely cause some breakage. Unless you've been gifted with cat-like dexterity, anyway.
This was my favorite style. Simple, but effective. Like how every Starbucks barista wishes you'd order in the fall.
 Repeat until you've used all your leaves. Told you, these are quick, easy, and oh dear sweet pumpkin spice baby Jesus, so delicious. It's got the right balance of everything--first you're hit with chocolate, then the pumpkin comes waving in followed by the smooth boldness of the cinnamon cream cheese. I'm running out of adjectives to describe how utterly perfect these are, so just bake them yourself and discover a brand new fall staple. Maybe they help you survive Thanksgiving. Maybe you keep some in your car for Black Friday shopping fuel. Maybe you hide them from your family because they're too good to share. Whatever you decide, you won't regret a single bite. Happy Fall, y'all. 'Til next time, my fellow eaters!
Fall will always be the tastiest.