Tuesday, March 1, 2016

Top 'O the Mint to Ya.

I have regaled you all on several occasions about how I believe mint is truly one of the best things a person can add to a dessert. I also spent the entirety of last March gushing over why I love Saint Patrick's Day desserts for that reason. Well, that and the booze. Saint Patrick's Day food celebrations are precisely why I gave up drinking booze for Lent and not eating booze for Lent. I knew I wouldn't be able to resist a Guinness chocolate cake slice or two. I realize the probability of my going to hell relies on a lot more than my abilities to keep my Lenten promises, but I'm trying to do real good here with my blogs and baking every week. Just call me the Mother Theresa of desserts. Unless there's another patron saint of desserts...did anyone else just hear a lightning strike? It's starting to feel a little smite-y in here, so I better get to the good stuff. Mint can only be improved by the addition of chocolate...and more mint. I decided to continue on with the handheld dessert kick I've been going on with quite the fervor lately, so cookies seemed inevitable. But chocolate chip cookies with just a dash of mint extract didn't seem minty enough. I wanted to bite into a cookie and get the sudden overwhelming urge akin to that of a York peppermint patty but with even more minty substance. I knew what this recipe would call for...the pinnacle of chocolate mint candy: the Andes mint. And thus, the mint chip cookie was born.
COMMENCE THE DROOLING!
Are they for the Grinch or for the leprechauns? Who knows...because in either case, if you leave these out after midnight with a glass of milk, someone's gonna eat them. And that someone is probably me. I've got a bit of a mint chip gutbomb happening between the dough I ate and cookies I ate once again in the name of blogging. Or something like that. But the good news is that these mint chip cookies require very minimal time and effort on your part but will be the hit of most Saint Patrick's Day related treat festivities. I promise there's no alcohol in these, so they're even kid safe! I know, look at me, being a baker for the people.
See, no baking booze in sight!
I pretty much did some riffing and freestyling based off of my tried and true chocolate chip cookie recipe to come up with these. So gather up:
  • One stick of room temp butter
  • One room temp egg
  • 3/4 C of sugar
  • 8 drops green food coloring
  • 3/4 tsp of mint extract (not peppermint)
  • 1 1/2 C of flour
  • 1/4 C of vanilla instant pudding powder (This is the secret ingredient that keeps the cookies from going stale for weeeeeks.)
  • 1/4 tsp salt
  • 1 tsp cream of tartar (This always makes me think of tartar sauce, but I promise you these are unrelated. The cream of tartar will help the cookies stay "puffed up" while baking without taking the usual 2 hours required to freeze the cookie dough balls so they stay puffy after baking.)
  • 1 tsp baking powder
  • 1/2 tsp baking soda
  • 1/2 C chocolate chips
  • 1/2 C Andes mint baking chips
Start by preheating the oven to 350 and greasing a cookie sheet. Cream together the butter and sugar for 3-4 minutes until fluffy and Peep-like in appearance. Blend in the egg, food coloring, and mint extract. Scrape down the bowl before adding in the flour, dry pudding mix, salt, cream of tartar, baking powder, and baking soda and blending slowly until fully incorporated. Finish up by adding in the chocolate chips, blending slowly, and then the Andes chips, blending slowly. 
I ate a lot of dough. Apparently, two cookie's worth.
For all you self-restrained, non-gluttonous people out there, this recipe will make 24 cookies. For those of you with a bit of a raw cookie dough fetish like me, chances are you'll yield about 22 cookies after sampling the raw goods. Don't feel bad about your dough addiction; it could be worse. You could be addicted to crack. Life's all about perspective.
Missing: my dignity.
Using a cookie scoop, plop eight mounds of dough onto the greased cookie sheet and bake for 11 minutes. While baking, get another tray out and scoop the remaining dough into cookie balls and place into the fridge. Once the cookies are done, they will still look pale, but I promise they are set in the middle. Rest them on the baking sheet for five minutes before moving to a cooling rack. Repeat the bake/rest/cool method until all of your cookies are done!
Even if you didn't eat any raw dough, you will crumble under the pressure of not eating any cookies at this point.

Pictured: 11/12's of two dozen cookies.
Once the cookies are totally cooled, store in an airtight bag or container. Thanks to the pudding powder trick, these will stay fresh for a couple weeks, so you don't have to eat all of them in a day or two. Not that that will stop you from trying. But no need to feel the pressure. I'm very happy to report from start to finish, in under one hour I had the perfect cookie of my dreams. It was the cookie form of a scoop of Blue Bell's mint chocolate chip ice cream. And since that flavor hasn't made it back on the market yet, I am more than thrilled to have a stand in for the time being. The mint extract plus the mint Andes chips are absolute perfection and take a boring, routine chocolate chip cookie and make it something incredibly decadent. I love that these cookies have a slight crisp to the outside but are melt-in-your-mouth soft on the inside. This is a Kate Bakes Cakes recipe that with be sticking around from now until it's decided no one will celebrate Saint Patrick's Day ever again. I hope to be long dead if or when that day comes, so be sure to bury me with a couple dozen of these. They'll probably stay fresh for the first year or two anyway thanks to the recipe tricks. Be on the lookout for the next couple of weeks for new (and sometimes boozy) recipes to celebrate the coming holiday! 'Til next time, my fellow eaters! 
Pro tip: If you hate drinking milk like I do, try introducing fresh cookies into the equation. You won't be able to get enough of the stuff!

Thursday, February 25, 2016

You Can Bake a Cake in That?

Well, it's official, I've finally gone postal. Let me rephrase that into less of a "no duh" moment...my cakes have finally gone postal. And to think, this dream made possible by one of those government-mandated vacations my husband has to take regularly. I may not be the world's greatest wife, but when you're married to a woman who best shows her love via her cooking, you better believe she's gonna find a way to ship you baked goods from clear across the globe. I have a great cookie recipe that my husband swears even after two weeks of shipping still are totally edible and not at all hockey puck-like. He could be lying to save my feelings, but he probably wouldn't request them if they sucked, so I've got that going for me. Since I sent those literally the day after he left, I figured it was once again time to force my love upon him all the way from the Western Hemisphere. Can someone feel suffocated by love if they're not in the same country as you? Because that's what I'm going for. No need for the sappy Facebook posts that make all your friends want to vomit when you have an ace up your sleeve: mason jar cakes.
I know, cakes in jars with labels and twine...who am I if not really freakin' Texan.
In case you didn't pick up on it in the last blog, this is what all my secret squirrel business was that I swore I'd tell you about. Essentially, these are so quick and easy to make that you can make an entirely separate dessert for yourself while they do their thing. Because you know what you need, nay, deserve while your spouse is deployed? Calories. All of 'em. But preferably in sweet, sugary form. Am I using dessert as a replacement for companionship? Probably. I'm assuming this is what I would be doing anyway if I was single, so all roads inevitably led to this anyway.
Oh Betty and Duncan, even in an alternate universe, we'd still be besties.
I know what you're thinking. Boxed cake mix to show your husband you love him...what is this, amateur hour? Hear me out...I am honestly a little worried that even after wrapping my jars in loads of bubble wrap and cushioning (remember, I know what I'm doing--I worked for FedEx 85 years ago) that the USPS may still somehow work its usual magic and break everything. So these are test cakes, really. I'll be less sad to hear box cakes were ruined than say, my delightfully delicious Baileys cake. How many link-backs is this now? I feel like I'm heading for a blogging record. Anyway, one box cake will yield four mason jar cakes. All you have to do is prep your batter using the tried and true cake-jacking method of an extra egg, milk instead of water, and butter instead of oil with the amount doubled. Be sure you've washed out your mason jars before putting any batter in them. No one wants a janky, dirty jar.
Messes were made.
Regardless of what the cake mix says, preheat your oven to 400. While your batter is blending, spray the ever-living bejesus out of the jars with some Baker's Joy or Pam. I used both because I'm the queen of overkill. You want to fill the jars up halfway. If you have a large squeezy bottle, 10/10 would recommend. You don't want to get any batter on the outside of the jar or around the inside rim, so precision is key. Know who's accident prone and not precise at all? Mhm, me. I ended up using a 2/3 measuring cup to scoop batter and plop it into the jars. This worked...sort of. I had to wipe down a few jars.
Why am I reminded of marshmallow Peeps right now?
To keep from tipping all of the jars over, place them into a deep baking pan. Make sure they're not touching the edges of the pan or each other so they bake evenly. My oven cooks hot, so these were done at the 25 minute mark. Check to see if the cakes are done by placing a butter knife in the middle of one and seeing if it comes out clean. Add more time as needed. They may dome up higher than the lid, just slice any excess spillage off. Mostly so that you have excess spillage pieces to eat. Have to ensure quality standards and whatnot.
My, what foxy towels you have.
While the cakes are baking, take JUST THE LIDS, not the rims, and put into a pan with water. Bring to a boil, shut off, and cover with a lid. This is what makes the rims waxy enough to adhere and seal to the jars, creating pretty heavy duty suction.
Tongs definitely necessary.
The moment the cakes are done in the oven, use some tongs to take one lid out and place it on top of one of the jar cakes. I screwed them down just a little, but holy mother those things get hot quickly...like they're made of metal or some element that conducts heat... So finish sealing the jar by using two hot pads, one holding the jar, the other twisting the lid shut. Repeat this for all of your jars. You will hear lots of pings. Pings are the noises of success! This means the lid is tightly fastened and sealed. 
Oh look, mini cream pie bites.
It really went against everything I believe in as a baker to put the lid on these cakes while they were still hot. It made me a little twitchy. But finally, oh sweet relief, move them to a cooling rack to finish cooling as cakes were made to do. 
I'm clever. I know.
While the cakes are cooling, finish making your own personal dessert or write out cute, gag-inducing tags to place on each jar with some twine. I did both. Because I'm awesome. I also wrapped each jar in decorative Scotch tape first since everything looks better with sparkles. Sparkle tape was my stand-in for sprinkles in this cake.
Straight outta Southern Living.
Were you wondering where in the hell the frosting came into play? You know Kate don't bake no cakes without frosting, sucka. But in this case, frosting in the jars would absolutely turn into goo by the time it made it overseas. The best thing to do in this case is buy a few tubs of frosting and keep them unopened for shipping purposes.
Did you know bubble wrap comes in BLUE? Clearly I did not.
Once you've got cooled cakes and decorated jars (or not, be lazy, see if I care. My husband knows I went the extra mile because of the glitter tape...), take a long section of bubble wrap and fold it in halfsies. In half. God, I'm turning into the southern version of Martha Stewart. No, that's not Paula Dean. To my knowledge, Martha isn't a white supremacist. 
Pleeeaaasseee don't break.
Roll each individual jar cake up with long sections of bubble wrap folded...in half. I was able to fit six mason jar cakes in bubble wrap and three tubs of frosting all in one large flat rate USPS box with extra bubble wrap lining the bottom of the box (again, I was a professional). The other two jar cakes fit into a medium box with some other tightly packed odds and ends. We'll know in two weeks time whether or not they show up in one piece or many and whether they're edible or not (clearly not if broken glass is involved). These were simple and actually quite a bit of fun to make. I now have a higher respect for moonshiners...mason jars really are a blast to work with. I promise I'll update once my husband has been able to quality inspect each cake. 'Til next time, my fellow eaters!

UPDATE: All 8 jars arrived sealed and in one piece, so you can officially thank me for this awesome method of packing. Now your significant other can hoard cakes or use them as currency. Their pick...like prison but tastier and less terrifying.
Guys, I'm afraid I might start really going over board with twine after this.

Tuesday, February 23, 2016

Bite-Sized Bliss!

I eat in a style best described as "anaconda swallowing a horse." No, it's not pretty, but either way it is intensely exciting to watch a 120-pound creature trying to eat an entire meal in one bite. Not sure if I'm talking about me or the snake? I honestly have no idea either. But after nearly dislocating my jaw trying to eat last week's pie in under six bites, I decided I needed to make something this week that wouldn't end in an emergency visit to the dentist for jaw resetting. It just so happens that I'm also an incredible miser, and I'm still trying to get my money's worth out of the mini muffin pan I bought to make tiny, boozy Super Bowl desserts in. I knew I needed a minuscule, micro dessert, but just about everything these days has some form of "mini" recipe, so I was still at a loss. I was thinking about mini cannolis, but I knew that would end in me just eating the filling out of a bowl while quietly trying to find some way to spin this "accident" into a good blog. Once I figured out I wanted a cream-based dessert that wouldn't work without the sum of its parts (a.k.a., a "safety net"), the only thing that really made sense was a Boston Cream Pie. More pie? A second week in a row? I know...but you see, these pies are teeny tiny and adorable, so that makes them different. I know, I'm reaching, but work with me here because once you see how cutely delicious these look, you, too, will be begging for the cream-filled kind. Bonus points if you get the Lion King reference, we can be friends.
Brings new meaning to the phrase, "So cute I could eat you up." Cause I'm gonna.
I happen to be fond of tiny things. This is why I own two dogs that would be normal in stature, but instead have tiny little legs because they're Corgi mixes. I myself am a tiny thing, so perhaps I'm just trying to instill a sense of greater purpose for my pint-sized stature. I was made to make tiny desserts and own tiny, legless dogs. It's a hard knock life. Anyway, these are actually more than just "a" bite. Well, they're one jaw-unhinged-anaconda-Kate bite, or three normal people bites. I pity you small-mouthed plebeians. How long your meals must take...
I didn't even know sugar cookies came in a bag. What else comes in a bag now that I'm not aware of? Milk? What is happening...
The recipe I found and adapted for my mini pies is super simple and doesn't require a ton of weird ingredients. If I can find everything I need at our crummy commissary, it's a win. Gather up:
  • One bag of Betty Crocker sugar cookie mix
  • One stick of room temp butter
  • One room temp egg
  • One pint container of heavy whipping cream
  • One 3.4 ounce packet of Jello instant vanilla pudding
  • 1/3 cup of powdered sugar
  • Optional toppings: chocolate sauce, mini chocolate chips
You're gonna need to grease the ever-living crap out of a mini muffin tin and preheat the oven according to package directions (in this case, 375 degrees). Mix together the cookie mix, butter, and egg until well blended. Find a trusty cookie scoop, and make 24 scoops. Plop each scoop into the muffin tin. Take a tablespoon and make an indent in the top of each ball of dough:
Ugh, the squuuiishhh is so satisfying. I clearly have deep-seated psychological issues.
Pay no mind to the cake mixes, you'll see what those are for in a few days.
Once you've placed a divot into each dough ball, pop into the oven for about 7-9 minutes. You want things set but not fully cooked and crumbly. A toothpick should come out clean, but things will still be very soft and mushy. I promise I'm not going to give you salmonella from under-cooked batter. I ate like seventeen of these, and I'm fine.
That tablespoon is workin' overtime!
Right away, place the mini muffin tin on a cooling rack and use your tablespoon to press the divots back into each cup...they puff up during baking. I had to go through and do this step twice to keep the formation of the cups.
I mean, really, the possibilities here are endless. Cream pie filling, the world's tiniest and most adorable scoop of ice cream, you name it.
Let the cookie molds cool for a few minutes in the tin before removing to the cooling rack. If you happen to have three tubs of frosting on hand like I did, go ahead and eat one. These don't take too long to cool. Side note, didn't actually eat the frosting, but not because I didn't want to...I promise I'll tell you why I have thirty varieties of canned frosting in my next blog. When the cups are completely cooled, make the filling by dumping the whole pint of whipping cream in your stand mixer. Blend on low for a minute while the cream starts to thicken before bumping up the speed to super high for another minute...at this point, you'll have a giant bowl of Cool Whip, essentially. Finish up by blending in the powdered sugar and packet of instant vanilla pudding. 
The 1M tip: making my decorating abilities look fantastic with minimal effort.
Load up a piping bag with the pie filling. Use whichever frosting tip you prefer, but I selected the 1M tip. I simply placed my tip straight down over the top of a cookie cup and piped a hefty mound of frosting into the cup. I had to refill my bag halfway through and still had a little filling leftover.
It was a super simple way to make cute treats!
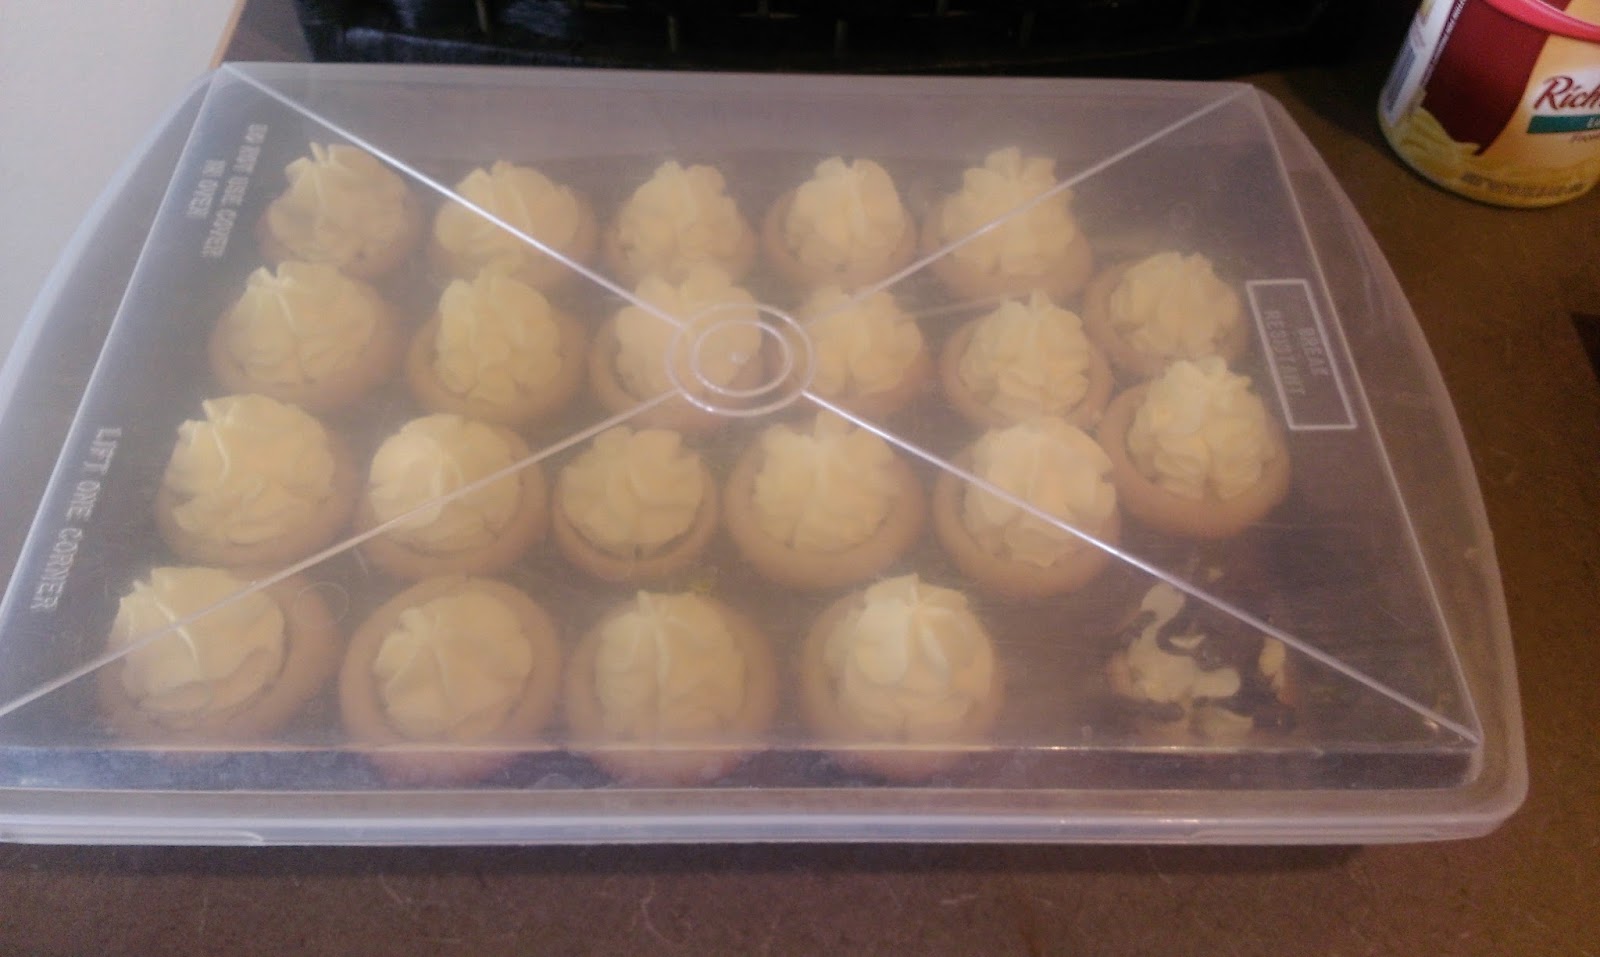
At this point, if you're not going to eat all 24 at once, you're going to want to refrigerate these. All that heavy whipping cream could get real bad real fast, and I'm emphatically trying not to give you salmonella via my blogs. Luckily, a 9x13 cake pan with a lid makes the perfect container:
Ahem, with a little space leftover if you've already eaten a couple.
For photo and blogging purposes, I took some chocolate syrup and drizzled it (we'll say, generously) on a couple pie bites. And to literally top it all off, I gingerly placed three chocolate chips on top of each one. A star was born.
A beautiful, chocolatey star.
Remember how I went on and on about how densely chocolatey and rich the salted pie from last week was? Well these mini Boston Cream Pies are exactly the opposite in the best way possible. The pie filling is so light and airy, yet somehow still packed with an enticing, flavorful experience. The cookie cups have a nice crisp outer shell while remaining soft with that melt-on-your-tongue center. And the chocolate syrup and chocolate chips? You may say overkill, but I may say literally the perfect finishing touch. These have that sophisticated look that makes people think you spent hours in the kitchen crafting them, but you reap the benefits of a dessert ready in under 30 minutes. The only downside is I ate a few and couldn't stop talking in a Boston accent for about an hour. The letter R no longer formed in my mouth, so I think I've finally gotten to the bottom of why Bostonian's sound so delightfully wonderful: too much pie. Wicked smaht idea, Boston. 'Til next time, my fellow eatahs!
Who wants to bet me money I could fit all three of these in my mouth at once?

Tuesday, February 16, 2016

The Rush You Really Need...PIE!

Fun fact! Did you know that the only form of guilt more powerful than a mother's guilt is Catholic guilt? Last week and once again, Lent decided to show up earlier than I was prepared for...I mean, I'm used to giving up meat on Fridays during it for reasons that are pretty much unknown to me but subsequently fall in line with Shrimp Fest at Red Lobster, so I don't ask too many questions. But I always like to come up with something to give up that actually ends in real sacrifice and character building (who is this Kate and what have you done with the original mean one?!). I try nixing terrible bad habits like cussing, fast food runs, general laziness, etc. I've seen many friends give up Facebook for Lent, but I'm not sure how I would ever pass the time if I wasn't acutely aware of all my friends' stances on politicians, religion, and Taylor Swift. So I'm going for my old fallback favorite: giving up drinking alcohol. Notice I prefaced alcohol with the word "drinking." I still intend to bake with it, but a cupcake topped with boozy frosting has never once led to the eating of seven other cupcakes and a foggy memory haze the follow morning. Same hangover gutbomb, but without the remorse and regret! Since I'm on the path to fancy hangover-free adulthood thanks to Lent, I decided I needed a dessert hoity toity enough to reflect my newfound status of droll teetotaler. Know what can make anyone have a good time? Pie. Know what can fill a boring situation with excitement? Chocolate. Know what just tastes really good no matter what? Salted caramel. Now pair those together, and you get the most beautiful amalgamation of all three: Salted chocolate and caramel pie. Did I mention the crust is made of Oreos? Because it is. And it is spectacular.
Pictured: decadence.
I've got my Blue Bell back, and now I've got the perfect platform upon which to place it. This pie is so insanely rich and delicious that it is the only thing I ever want to eat from now until the day I die of a sugar-related heart attack. This pie is so good that my entire house could be burning down around me, and as long as I had a slice, nothing else would matter. Although it is without a doubt not 'light' or 'fat free,' it is worth the extra time on the elliptical. The kicker? It's only six ingredients!!! I promise I'm not tricking you. Stone-cold sober (but full of pie), I kid you not.
All the best desserts start with Oreos.
Like anything worth eating, this pie (original recipe here) is full of butter and all the right stuff. Gather up:
  • 1 package of plain Oreos ...these do, in fact, still exist which is shocking, because...Double Stuff.
  • 2 sticks of butter, divided
  • 2/3 cup of brown sugar, packed
  • 12 ounce bag of dark chocolate chips ...if you don't like dark chocolate, use regular. I think the pie is the perfect amount of sweet with the dark chocolate, though. Milk chocolate may cross over into that "It's so sweet I'm gonna gag" territory.
  • 1 1/4 cups heavy whipping cream
  • Coarse sea salt
  • Optional: extra caramel sauce for drizzling and God's gift to ice cream: Blue Bell's Homemade Vanilla
I was starting to feel bad for my blender considering I wasn't going to be making any frozen adult beverages any time soon, and then I found this recipe. I don't own a food processor, so I make life work by beating things into tiny, crumbly submission with a rolling pin in most instances. But this recipe requires an entire bag of Oreos, cream and all, so I decided to give the old blender a chance to shine outside the realm of margarita making.
I was pleased with the results.
To make the crust, blend about 10 Oreos at a time into a fine pulp and dump into a medium-sized bowl. Once the Oreos are all crushed, melt one stick of butter in the microwave, and then blend it together with the crumbs to form a crust.
Gonna start dunking my Oreos in melted butter from now on...
Press the crust mix into a pie pan and freeze for about 20 minutes.
Homemade caramel...is there anything better?
While the crust is setting, get a medium saucepan out and melt the other stick of butter and the brown sugar together. Whisk it quite frequently, and once it starts to really bubble, stir constantly for a minute before removing from heat. Pour in 1/4 cup of heavy cream and blend well. Set this aside to cool for 15 minutes.
I'd even have settled for the pie as is at this point.
Once the crust is set and the caramel cooled, pour the caramel into the crust. Place back in to the freezer for 40 minutes so the caramel can firm up and form a skin. This way the layers of chocolate and caramel stay separate later.
I didn't even need the spatula...this dessert is so kind when it comes to dishes.
When the caramel has about 5 minutes left to finish setting, bring one cup of heavy cream to a simmer in a saucepan. Pour out the bag of chocolate chips into a large bowl while this is taking place. Once simmering and almost to a boil, pour the heavy cream over the chocolate chips and let rest for a few minutes. Once the chips have had a few minutes to get melty, stir together the cream and chips to form a nice, thick chocolate sauce.
Dear God, you're perfect.
Once the chocolate sauce is fully mixed, get the pie out of the freezer and pour the final piece of the literal pie on top. If you need to smooth things out, go for it. I didn't have any weird unevenness or lumpy bumps, so you'll probably be fine. If anyone is gonna ruin a dessert, let it be me. I'll still eat it. Place the pie back in the freezer to set for 2 hours or into the fridge overnight.
The waiting was the hardest part.
I was DYING to try this pie. Once the chocolate was solid, I sprinkled coarse sea salt on top and took about 50 pictures because it was so beautiful I wanted to cry. I thought about skipping dinner, but the pie was taking too long to set and my hunger anger over waiting for Adele to perform at the Grammy's was full-force. But when the time finally came, I loaded a slice up with a caramel drizzle and a scoop of Blue Bell. I no longer cared about anything else in the world. To say this pie is good is like saying we need air to breathe. It's the right combination of so many flavors- sweet, decadent, salty, and just downright the best pie I've ever had in my life. I'm an avid dessert eater, obviously, but even I was taken aback by just how good this combination of caramel, chocolate, salt, and Oreos came together, especially with only six ingredients and some super simple steps. Basically, if you want to wow the crap out of everyone you know, bring this to your next social gathering. You won't even miss the beer or wine with this bad boy handy, I know I don't! Pie...the anti booze! I'm going to be incredibly dumb, fat, happy, and pie-drunk for the next several days, and I recommend you do the same. Make the pie. Eat the pie. Let the pie wash away your Catholic guilt. Although anything that tastes this good is probably sinful in some way, but that's a problem for another Lent. 'Til next time, my fellow eaters!
I want to thank this pie for making Lenten sacrifices possible. You're the real MVP.

Sunday, February 7, 2016

Chocolate: America's Coping Mechanism

I was born into a family with proud Minnesotan roots. Roots so deep that even though I grew up in Texas, every Sunday was a "bleed purple and gold whether the Vikings won or lost" kind of experience. I will say the latter happens more often than the former though. So we don't have the greatest record, and we've never won a Super Bowl, but our mascot is bitchin', our defense will eat you alive, and we still have one of the most fantastic running backs in the entire NFL...ahem, not to boast, but we're also this season's NFC North Champions. But if there's one thing I've learned as a lifelong Vikings fan, it's how to channel the loss-rage into a little something I like to call "eating my feelings." When we lost the 2009 NFC championship game thanks to He-who-shall-not-be-named (traitor), I blacked out a little, but I still think I managed to eat almost an entire pan of brownies. That may sound extreme, but it was better than rage spiraling and punching the person closest to me or drinking a pony keg's worth of beer. Football is passion. We yell at our TV every Sunday in hopes the coach will somehow hear us and stop making terrible calls and get it together. We scream with glee when our team blows it out of the water with a game-winning touch down. But when it comes to the worst and we get one in the loss column, you know what's always there to make you feel better? Chocolate. Chocolate has been solely responsible for ensuring I make it through every Vikings game since I was a child. Chocolate is the food version of a mother's hug...win or lose, chocolate just makes people happy. So when the pinnacle of all football games comes around every February, you gotta make sure you have a dessert on hand for either celebration or defeat purposes. Enter the Rolo-stuffed brownie bite topped with Baileys salted caramel chocolate buttercream. Both a mouthful to say and eat!

This is what we call intentional yummy.

I'm totally on the fence for game. Do I love the Manning family? Absolutely. Do I hope Peyton can win one more and retire at the top? I so do. But at the same time, Cam Newton has been a beast leading the Panthers all season to a nearly perfect record. It would be a major blow to get this far and not win the Super Bowl. So I needed to make a dessert that would leave my ambivalence satisfied with either outcome. I made chocolate footballs last year, but there was no booze in those. I needed chocolate and booze in case Nationwide decides to show another dead kid commercial this year or in the event the halftime show is as underwhelming as it has been the past five years...I had to be prepared. So I rolled the idea around in my head, and I came up with a dessert so simple, you can make it in an hour. If you're still wondering what deliciousness to bring to your own parties tomorrow, heed the recipe!!
Yes, I cheated and used a box mix.
You will have tons of leftover Rolos, so, win!
That's right...you get to use a box brownie mix. No fancy recipe here. I'm sure you could find one, but let's face it, the big same starts in a few hours, and if you're in a pinch, no one will care you used a box brownie mix because you've gone the extra mile and put Rolos in them. So preheat your oven to 325 and make the brownies as directed. Grease a mini muffin tin (I just bought this, and will be making everything in mini muffin form from here until eternity--case in point--also making mini spinach dip cups for the game, too). Place a dollop of brownie batter into each hole, and then unwrap a ton of Rolos and simply plop one into the middle of each cup of batter. Bake 12-15 minutes or until mostly set. Allow 5-10 minutes and remove the brownies to a cooling rack.
It's ok, we're all gonna feel a little sunken in tomorrow morning what with the food and drink hangovers.
The brownies will sink in where the Rolos were placed, but this is fine. You can leave your brownies sunken and exposed, or be a pal and cover them up with frosting. In this case, boozy frosting.
More Baileys? Yes. There's never enough.
This is a pretty simple frosting recipe, and if you wanted to make it booze-free, just sub milk or heavy cream for the Baileys. But I feel like I'm really on to something here. Why just drink alcohol during the big game when you can eat it, too? Gather up:
  • 1 cup of room temp butter
  • 1 tsp vanilla 
  • 3/4 cup cocoa powder
  • 4 cups powdered sugar
  • 4 TBS Salted Caramel Baileys
Cream the butter and vanilla for a few moments, then add in the cocoa powder. Finish up by adding in two cups of sugar and two TBS of the Baileys, blend, scrape the bowl, and add in the final two cups of sugar and two TBS of Baileys. Place into a piping bag with the tip of your choice and pipe away!!
Yeah, I ate one for breakfast...what about it?
Dear. God. I am obviously saving (or trying my best to) these bad boys for the party in a few hours. But I had to sample at least one so I could blog about it. Very gluttonous and scientific reasoning, you see. 'Ooey gooey' would be the best way to describe these...that nice crisp brownie outer coating gives way to smooth, melted caramel and soft brownie center. The Rolos take your standard brownie game off the charts. I would most definitely call these a touchdown! I didn't eat mine with Baileys frosting, as it was the wee morning hours and even I don't start drinking or eating booze until a respectable hour of the day. But when I made the frosting last night, I may have accidentally licked the bowl after I was done piping. Baileys Salted Caramel is now my new favorite thing. Since I don't drink coffee, I'm going to have to find new ways to add this into all my frosting and desserts from here on out. I hope you all enjoy the treats and festivities America's favorite game will bring you this evening. May your pants remain comfortable and your mouths full...of brownie bites, pizza, and beer. But not all at once, that would be weird. 'Til next time, my fellow eaters!
Look, a three point conversion!

Tuesday, January 26, 2016

Reviving the Best of the 90s

Ahh the 90s...the time of Crystal Pepsi, blow-up furniture, and approximately 76 different boy bands. It was a decade where boys wore bowl cuts and girls wore ungodly high platform sneakers (in hindsight, the bowl cut was the safer choice. Orthopedists everywhere are thankful for the trend though). The 90s had music so damn good that MTV still played videos in their regular programming. Kids these days will never know the real reason libraries exist and the horror of having a take-home research paper that required you to hope to God your Encyclopedia Britannica cd-roms worked without freezing Windows 95. When the Internet came on the scene, I still remember the joy I felt creating my very first AOL screenname and exceedingly colorful profile typed out in Comic Sans when it was still an acceptable font. We grew up in a time where our video gaming was limited as our parents forced us into this magical place called "outside" to play. You knew your parents loved you, but you were never more sure then when they packed your lunch with your favorite Lunchables and the Holy Grail of 90s desserts, Dunkaroos. As a child, I was not well versed with "pacing myself" (it could be argued I'm still not so great at it), and so I could never find the magic ratio of Teddy-Graham-to-funfetti-dip with my Dunkaroos. It always ended in the pitiful sight of a nine-year-old girl scraping the bottom of the dip with her tiny little fingers while muttering about how there's never enough...ahhh, baby's first fix. It has taken me the better part of 20 years, but I finally solved that problem. Fellow children of the 90s, say hello to Dunkaroo dip.
If they had just given us this much dip to begin with, there wouldn't have been a problem.
That is a veritable bowl of nostalgia right there. One bite of this dip transported me back to my elementary school lunchroom cafeteria. Aside from our lunch monitors being power-hungry college students, lunch was an enjoyable experience for me. Every Friday we had square pizza (you know the one), and every once in a while I was fortunate enough to have my mom bring me a Happy Meal before I became too cool to eat with her in junior high. Why I ever turned down the opportunity to eat McDonald's to save face is beyond me. I speak with like two people from my junior high days still, and I'm pretty sure they would've just been happy someone had good fries to share with them and not cared about the parent thing. I digress. Clearly I enjoyed the 90s, but we all know there's nothing I enjoy more than a really simple but insanely delicious dessert recipe (sorry jelly shoes, you're a close second).
Even the biggest of dreams have humble beginnings.
Yeah, three whole ingredients make up the Dunkaroo dip. My husband found this dip recipe on Imgur, the greatest website in the world to waste time on, and my only regret is that he is deployed and I will have to eat the whole bowl myself. Did I say regret? Because it kind of feels more like gleeful, sinister gluttony. I mean, I ate this FOR LUNCH. I know it seems like maybe I'm the mature one in this house, but the real truth is my husband is the adult, not me. I've already had ice cream for dinner more than once and he's only been gone a few days. I have sweet tooth impulse control issues that can clearly only be controlled by a real adult, not just a pretend one.

I tweaked this recipe a bit to fit my sweet toothy needs, so here's how it breaks down:
  • One box of funfetti cake mix (do not make the cake recipe, leave it dry)
  • 1/2-2/3 of a tub of Cool Whip (see note below)
  • 16 ounces of plain yogurt (see note below)
  • Mix all three of these things together, put in a bowl, cover, and let set in the fridge for a couple hours to overnight. I somehow channeled the willpower of a god and let mine set overnight.
Good things come to those who wait. Good, gluttonous things.
Hi, I'm the note below: For the amount of Cool Whip, it's all about taste preference. I like a light, fluffy dip, so I used 2/3 of the tub. If you want a denser dip, just use half the tub. As far as the yogurt is concerned, I realize mine is vanilla and not plain. Know what our Walmart has? Six cases full of different kinds of yogurt. Know what is does not have? Plain yogurt in any size under "able to feed family of thirty-seven." Since I didn't want to throw away a ton of plain yogurt, I opted for vanilla. It really added a nice flavoring to the dip.
Can you feel the diabetes?
After my dip had set overnight, I turned it out into a pretty bowl and topped it with sprinkles...not because I'm taking it anywhere, just simply for photo staging. A picture of me using my hand a spoon didn't seem appropriate. Well that and my inner child just cannot get enough sprinkles. I set this up with Nilla Wafers, chocolate Spritz cookies I thawed out from my mom, and birthday cake Oreos. Fairly certain I've never eaten more sugar in my life after sampling several of these, so this blog post was brought to you by the best sugar high I've had since that one time I ate eight pancakes in one sitting as a small child. Again, impulse control is just really not my thing. Honestly, this dip would be an amazing addition to your upcoming Super Bowl festivities. I just want to say how happy I am to have predicted the Super Bowl teams for like the fifth year in a row. I also have some residual happiness from watching Tom Brady lose. He clearly never ate Dunkaroos in the 90s, and I have a feeling that's why he's such a sore loser. So here's to yet another Manning pulling one over on him and to the world's most nostalgically delicious dessert dip ever. 'Til next time, my fellow eaters!