Saturday, January 16, 2016

I'm Not so Good with the Goodbyes...

Not once in my life have I ever thought to myself, "I could go for a drink of Baileys." I'm honestly not even sure what it could go into other than coffee, and coffee is just not my thing. It smells like acrid poo to me, and I imagine the taste is strikingly similar. Perhaps if I had just been adding Baileys into it this whole time, it would have sufficed. But I'm told drinking booze before noon is generally frowned upon, so I'll never know. My point is, Baileys is like the wing man of spirits. It can take a boring drink and spice it up so just about anyone will agree to drink it. If that's not going in for the assist, I just don't know what is. I've fondly been adding Baileys into my frosting when I make my Guinness chocolate cake for ages, and the two just compliment each other so well. I started thinking to myself what if I ditched the middleman and just make a Baileys cake? Could Baileys possibly stand on its own and become the star player? These are the hard-hitting questions a former journalist turned baker ponders. Sure, my life could use some direction, but...cake. I'm happy to report that sometimes even the silliest of dreams can come true. Baileys cake is now the best damn cake I've ever had in my life.
Perhaps I should've prefaced this.
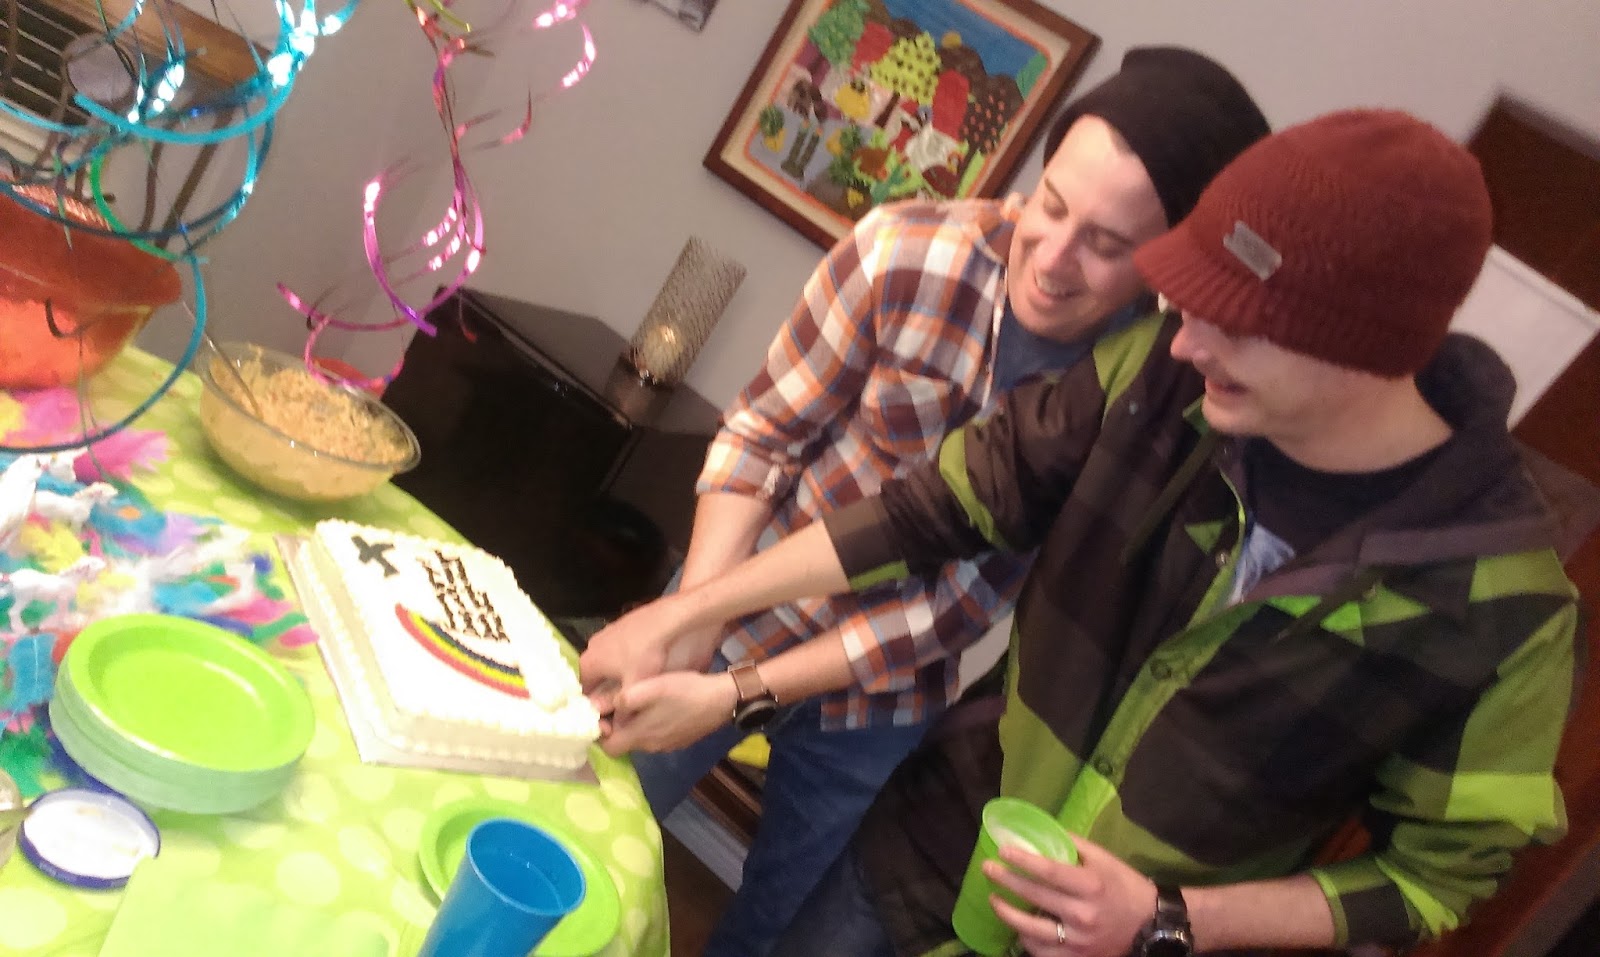
Yes, I am one of the meanest friends you could ever have, thank you for noticing! I was commissioned to make this cake originally for a friend of ours who is going off to pilot training. It also happens to be time for my husband to take another one of those government-mandated vacations in the near future, so our friends requested this cake also be a farewell for him, too. But in the beginning when it was simply a "good luck and goodbye" cake, I didn't want to make some sappy, sentimental cake. I'm not so good with the goodbyes, but I am excellent with the snark. Our friend happens to share my same love of sarcasm and snarkiness, so I decided to go full speed ahead with a message that was both...along with some rainbows, a very tiny airplane, and a unicorn. I had to ditch the unicorn when my husband's note was added in, but I think the message stands: we love screwing with you, friend.
This is perfectly normal.
See, he loved it. No hurt feelings, just a really big mess. And some general looks of disapproval.
You can also get away with making someone a mean cake when it is literally the best tasting cake in the world. Seconds were had. There was drooling, and not just by me! Seriously though, I show my love for my friends not with words, but by actions. Spending several days coming up with an idea and a full day baking, frosting, and decorating a cake is my way of being nice. Who doesn't love cake?
I told you, you can't have coffee without Baileys.
I had to search high and low for a recipe that I thought would be correct and was also in standard units of measurement my lazy American ass is used to...there are boatloads of Baileys cake recipes on the internet, but all of them are from across the pond. You'd think this cream was like Irish or something. Wait... But I finally found this recipe. It is pretty foolproof, but some details on ingredients if you're not a seasoned baker are very helpful, so let me guide you my dear child.
  • 2 cups of flour, sifted or using the scoop and swoop method with a spoon. Just don't hard pack it.
  • 1 3/4 cups of sugar
  • 3/4 cups of unsweetened cocoa  
  • 1/2 teaspoon of salt
  • 1 tablespoon of baking soda
  • 1 egg at room temp
  • 2/3 cup of vegetable oil...I wanted to try real butter for this, but opted to follow the recipe. It is plenty rich without the butter.
  • 3/4 cup of buttermilk at room temp
  • 1/4 cup of Baileys at room temp
  • 1 cup of coffee at room temp
Remember, all ingredients will incorporate much better flavor- and baking-wise if they are at the same temperature. Plus hot coffee + 1 egg = a really gross scrambled mess. Start by greasing a 9x13 or two 8-inch round pans and preheating the oven to 350. In a medium bowl, mix together all dry ingredients and set aside. In your stand mixer, mix the egg, oil, buttermilk, Baileys, and coffee on low until blended. Add in a third of the dry mix, blend, and scrape the bowl. Do this two more times. Turn the batter into a pan and bake according to your pan size...I used a 9x13 and my cake was done at 28 minutes, so look for that window between 25-30 minutes.
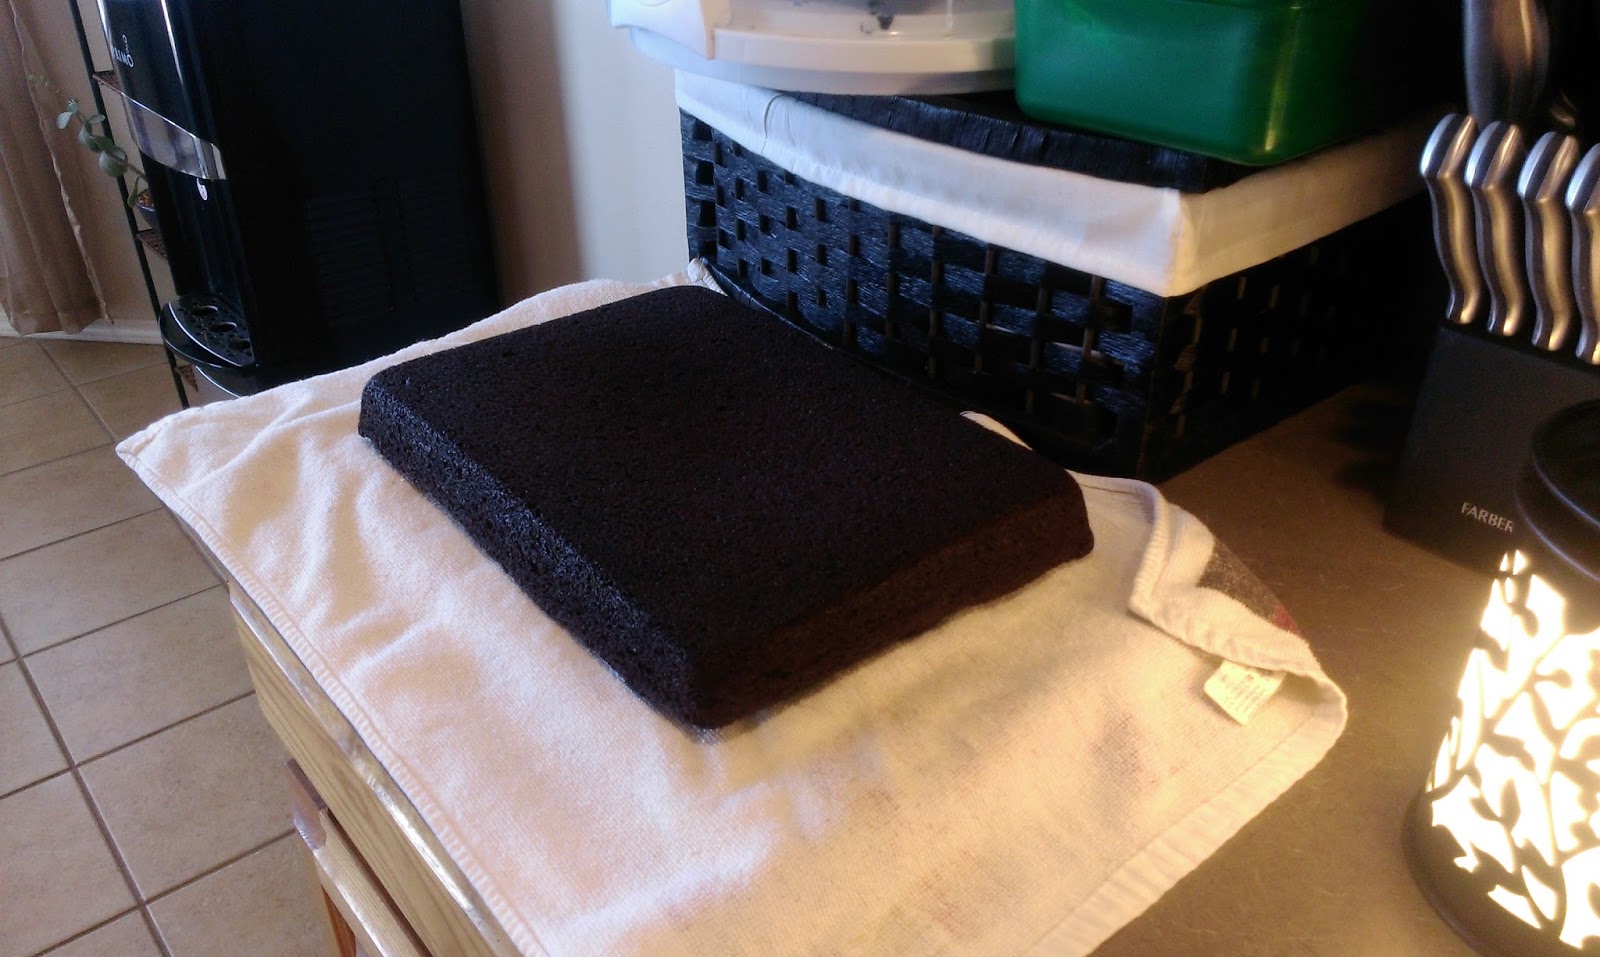
Just the most perfect brick of cake I've ever seen.
Let the cake cool in the pan on top of a cooling rack for 10 minutes before removing from the pan and letting it finish cooling on the rack.
I couldn't make a cake and not use copious amounts of butter at some point.
I tweaked my Baileys frosting recipe so there was more of a butter base this time and less Crisco. I'm becoming a real frosting snob, and the more butter the better.
  • 1 cup of Crisco
  • 1 1/2 sticks of butter at room temp
  • 1 tablespoon of CLEAR vanilla extract if you want whiter frosting, otherwise use regular
  • 6 cups of powdered sugar
  • 4-5 tablespoons of Baileys
Start by blending the butter and Crisco. Then add in the tablespoon of vanilla, one tablespoon of Baileys, and two cups of sugar and blend. Repeat the sugar/Baileys blending process until you've used all six cups of sugar and 4 tablespoons of Baileys. I opted for the extra tablespoon to make piping easier and less stiff. Now let's take a walk down crappy photo montage lane.
Obviously a crumb coat is necessary for a cake this dark with white frosting. I would've given it two crumb coats, but every ounce of frosting is spoken for with this cake. Let the crumb coat freeze for 30 minutes in the freezer.
Then place the final coat on and freeze for 15 minutes. Not pictured is what you need to do next: the Viva paper towel trick to smooth out the top and sides. Make it pretty, y'all.
So, I kind of shot myself in the foot with this rainbow idea.
Rainbows are kind of known for being colorful. They're also a pain in the ass to put on a cake for that same reason. I used 7 tips fitted with #21 and #18 open star tips to decorate the rainbow. The larger tips are for the colors "closer" to the view. I then spent 87 years mixing small amounts of frosting with the respective proper dye colors. I also made an extra bowl of grey frosting for the airplane and placed that in a bag wit h a #3 tip to start. The black frosting for the writing was made by mixing all leftover colored frosting together with a bit of black dye and placed into a bag fitted with another #3 tip. For the clouds and border, reserve a large amount of white frosting.
Here I am preparing to paint with all the colors of the wind. Thanks, Roy G. Biv.

I started everything off by drawing and writing in where everything would go with a toothpick. Then I made the outside edges of the rainbow so I would know how much space I had for each color.
Once I had filled in my rainbow, I took my bag of white frosting fitted with a #1A large open round tip and made my clouds. I let frosting pile up and swirled it around with the tip to achieve that puffy look.

I mean, this is best birthday cake for an 8 year-old-girl ever at this point.
I outlined the plane in grey with the #3 tip before switching to a #21 tip.
Then I filled in the plane with that star tip.
After mixing the black frosting with the leftover colors and the black dye, I piped out the message very slowly and carefully with a #3 tip.

I've come across a lot of challenges in my life being left handed, but none so greater than trying to write on a cake. There was a lot of cursing, sweating, and praying simultaneously, so someone upstairs was probably doing a lot of head shaking and palm-to-forehead smacking.
I then switched my white frosting to a #21 tip and piped a shell border around the sides. So fancy and official...if the rest of the cake wasn't covered in rainbows and mean wording.
This ends the crappy photo montage. You're welcome.
 I'm going to be obsessing over this recipe for weeks to come. My only regret is that I had just one piece. No one wants to have to share, but in circumstances such as going away parties, it is a necessary evil. Otherwise the only person anyone would want to go away is the person bogarting the cake. It still may have been worth it? This cake is not dense, but yet somehow packed full of moist chocolatey flavor with a hint of Baileys. Well, more than a hint of Baileys thanks to the frosting. I'm very much so a have your cake and booze it, too, kinda gal, so this recipe was without a doubt the best cake I've ever had. What I'm saying is, go make this cake. This cake recipe is my equivalent to winning the Powerball lotto. Decadent. Rich. Dreamy. A real jackpot. I think I'm out of adjectives at this point, so I'm off to drool over this cake some more. 'Til next time, my fellow eaters!
Soar high, touch the clouds, other inspirational message here.

Thursday, January 7, 2016

My Birthday is a Black Tie Affair.

Today I turned 29 for what will be the first of many times. I could write an entire entry about how my body is slowly failing me, but that would be incredibly depressing for a cake blog. Cake should make people rejoice with happiness, and I firmly believe that is why it is never served at a funeral. Unless you want to fondly reflect on that pumpkin chunkin incident that turned fatal for poor Uncle Cletus, leave the cake for bonafide celebrations like birthdays or making it to work on time. I was trying hard to decide if my 29th birthday cake should reflect my age and maturity (ha) and be serious and delicate for once, especially considering my 30th birthday is ripe for a tombstone-themed cake. Thankfully, a little voice in my head spoke up (I know I probably need years of psychotherapy, but it's my birthday, let me have this one). It told me do not go gentle into that good night--I need to embrace the youth that is still so prevalent in my soul, so I decided my cake needed to be fun and delightful. It needed to fill me with awe (or "aww") like the cute and adorable cakes my mother used to make for me as young girl did. I thought about what I liked as a kid for a possible theme, but I'm not into Barbies, Power Rangers, or the Spice Girls anymore (that's a lie- I still LOVE the Spice Girls, but wasn't feeling up to the task of creating a cake-likeness of them). So then I decided to think about what fills me with delight every time I see it now. Minions obviously, 50% off signs, and really fat animals...which led me to think about one of the world's most awkwardly adorable yet formal creatures- penguins. They combine both my love of cuteness and formal attire, so this was a no-brainer. I then thought about my favorite of all penguins, Kowalski from the Madagascar movies. A star was born.

"It is strategically... adorable."
Old age and decrepit hands aside, I really enjoyed making this cake. Seriously though, my hands still hurt from piping all those individual little stars. I now have a crab claw and not a left hand. At one point, I thought to myself whether it was actually necessary to frost the top sides of the cake since no one would see it in pictures...but I couldn't half-ass it. I had to go the distance and whole-ass it. I'm delighted by how cute this turned out to be, and BONUS, this recipe had leftover cake batter that I turned into six additional cupcakes. So I got to sample the goods a whole day ahead of time. You know, to ensure quality standards and blah blah blah.
Blah blah..ohh, pretty. Decorating tips found here.
Traditionally, I have strawberry cake with cream cheese frosting for my birthday. But I have become obsessed with raspberry this past year. I want it in my pastries, in my fruit cups, in my booze; you name it, I am gonna find a way to add in that flavor. I always thought of raspberry to be something for the adult palette as it was more robust and less sugary, so maybe I really am growing up despite my best efforts to still laugh at fart jokes and crack dirty double entendres as much as possible. One thing at a time, I suppose. I found a recipe here for a wonderful raspberry cake and decided it would go perfectly with my almond buttercream frosting. As per usual, I was most undoubtedly correct...which is the greatest birthday present of all.
Bonus, plenty of leftover raspberry jam! To put in your pastries, in your fruit cups, in your booze...
I like it when the hardest part of a recipe is having to stop my mixer to add things to it. Loooowww maintenance! This recipe does need cake flour and not regular flour. Cake flour is super fine and just adds an amazingly airy quality to the taste and density of the final product. I know this because the side of the cake flour box told me so. Here's what you need to be a raspberry fiend like me:
  • 2 cups sugar
  • 1 cup of room temp butter
  • 3 cups cake flour (use the scoop and swoop method and spoon flour into a measuring cup. Do not pack it down.)
  • 2 1/2 tsp baking powder
  • 1 tsp salt
  • 3 eggs at room temp
  • 3 egg yolks at room temp (thank God I don't suck at separating the yolks...just separating the whites for whatever reason)
  • 2 tsp vanilla
  • 1/2 cup seedless raspberry jam at room temp
  • 5-6 drops of red food coloring
  • 1 1/2 cups whole milk at room temp
Start by preheating the oven to 350 and greasing your pans. This recipe makes enough cake for three 8-inch rounds, two 9-inch rounds, or one 9x13 with the bonus six cupcakes I mentioned. In the stand mixer, cream butter and sugar until fluffy. While that's happening, blend the cake flour, baking powder, and salt together in a medium bowl and set aside. Once the butter and sugar is creamed, add in eggs one at a time and then the food coloring, vanilla, and jam. Be sure to scrape your mixing bowl often. Finish up by adding in a third of the dry mix and blend well. Then add a third of the milk and blend well. Continue this pattern until you've blended in all the dry mix and milk.
Hmm, I see a dog butt in this photo. He's helping.
 If baking in a 9x13 pan, bake the cake by itself for 30-35 minutes and the cupcakes for about 15-16 separately. A smaller pan like an 8-inch round will take around 20 minutes. Let rest in the pan for 10 minutes on a cooling rack, then turn out onto the rack to finish cooling completely. Since I was cutting this into a penguin shape, I put my cake in the freezer for a couple hours to make trimming easier.
Nothing can be bad with this much butter.
About 15 minutes before I pulled the cake out of the freezer, I made my almond buttercream. I know I've given you this recipe a kajllion times, but that is because it is quite literally the most complimentary frosting ever (mean to the hips, but really nice with any kind of cake).
  • 1 cup of room temp butter
  • 6 cups of powdered sugar
  • 1 tablespoon of vanilla
  • 1 teaspoon of almond extract
  • 6 tablespoons of heavy cream, half and half, whole milk, skim milk, your choice depending on how rich you like things
Cream the butter for a few moments then add in two cups of sugar, the vanilla, and the almond and blend well. Add in two tablespoons of milk and blend. Add in two more cups of sugar, blend, and then two more tablespoons of milk and blend. Repeat one last time and you're done! Set aside and get ready to cut up that cake!
I never said I was good at drawing, okay?
I like to draw templates when I'm going to make my cake into something that's not in the standard wheelhouse of "round." I drew out Kowalski (obviously by hand) so I had something to cut around on my cake.
Like so.
Clearly his flippers are larger than the cake, so I held on to my scraps after cutting around my template.
Right now he just looks like a fat, armless robot. Oh look, another dog.

I cut some cake scraps to fill out his flippers and connected them to my cake with wooden skewers.
Then I gave him a good crumb coat. This is a must when you've trimmed a cake down!
 I let Kowalski sit in the freezer after the crumb coat for about 30 minutes. Penguins like the cold, this is a fact. Now hold on to your butts, here comes a crappy photo montage!
You're going to use EVERY bit of frosting for this cake, so sadly, don't eat any. Instead dye a small amount orange and place into a bag fitted with an open star tip. I used a Wilton #21. Place a fair amount of white frosting into a bag with a coupler and for now, another open star tip. Dye a LARGE amount of frosting black. Place into a bag that has a coupler on it and fit with a small round tip. I used a #3.
In yet another attempt to make things foolproof because I do fall victim to blonde moments, I used a toothpick to outline where everything needed to go for Kowalski to look like a penguin and not a failed science experiment, or worse, just a regular bird.
I started by outlining his mouth. I was going to do buttercream transfers for his eyes, but when I finished them, one eye was white and the other cream colored. I used the same bag of white frosting for this, so I have quite literally NO idea how that happened. Instead, I recommend outlining his eyes in black at this point and drawing in his pupils, too. Lesson learned. Frosting can apparently play tricks on you. Who knew.
Once the mouth was outlined, I filled it in with my orange frosting fitted with the star tip. This is simple, but time consuming. You just place row after row of stars until the area you want is filled. When done, I came back over and re-outlined his mouth in black to create a fuller, thicker lip line...just like you do every morning. Penguins, they're just like us! I also filled in his feet.
Once finished with his feet, I took the small tip off of my black frosting and fitted the bag with a #21 tip. This is why a coupler comes in handy. Then I outlined what areas would be in black.
And filled in the top of his body. My hand had gone numb at this point, so I took a break and ate a cupcake. It was the right choice.
Then I outlined the areas that needed to be white.
...Before filling in his body. I then iced my left hand (with an ice pack, not frosting, although I have done that on accident before) and ate dinner with my right hand. Eating with your non-dominant hand is like having someone else feed you, if that someone else is accident prone and really bad with a fork. I recommend trying it some time! Once dinner was done and my hand had been fully iced, I finished his body by piping the rest of the black frosting onto the sides of his body. Without eyes, penguins are actually quite terrifying. He kinda looks like he's happily going to devour your soul and steal your eyes all in one fell swoop. Moving on.
Since my buttercream transfers didn't work, I placed the small #3 tip back on my black frosting and outlined his eyes...which was hard to achieve evenness on top of all those stars. This is why I recommend doing this when you outline his lips and forgo trying to do the transfer.
Then I placed a #5 tip on my white frosting and filled in the eyes. I smoothed out with a spatula, and then added dots for pupils, and he was done. Kowalksi, you handsome sonofabitch, I could get lost in those wonky eyes.
This cake...I almost don't want to eat it because it's so cute. But I had a cupcake, so I know I'm going to eventually have to cut into Kowalski because he's too damn tasty not to. The almond + raspberry experience is real, and it is amazing. A subtle zing of berry and the richness of almond are pretty much my favorite combination of all time now (sorry, vodka and soda). So far the 8th anniversary of my 21st birthday has been incredibly enjoyable. I've had great well wishes, excellent gifts, and wonderful conversations with friends and family. As someone who is introverted and never wants anyone to go out of their way for me because it makes me uncomfortable, it is a really nice reminder that I am so loved (and tolerated) by my family and friends. I want to thank you all for making the last year I ever publicly celebrate a birthday so great. Now if you don't mind me, I'm off to eat another birthday cupcake and research how much botox is an appropriate amount of botox to still look lifelike but wrinkle free. 'Til next time, my fellow eaters!
Here's looking at you, Kowalski. Yes, my slippers have ducks on them. I clearly like awkward birds, okay?

Saturday, January 2, 2016

Champagne Resolutions

I hope everyone enjoyed their New Year's Eve hangover as much as I did. I'm not sure why I love New Year's Eve so much...the following morning is always a stark reminder that I am, in fact, not a 21-year-old frat boy capable of drinking until the wee morning hours with nary an ache when I wake up. Instead, I spend the morning after celebrating that I have somehow survived into a new calendar year by rocking back and forth in the fetal position wondering why champagne has to taste so good but hurt so bad. It's bubbly and effervescent like a carefree child, but it can also end up being nearly as big of a pain in the ass as one, too...I would know. Seventy years ago, I was a child capable of causing mass destruction and epic headaches for all four of my parents. Perhaps my affinity for drinking champagne is karmic justice...or maybe I just like drinking good hooch. But we all know the only thing I love more than drinking booze is finding a way to infuse it into my desserts. So if you're wondering what the hell to do with all your leftover bottles of champagne (is this really a thing?) this week, never fear, I am here to help. I mean, I could drink them all for you, or you could make these insanely zippy champagne cupcakes with champagne buttercream frosting.
Auld Lang Yum.
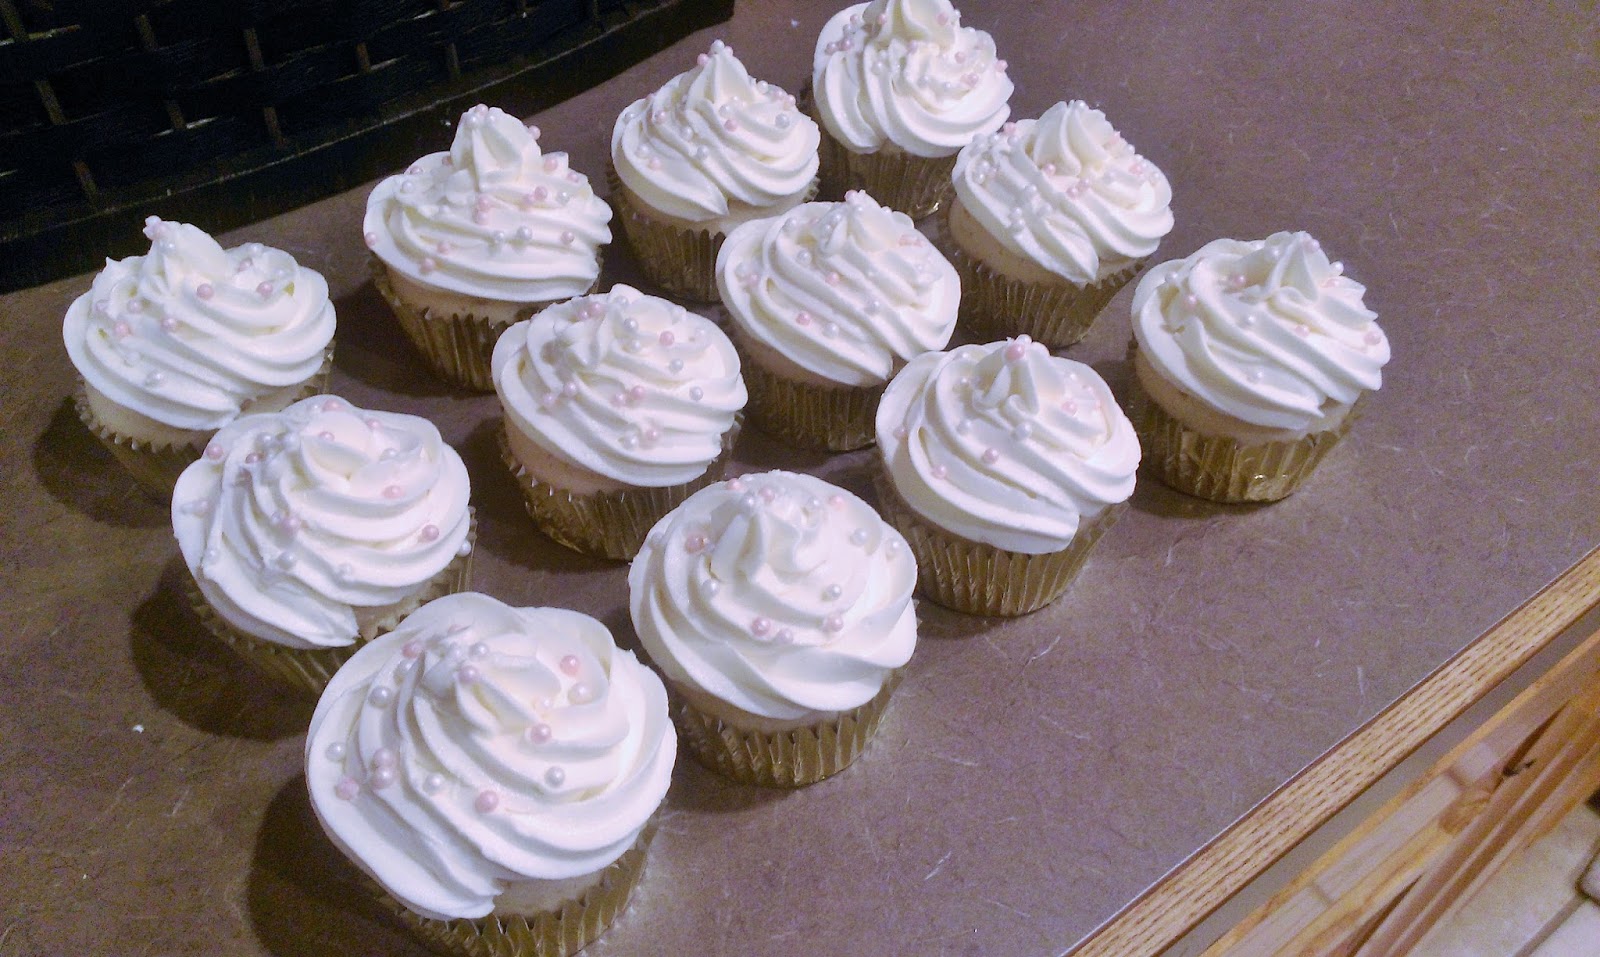
Classy, right? They were so pretty I almost didn't want to let anyone eat them. But then I remembered we're still working on finishing mint fudge and caramel bars from Christmas, so I stashed four of these cupcakes for ourselves and took the remaining dozen to a party. Charitable, I know. While the alcohol does evaporate out of the cupcake while baking, the frosting is loaded up with enough hooch to get you drunk if you eat more than one in a sitting...joining together gluttony and alcoholism in a way that is truly as American as apple pie moonshine.
A 9 dollar bottle of champagne is about as fancy as it gets in Clovis.
This cute blog has the original recipe that I tweaked to my liking. To start off, gather up:
  • 1 and 2/3 cup of flour
  • 1 cup sugar
  • 1/4 tsp of baking soda
  • 1 tsp baking powder
  • 3/4 cup room temp butter
  • 3 egg whites at room temp
  • 1 tsp vanilla
  • 1/2 cup sour cream softened to room temp
  • 3/4 cup of champagne--get this out about an hour before you're ready to bake so it isn't freezing cold but just cooled so it mixes well with the other ingredients. No one wants warm champagne, you heathen.
 As far as champagne flavors go, pick out whatever you like best. If you like sweet, go for it. Brut is my favorite champagne because it supplies that nice little kick to the taste buds that reminds me I'm alive but still not girly enough to drink champagne that's pink. I won't judge you if you do, and honestly, a sweeter champagne would yield a sweeter cupcake. So in this instance, I'd have to fold and say if I make these again, I'll begrudgingly buy a bottle of pink champagne. But I'm doing so incognito across the state line.

Preheat your oven to 350 and line your muffin tin with cupcake papers. I went with a festive gold shimmer liner as to properly reflect that these cupcakes contain all the champagne. Now mix together the flour, sugar, baking soda, and baking powder in a bowl and set aside. Cream the butter in a stand mixer for a couple minutes until fluffy. Add in the egg whites one at a time and mix well....I suck at separating whites from yolks, so I had some yolk in there, no biggie. We can't all be perfect, but that won't stop me from trying anyway. Add in the vanilla, sour cream, and blend. Add in the champagne a little at a time and blend. Add in half of the dry mix and blend until incorporated. Finish off by adding in the rest of the dry mix and blending until fully incorporated.

Spoon in enough batter to fill the cupcake liners 2/3 of the way. Bake these for 16-20 minutes. They'll be pretty blonde in color, so just test for doneness with a toothpick. When it comes out clean, you're good.
I'm told gentlemen prefer blondes anyway.
Let these cool in the pan for about five minutes before removing to a cooling rack. I had enough batter to make 16 cupcakes. Once all of them were baked, I transferred my cooling rack to the freezer for 15 minutes to speed up the cooling process.
Surprisingly, did not drink the champagne out of the measuring cup. I am growing up.
Can we talk for a moment about how two weeks ago it was still 65 degrees, and then last weekend we all almost died in a blizzard out here in New Mexico? Thanks winter storm Goliath. I mean, the worst of it for us was the snow drifts that reached our roof in some parts and caused our internet to go down. Luckily I had my baking to keep me occupied. Between that and the dog figuring out she could climb the drifts to get on the roof, my day without internet was surprisingly full. Moral of the story is I don't miss the 1990s pre-internet days nearly as much as I thought I did. When you're trapped in a house with lots of champagne, dessert, and no internet, it's a distinct possibility your husband could come home from work to find a drunk wife with a stomach ache and dogs climbing around on top of your house. Luckily, this was not the case...mostly because drunk snow shoveling didn't seem like the smartest idea in the world to me. Now, back to the frosting. I made a MASSIVE batch and didn't end up using it all, so I'm tweaking this recipe to a manageable amount for decorative frosting. Unless you want a bag to mainline all to yourself straight from nozzle to mouth, double up, but if you're not looking into starting 2016 off with a shame spiral, go with this recipe instead:
  • 3/4 cup of room temp butter
  • 3/4 cup of Crisco
  • 5 cups of powdered sugar
  • 5-6 tablespoons of champagne, chilled
Y'all...I love fully buttered buttercream, but, it's yellow. I wanted my frosting to have a soft golden hue to it (I was REALLY taking this champagne theme to heart), so instead of using a cup and a half of butter, I split it down the middle with Crisco. If you don't care about frosting color, I'd say go for all butter. It just tastes better with butter. Is this a slogan? Because if it's not, it should be.

Start by creaming together the butter and Crisco for a few minutes. Add in two cups of powdered sugar, two tablespoons of champagne, and blend well. Add in two more cups of powdered sugar, two more tablespoons of champagne, and blend well. Finish off by adding in the remaining cup of powdered sugar and remaining tablespoon of champagne. I wanted a stiff frosting to hold shape, but if you like things a little more loosey goosey both figuratively and drunkenly, add in the extra tablespoon of hooch.
I used a 1M tip and the standard swirl design for these cupcakes piled nice and high.
Fortunately, even with the Crisco, this frosting still had what I would call a nice "zing" to it thanks to the champagne. This is really where the sweeter stuff would come in handy as far as frosting is concerned. To finish off the champagne theme, I added "bubbles." My bubbles were just some pink and white sugar pearls I had on hand from Hobby Lobby. I used my cake tweezers to gently place random pink and white pearls around my cupcakes to give it that bubbly look. I still swear by my cake tweezers...everyone should have a pair of tweezers in their kitchen solely devoted to placing sprinkles on goodies and removing dog hair from food. This is a real problem in our house.
You are precisely the opposite of what New Year's resolutions are made of, my dear.
I realize you may be thinking of cutting out desserts or sugar or what have you as a part of your resolution for 2016, but please, do so AFTER you utilize your leftover champagne (seriously, how is this a thing) to make these champagne cupcakes. They are dense cupcakes that pack a lot of zippy champagne flavor with each bite. They are in no way remotely redeeming or healthy, but they are totally worth spending an extra 30 minutes in the gym for. After all, swimsuit season is a future you problem. Getting rid of the extra champagne (really?!) so you're not tempted to drink it all and blow your resolution is a now problem. You don't get a whole bottle in each cupcake (trust me, I looked into making that happen but it wasn't possible), so you're sharing the wealth. Not that I could ever really consider an overabundance of champagne as a problem per say, but my hangover from yesterday would beg to differ.  I'll be back in a few days with my birthday cake blog. Nothing like the new year and all that champagne to remind you of your impending doom age change. 'Til next time, my fellow eaters!
To a very bubbly and effervescent 2016, minus the crippling hangover.

Monday, December 21, 2015

Mint Fudge Wonderland!

When I'm feeling down, there are a few words that bring comfort to me and fill me with hope and happiness upon hearing...words like "puppies," "BOGO," or most things prefaced by the word "free" for example. But nothing takes me from catatonic to a level of glee best described as "only child at a pony farm" quite like the word fudge. Coincidentally, if I'm in your home and you tell me there's fudge, you can also see me go from calm and rested to in your kitchen in under .2 seconds, so I've got that party trick going for me. I adore fudge: flavored chocolate served to me in slab form. Perfection. My favorite place in the world to get fudge is a kitschy little Bavarian town in Michigan called Frankenmuth. I enjoyed visiting there to eat delicious German foods and contemplate whether lederhosen is as uncomfortable to wear as it is ridiculous-looking. I mean, the fudge there is so good you can even order it online and send it directly to your mouth via your mailbox. But since Frankenmuth Fudge isn't paying me to blog about their wares, I'm forced to make my own fudge. My all-time favorite fudge fits in perfectly with the holiday season because it is loaded with tons of mint! I was trying to come up with a Christmas song to riff off of here but "Silent Night, Fudgy Night" took on a very different meaning once typed, so I'll just continue on and tell you about my mint chocolate fudge recipe.
Melt in your mouth AND your soul! Fudge lovers rejoice!
So we all know how the free Andes mint after your Olive Garden meal feels like total overkill after shoveling down several baskets of free bread sticks and all the carbs, but we eat it anyway because mint chocolate is worth the gut bomb in all its deliciousness. This mint fudge recipe is essentially one 8x8 slab of giant Andes mint, and it is ah-mazing. I am trying my best to save the entire pan for Christmas company, but I keep finding reasons to shave slivers of fudge off every time I pass through the kitchen. Just finished my workout? I could use some fudge. Accidentally flayed my thumb open from knuckle to knuckle with my own pinky nail? I could use some fudge. First non-kitchen related injury in a year? I could use some fudge. Seriously, my thumb hurts and not just because it was betrayed by another one of my fingers. The fudge soothes me.
Did I mention this was really easy to make? The thumb pain is causing memory loss.
Five whole ingredients and you're going to be the hit of the Christmas dessert table. You can feel smug in knowing it took you ten minutes to make something that everyone will devour in five. Fudge is on the exact opposite end of the dessert effort scale from a fully decorated cake. So gather up:
  • 12 oz semisweet chocolate chips
  • 12 oz white chocolate chips
  • 14 oz can sweetened condensed milk divided in half (I poured half the can into a small liquid measuring cup and left the other half in the can)
  • 1-1 1/2 tsp of mint extract depending on how minty you like things
  • A few drops of green food coloring
 Start by lining an 8x8 pan with foil so it hangs over the edges. Then get two medium-sized sauce pans out and put the bag of semisweet chips into one and the white chips into the other. Start by heating the white chips over medium heat while stirring frequently to keep from burning. Pour a little bit of the divided milk into the white chocolate chips and stir like crazy (I made the mistake of pouring the full half of the milk into my chips and it was nearly impossible to get things to melt nicely again). Once your white chocolate is melty again in consistency, pour in the rest of the divided milk and stir like crazy. Finish up the white chips by adding in the mint extract and green food coloring and mix until nice and melty again. Place this on low heat.

Now melt the semisweet chocolate chips on medium heat while stirring frequently to keep from burning. Take the other half of the divided milk and pour a little bit in and stir like crazy. Once the chips are melty again, pour in the rest of the divided milk and stir.

Here's where you can get fancy. You can dollop a spoonful of the now mint chocolate into the 8x8 pan and then a spoonful of the semisweet chocolate into the pan and repeat quickly a kajillion times before swirling with a knife. OR...
You can just pour the semisweet chocolate in and smooth it out...
Then pour the mint chocolate on top...

And just smooth it out. Optional: top with chopped Andes mints, chocolate chips, sprinkles, etc. before it fully sets.
It's fudge. It doesn't have to be pretty. It is going to taste fantastic with or without the swirling effort. I honestly wanted to do the swirl, but my chocolate was hardening up insanely fast since I added each half of the condensed milk all at once, and my chocolates never got all that melty after that. Layers of fudge seemed practical and less shame-inducing. I really hate making mistakes, but the edge is taken off when they still end up being tasty mistakes. Once you've got your fudge in the pan, place it in the fridge to harden for at least a few hours to overnight. I left mine in overnight and removed first thing this morning. Once it came to room temp, I sliced my fudge up to take some pictures. This incidentally led to me eating what I will now call "breakfast fudge." Anything can be eaten for breakfast if you simply preface it with the word breakfast. Breakfast cake, breakfast pie, breakfast sundaes...

Anyhow, I hope everyone has a very Merry Christmas. If you're traveling, at least El Niño is keeping things unseasonably hot and snow-free around most of the country, so that's nice. If your family is visiting you, I hope you've stocked up on a higher than reasonable about of meat and booze. Regardless of your plans, I hope Santa (or your very patient significant other) brings you everything you've wished for, like world peace or a Ferrari. If not, at least you have my gift of fudge. 'Til next time, my fellow eaters!
All I want for Christmas is fuuudddggee! Whew, it was really going to drive me crazy if I couldn't come up with a Christmas song to riff off of.

Sunday, December 6, 2015

Tis the Season to Be Minty

Peppermint does for winter what pumpkin spice does for fall...it gives it flavor. It was a very cold and snowy Thanksgiving for us when we visited family in Colorado, and all I wanted was a some spiked hot chocolate. Thankfully, my brother pulled through for me and made a delicious hot chocolate and peppermint Schnapps combo. Heaven, I tell you (both the drink and the fact that being the baby of the family means other people will always do stuff for me). It was in that moment that I decided this flavor needed to be made into a dessert of some sort. Mint chocolate is definitely one of my favorites, but peppermint and chocolate just takes things the extra dessert mile. My mom used to be able to find these fantastically amazing chocolates with crushed peppermint in them at Macy's. It was quite literally one of the most enjoyable parts of my annual Christmas pig out. Sadly, they no longer make them, so I was left with a peppermint chocolatey void in my life and/or mouth. I couldn't face a second Christmas in a row without them, and thus, the peppermint chocolate cupcake with peppermint butter cream frosting and crushed peppermint topped cupcake was born. I really, really like peppermint, y'all. I always failed at turning my candy canes into fake vampire or walrus teeth like every other normal child does because I could never resist just chomping the damn things into pieces and eating them as fast as possible. Most people savor a candy cane for like an hour; I'm done with one in about 43 seconds.
Let me tell you about how amazing my house smelled after making these.
Winter Wonderland has a smell, and it is peppermint chocolate cupcakes. Drool factor is a 10 out of 10. We had a small gathering last night to play Cards Against Humanity and mini beer pong, and I wasn't planning on serving these up but instead saving them for myself because I am both greedy and a glutton (just checking those Seven Deadly Sins right off the list). I put these in my cake safe and placed them on top of the fridge. I sorta figured that was the international symbol for "off limits," but considering most of our friends (and my husband) are extremely tall, this was like precisely at eye-level for practically everyone except me. There was oogling, and quite a few people managed to snake a cupcake. When you come to my house, it is pretty much assumed there will be dessert, so this was my mistake really. But I channeled my inner-Grinch and ended up hiding them so I would actually get to eat one before they all disappeared. Don't look at me like that...the recipe only makes 12, and I have to be able to taste test my work so I can bring you these delightfully insightful blogs every week after all. So let me give you the recipe for these delicious cupcakes so you, too, can also hide dessert from the people you love. Tis the season to be selfish, fa la la la la la la la greed.
I know, looks like a lot, but they are so easy!
I found and adapted this recipe to make things even peppermintier. Not a real word, but fun to say. So gather up:
  • 3/4 cup plus 2 TBS of flour
  • 3/4 tsp of baking soda
  • 1/2 tsp baking powder
  • 1 cup of sugar
  • 1/4 cup plus 2 TBS of unsweetened cocoa
  • 1/2 tsp salt
  • 1/2 cup room temp butter
  • 1 room temp egg
  • 1/2 cup buttermilk
  •  2 tsp vanilla extract
  • 1/4 tsp peppermint extract
  • 1 tsp espresso powder dissolved into 1/2 cup of boiling water
Preheat the oven to 350, and start by mixing together the flour, baking soda, baking powder, sugar, cocoa, and salt in a large bowl. In a stand mixer, cream the butter until fluffy. Add in the egg and extracts and mix well. Add in half the dry mix and all of the buttermilk and blend well. Add in the other half of the dry mix and the espresso and blend well. Don't worry fellow coffee-haters, this tastes absolutely nothing like coffee, but instead the espresso gives the chocolate a nice, dark taste.
Throw the batter into a lined muffin tin and bake for 18-20 minutes. Your house will begin to smell like what dreams are made of.
Once done, place on a cooling rack to cool for 10 minutes and then remove from the pan and continue to allow them to come to room temp. Drool all over yourself due to the smell.
Christmas isn't really my thing. I hate Christmas music, I hate red and green in combination, and I really, really hate sappy Christmas movies (exception being A Christmas Story, because leg lamp). I will say though that Christmas is a joy when it comes to baking. My house smells amazing for the entire month of December, but if I could bottle the smell that these cupcakes filled my house with and sell it, I would be a very, very rich Scrooge.
There's a peppermintception occurring with this frosting.
Once the cupcakes are cooled and you're nearing your ability to resist eating all 12 at once, make the peppermint butter cream frosting:
  • 1 cup of room temp butter
  • 5 cups of powdered sugar
  • 1 tsp of vanilla
  • 1 tsp of peppermint extract
  •  5 TBS of the forgot-to-be-pictured heavy cream or milk
  • Handful of crushed peppermint candy canes/peppermint candies to top frosting with
Cream the butter until fluffy and then add in 2 cups of powdered sugar, the vanilla, the peppermint, and 2 TBS of heavy cream and blend. Add in another  2 cups of sugar and 2 TBS of cream and mix well. Add the final cup of sugar and TBS of cream and finish blending. Now that I think about it, you could probably omit the peppermint extract and change one or two TBS of heavy cream to peppermint Schnapps and make this frosting boozy. Clearly I'm going to have to make these cupcakes again to try that because apparently like most of my best ideas, this one came far too late in the game. Sadness, thy name is Kate.
Not blood. Promise.
To get the cool two-toned effect, paint a thick line of red gel frosting dye on each side of the piping bag fitted with the tip of your choice (I used one bag with a 2D for half and another bag with a 1M for the rest because I am an adult and I do what I want). Carefully load up the bag with frosting, and it will look something like this:
Why are my wrists so veiny? Am I dying?
 Now pipe away! I did a traditional swirl like so:
Okay, this kinda gives me the Christmas spirit. I get it...it's nice to feel full of joy and hope, but I always feel that way when dessert is involved. Unless it's flan, and then you've filled me with rage and scientific questions about its consistency somehow being edible.
Aren't these gorgeous? Aren't you surprised I can take an accidentally artsy photo on occasion? Me too. Don't forget to add the peppermint candies on top when you're done applauding my creativity.
I am super happy to report that these taste even better than they smell. It isn't easy being a Grinch (lies), but I had to do it in the name of blogging (also lies). Although my heart did not grow three sizes upon consumption, my butt may very well have. These definitely aren't low on calories, but anything crammed with this much chocolate and peppermint simply is worth that extra hundred sit ups or five miles of jogging...try eating them while working out and it's a two-fer! I'm always here to offer you reasonable solutions to life's simplest of problems. I am a blogger with heart. A heart that is probably loaded with cupcake remnants and fried chicken. All I want for Christmas is to be able to eat anything I want without gaining an ounce. Is that so hard, Santa? If you can make reindeer fly, I feel like this is a pretty simple request. While I continue to place my faith in a fat, bearded man who really appears to enjoy his own fair share of cupcakes, I hope everyone is having a wonderful holiday season. We're off to gallivant in Tahoe soon and then host family for Christmas, so I'll be back with some more delicious minty recipes soon. 'Til next time, my fellow eaters!
Just load these up in a stocking, and you're set on gift giving until next year...we wish you a merry cupcake and a happy cheat day!