Sunday, March 12, 2017

No Grasshoppers Were Harmed in the Making of This Pie

The week of Saint Patrick's Day is nearly upon us. And while you're foggily scratching your head today and wondering to yourself, "Did my phone clock really update last night, or am I completely unaware of the actual time?" thanks to Daylight Savings Time, don't forget later that along with copious amounts of green beer go copious amounts of green desserts. Luckily, I've constructed a dessert that takes only ten minutes of your time, and it is so easy to throw together I have full confidence you could do so after your fifth Guinness with little to no issues. I've basically drunk-proofed this recipe in a sense that you can't really screw it up and no heavy machinery is required. It does, however, contain a massive amount of booze within it, so just remind yourself that drinking straight creme de menthe is like downing a shot of mint Scope. It doesn't sound like a bad idea in theory because everyone likes minty fresh breath, but remember--straight alcohol, much like mouthwash, tends to burn just a smidgen. I'm not sure I've ever had to preface a blog with a warning before, but there's a first time for everything. Like for instance, I've never tried a grasshopper cocktail, and now that I've figured out how to turn it into a pie, I probably don't need to. Chock-full of chocolate, Andes mints, and creme de menthe, I fail to see how the beverage could come anywhere as close to satisfying my taste buds as this low cal, boozy grasshopper pie can. To put it bluntly, this pie...sham-rocks. I'm sorry. I even hate myself a little for that pun, but you'll forgive me when you make this pie yourself and see how accurate that terrible pun really is.
Another brief warning...this pie will get you drunk.
Fun fact! I quit drinking for Lent last year, and I was amazed by how much better I felt and looked after only 40 days. I won't bore you with a soapbox speech, but I only allow one glass of wine a week in my diet now. For whatever reason, I never feel bad about baking with booze because it usually does such a nice job of enhancing the flavoring of the rest of the ingredients. If you don't believe me, try making a chocolate cake with Guinness instead of milk and get back to me. But since I no longer drink on a regular basis, I have the alcohol tolerance of a very small house cat. I didn't think I put that much creme de menthe in the pie, but a few minutes after I ate it, I was feeling rather euphoric. So it's either just that good of a mint chocolate pie, or it's just that boozy that I would not recommend letting your small house cat near it. And even though creme de menthe is absolutely terrible for you, I made a ton of other calorie cuts so that one slice of this pie will only run you 264 calories. That's right, you can have pie, Guinness, and your fish and chips this Friday. A Saint Patrick's Day miracle! Well, considering this holiday began as a religious feast, most of us Catholics would just call this a typical Lenten Friday, but instead of surviving off grilled cheese or tuna, we go big with fried cod. Save the Filet 'o Fish for a week when the sight of peanut butter and jelly makes you break down in tears.
It really is easy as pie.
I know..premade crust is not typically my thing. But low fat chocolate Graham Crackers are, to my knowledge, not a thing, so there was practically no difference between a homemade crust and an Oreo crust in the calorie arena. Plus, I told you this could be done in under ten minutes, and that isn't possible with homemade crusts. Just try your best when taking photos of your pie to keep the aluminum edges of the pie tin hidden, and no one has to know! To make your very own drunken grasshopper pie, gather:
  • 1 Oreo pie crust
  • 1 package of sugar-free vanilla instant pudding
  • 1 cup of skim milk
  • 1/2 cup of creme de menthe
  • 1/4 tsp pure mint extract
  • 2 cups of Cool Whip Free, divided
  • 15 Andes mints, smashed into pieces
  • Optional: 2-3 drops green food coloring, additional Andes mints for topping
I've spent more effort into putting on shoes than it did to make this pie.
 Start by mixing the booze, milk, and pudding into a large bowl for 2 minutes with a whisk. Your biceps will appreciate the small workout. Then, add 1 1/2 cups of the Cool Whip, the crushed Andes mints, and 2-3 drops green food coloring. Mix together, and then see if the pie is minty enough for you. I wanted to be smacked in the mouth with wintergreen freshness, so I added an additional 1/4 tsp of pure mint extract. Much like time spent around other people's children, a little goes a long way, so increase the amount of extract you want in small increments until it meets your taste preferences.
And come up with a list of possibilities on how to kill a bottle of creme de menthe. I think boozy Shamrock Shakes are in our future.
Once mixed and minty enough, dump your pie filling into the Oreo crust and smooth out. Place into the freezer for at least two hours to set. I left mine in the freezer overnight, and it sliced through perfectly:
Like buttah.
Once your pie is cut, serve your slices and let them thaw out for about 20-30 minutes. Garnish with the remaining Cool Whip Free (I used a 1M tip and simple swirl technique), and if you're feeling fancy, stick another Andes mint on top. If you're feeling super extra fancy, drizzle some low cal chocolate sauce on top.
I mean, it does make for great presentation.
I loved this pie cold, like my heart or a pint of Killian's Irish Red, and it certainly didn't disappoint in the taste department. The Andes mints were a great way to add both texture and additional mint flavor that most grasshopper pie recipes are missing. By nixing the traditional marshmallow creme for pudding mix and skim milk, you can add in the creme de menthe with minimal guilt concerning your waistline. It's basically the perfect pie, and your Saint Patrick's Day festivities would be woefully incomplete without a slice! I recommend leaving in the freezer until it's time to serve it, but if you like a softer consistency of pie, leaving it in the fridge would be fine. Just don't leave it out on the counter (especially near small house cats, for obvious aforementioned reasons) so it won't turn into a mushy puddle of minty booze pudding...although honestly, that still sounds delicious, and I'm pretty sure that's not just the pie's creme de menthe talking. But enjoy the joyous festivities this week, wear green so strangers don't try to pinch you (why this is an acceptable thing I do not know), and embrace the camaraderie Saint Patrick's Day always brings out in people. 'Til next time my fellow eaters, and slainte!
I'm sure this pie would go great with some Jameson, if you're into that sort of thing.

Monday, March 6, 2017

Trial and (Baking) Error

Although I do a good job of covering it, I am actually human, and I do sometimes, on very small, tiny, few and far between occasions, make mistakes. For some reason, when I make mistakes while baking, it literally upsets me more than anything else...except for maybe when I make a typo in an email or text message. I will find the nearest rock and crawl under it when that happens. But I feel like my creativity and my very own favorite hobby in the world betray me when I commit a baking fail. Thankfully, even when things go wrong, they still end up being edible so I can drown those weird emotion things back to a more neutral, sarcastic state where they belong. I must preface this blog with the aforementioned information so that I can, 1. Show you my triumph over adversity (I live a sheltered life), and 2. Show you that even a baking fail can be turned into a baking win with the right level of creativity. This blog is a giant "learn from my mistakes," post, so prepare yourself for plenty of self-deprecating wit and chances for you to sit back and feel better about yourself at my expense..but just remember, at the end of this post when you're feeling all high and mighty, I'm the one with all the cake.
And fail or no fail, it looks and tastes like a winner.
I am not Irish. My husband is, and he's also the one with all the luck, so maybe I should have had him at the ready while I was making this clover surprise cake. You may be wondering, "It's clearly a cake. Looks fine. Where's the fail so I can laugh at your misfortune?" Don't worry, we're getting there. I love Saint Patrick's Day. It affords me the opportunity to bake mint chocolate everything, and don't even get me started on Shamrock Shakes. I die. I actually didn't add mint to this cake, but I thought long and hard about it and opted not to because I'm a crazy person (clearly there was no other reason). This is actually a chocolate cake with white cake shamrock center and light cream cheese frosting dyed a color best described as "green highlighter." And while this cake almost didn't come to full fruition, I did manage to make it low calorie. With cake and frosting combined, 12 servings amounts to 250 calories a slice. Still under 300 calories with real frosting...a feat in modern baking! Remember that later while I regale you with how it all went wrong.
Duncan Hines...how dare you.
So it all began when I bought the wrong brand of cake mixes. I am through and through a Betty Crocker baker, but in my mad sprint through the grocery store, I nabbed Duncan Hines mixes because I swear they didn't use to also be in red boxes. For whatever reason, these mixes have a higher calorie content even when just using the dry mix. So kudos to you if you buy Betty's box cake, and knock an extra ten calories off each serving. But as far as ingredients go, you need:
  • 1 box white cake mix
  • 2 egg whites
  • 10 ounces of diet creme soda or diet Sprite/7up
  • 1 box chocolate cake mix
  • 2 egg whites
  • 10 ounces diet root beer or Diet Coke
  • Green gel dye
  • 1 10x6 loaf pan and other-sized pan for white cake (more on this in the fail section later)
  • Shamrock cookie cutter (...for reasons to be explained shortly, check the sizing to make sure it's not taller than your loaf pan. Figured out where I'm going with this yet?)
Start by baking the white cake mix. Preheat your oven to 350 and blend the white cake mix, egg whites, and creme soda for 2 minutes. Add a large heaping amount of green gel dye to this mix and blend. Now let me tell you about the type of pan you SHOULD use and not the one I used.
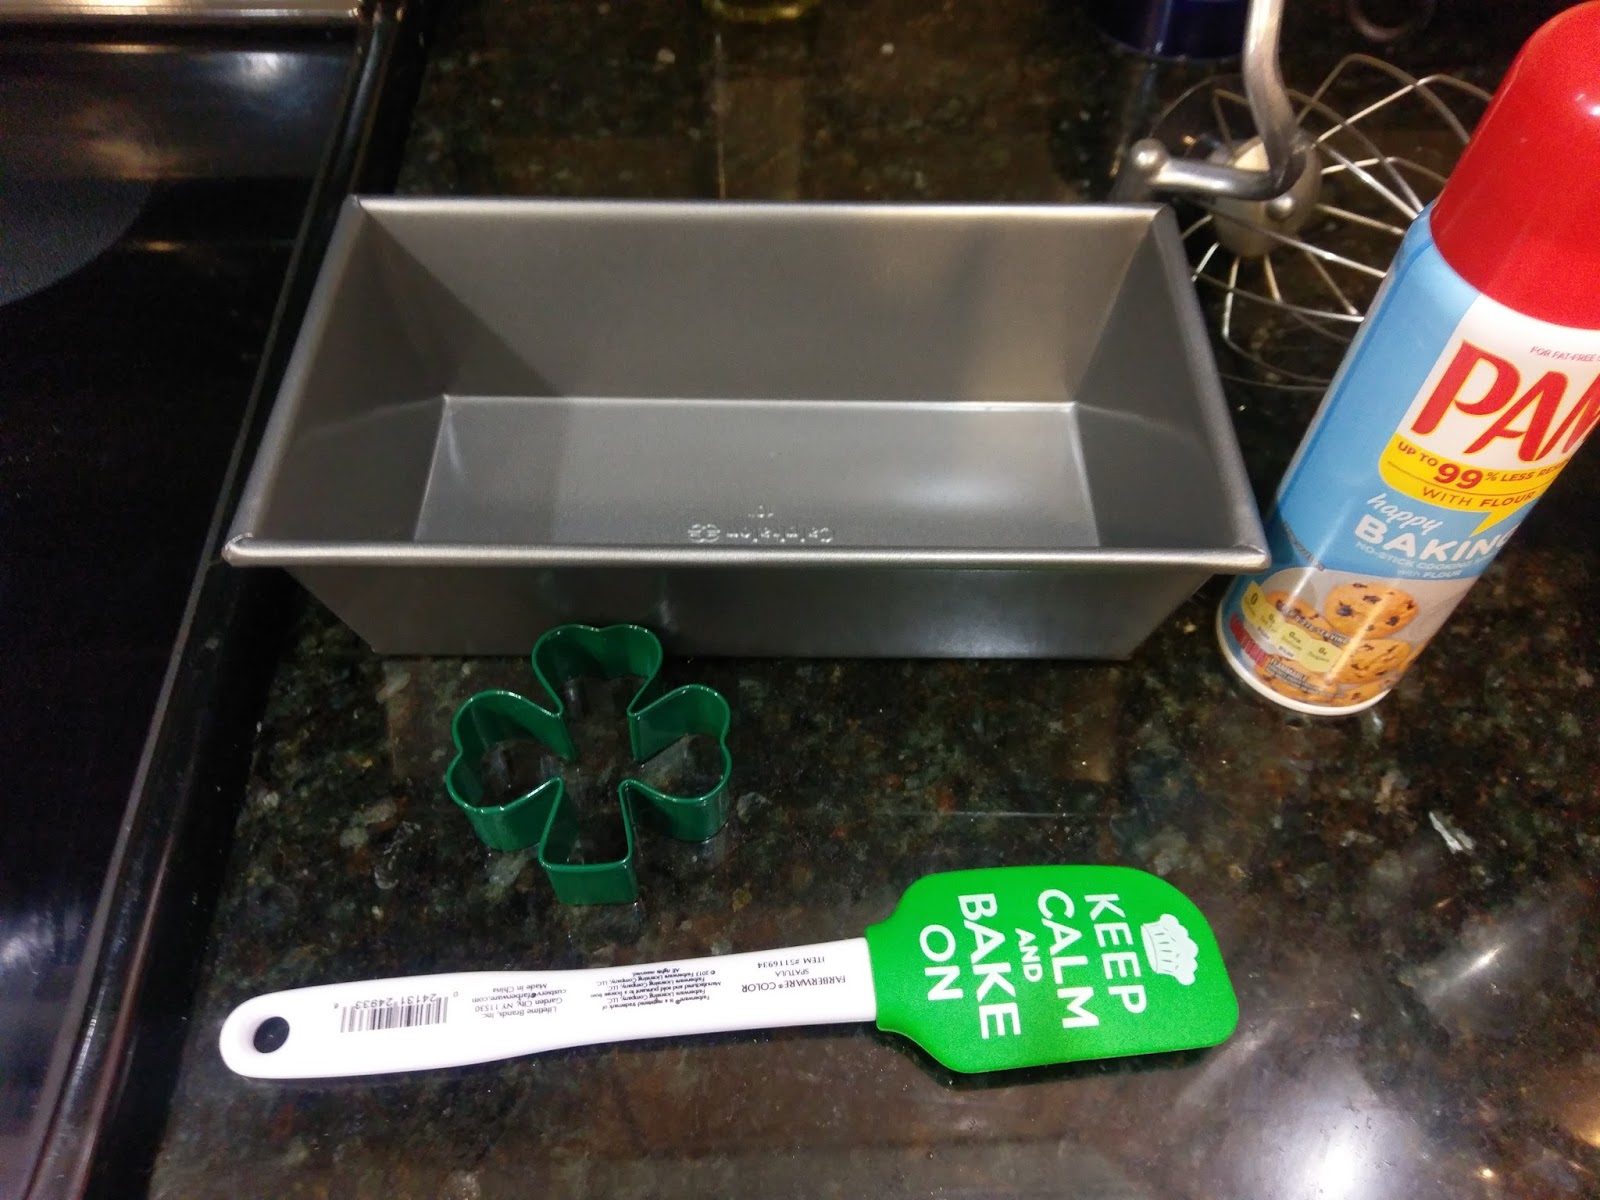
Oh look, a brand new, unassuming loaf pan. I also did not heed my spatula's mantra.
 This 10x6 pan was not the right size loaf pan for my green cake. When my cake baked, it was shorter than my shamrock cookie cutter. Since every Pinterest tutorial ever told me, "Oh, just cut your cake into loaves, and place your cookie cutter into each loaf to cut out the shape," Kate Panic Stage One (also known as the "I've made a huge mistake" stage) began immediately upon noting the first loaf I cut only came halfway up the height of my cookie cutter. To prevent your very own personal panic stages from commencing, use a pan that's going to give you more surface area to cut into, like a 9x13 pan, a jelly roll pan, or maybe even a 9x5 loaf pan that would bake up higher. Grease your pan of choice and dump your batter in. Bake for the required amount of time the box states, give or take 5 minutes. When I bake with soda, my cakes always seem to finish up 3-5 minutes before they would with the standard butter and milk.
I was still so full of hope at this point.
Even here, when I was delighted by how easily my new loaf pan released such a heavy cake. I was so happy I was considering writing a review for it on Amazon. That unbridled enthusiasm has since waned.
 Let your cake cool in its pan for 10 minutes, then remove to a cooling rack. I highly recommend placing the cake in the freezer for an hour. The firmer the cake, the easier time you'll have not necessarily for the cookie cutting, but for removing the cake pieces from said cookie cutter without them breaking. When your cake is fully cooled and partially frozen (also the working title for my autobiography), take your shamrock cookie cutter and cut out enough shamrocks to line up end to end in your 10x6 loaf pan with a little room on each end of the pan for the chocolate cake batter to cover them up.
Not pictured: Kate Panic Stages 2-4, more commonly referred to as the "cursing, crying, and bargaining" stages.
I was only able to yield 3 very fat clovers from my green loaf cake. I ended up having to stamp my cookie cutter down in the actual middle of the cake instead of cutting into loaves since my cake, much like its baker, was vertically challenged. My Wilton shamrock cookie cutter (obtained from Amazon) was only 3 1/2 inches high, and I mistakenly thought it was going to end up being too short. Oh to go back to that wonderful ignorance. After I yielded my three fat clovers, I placed them on a Parchment-lined baking tray and put them in the freezer overnight. Kate Panic Stage 5 then came to pass. This stage of panic is known as the "acceptance and eating of all the cake remnants" stage because nothing says "I've got this" quite like a grown woman eating cake scraps at 10:00 p.m on a Saturday night.
At this point, I was more or less trying to finish this cake in spite of my new loaf pan.
 I recommend letting your clovers freeze completely to avoid over baking, so if you can't leave them in the freezer overnight, at least let them freeze for a few hours. Once frozen, ensure your oven is set to 350 and begin making your chocolate cake. Mix together the soda, cake mix, and egg whites for 2 minutes. Pour about 1/2-3/4 of a cup of batter on the bottom of your very well greased 10x6 loaf pan. Save the look of scorn and betrayal as you know eventually you're gonna make one hell of a banana bread in this pan no matter what it does to this cake.
At least two pieces of this cake will not include a shamrock surprise. So I guess the surprise is that there isn't a surprise in those slices. Irony.
 Now, place each shamrock into the cake batter layer. This will help you stabilize and space them evenly, so you won't have two massive gaps in the middle of your cake like I did. Learn from my inability to think ahead and measure properly. In my defense, I never leave my small measuring tape in the same place. Either way I shake it out, I suppose this was my fault and not the fault of the pan or the cookie cutter or Amazon for somehow not reading my mind and letting me know my Pinteresty baking plans needed work and recommending a smaller cutter or something. It's 2017, and I think I no longer have the ability to live my best life without Amazon recommending me the right products for my existence.
I don't have a panic stage past level 5, but if I did, I'd call it the "heavy sighing and reluctance" stage.
Once you've lined up your shamrocks, gently deposit the rest of the batter on top of the shamrocks and around the sides of the pan. Things definitely won't look even or pretty, but the main goal here is to completely cover the shamrocks with chocolate cake batter so that you can't see any green poking out anywhere. Now, bake for about 50 minutes or until a toothpick comes out mostly clean from the chocolate portion of the cake.
You can run, but you can't hide, clovers.
 So it's gonna be pretty obvious where your clovers are inside of your cake thanks to the indentations, but this is what frosting is for. And at this point, I was just surprised when I opened the oven and the cake didn't sink in entirely because that would've been par the course. Let your cake cool in the pan for 10 minutes, then remove to a cooling rack and place in the freezer for 30-60 minutes until fully cooled.
Hindsight: the mint extract would've been good.
 I found a Weight Watchers cream cheese recipe, and I'm at the point in this blog where I'm not even ashamed to admit they've got some really great ideas for low calorie baking. Nothing like a baking fail or twenty to humble me. To make this frosting, you need:
  • 1 brick of Philadelphia reduced fat cream cheese at room temp
  • 1 heaping cup of powdered sugar
  • 1 tsp vanilla extract
  • Green gel dye
  • Decorative toppings: Gold sprinkles, gold stars, white and green sprinkles, etc.
  • Optional: 1/4 tsp mint extract. Still kicking myself for not adding this in. It would've made things even more festive for the season.
Mix together the cream cheese, sugar, extract, and gel dye for a minute until smooth. This is not a thicker consistency frosting, so I don't recommend piping with it. It will make enough to cover the entire cake, but I chose just to cover the top since the rich chocolate color on the sides of the cake was too pretty to cover. 
Also, you don't have to make your frosting greener than a John Deere tractor.
I just slathered all my frosting and distributed it evenly on top.
Then I used a spoon to make circular swirls in the frosting before, of course, topping with gold stars. Gotta make those leprechauns jealous, you know.
My husband said he liked the swirly, messy look of the frosting because it was an appropriate decorating technique for a drunken Irish holiday where the more Guinness made available, the less able anyone would be to frost a cake smoothly. I felt like I was taking the lazy way out since this cake had crushed my will to live, so that lifted my spirits to the point where I was ready to slice this cake open and see the level of failure I was working with.
In your face, loaf pan, cookie cutter, and Amazon.
 I was pleasantly surprised when I cut into the cake to see that it looked exactly like it was supposed to when I envisioned it. See, sometimes you just have to have a little faith that you can turn a potential nightmare into an aesthetic dream. My struggles were real(ly silly), but I'm glad I didn't scrap the idea and just make shamrock cookies. Anyone can do that; I'm here for the wow factor, not the meh factor. If going big or going home was an actual sport, I'd never be home, and well, then I wouldn't be able to bake anything because that's where my kitchen is. And after living through Kate Panic Levels One through Five, it was great to sit down and eat a cake with actual frosting and not just Cool Whip. It was my finding the pot of gold over the rainbow moment. For not having a ton of sugar, this was still a delectably rich frosting that went so well with the dark chocolate cake that resulted from the mixing of root beer and cake mix. Things may have been super dicey there for awhile, but Kate Bakes Cakes because Kate knows good flavor combinations. And I promise you this--my next one will be minty, and it will be chocolatey because everyone needs more Saint Patrick's Day dessert ideas for celebratory purposes. 'Til next time, my fellow eaters!
So now that you've laughed at my strife, I get to go eat cake. She who has the cake gets the last laugh! ;-)

Sunday, February 26, 2017

Life is Peachy.

I was talking about the visual superiority of Texas sunsets the other day (as you do when you're a Texan), and I was immediately met by the pangs of homesickness. I know everyone experiences a longing for their home state from time to time, but when we say everything is bigger in Texas, we're also talking about feelings. Don't believe me? Google Friday Night Lights or football in West Texas, and you'll see what I mean about the unwavering passion that emanates from most Texans. I was so hard up to experience home again that I begged my husband to drag me to the nearest Chili's so I could get Tex-Mex food...you know, where the meat actually gets seasoned and marinated and the guacamole doesn't look like soylent green paste. Clearly you all know by now my emotions are best described  as "awake" or "asleep" with the occasional hunger-anger thrown in, and this is because instead of experiencing a wide array of exhausting human emotions, I just eat my feelings instead. The world would be a better place if we all ate more cake and didn't get so upset about things in my opinion. And since I was allowing my homesickness to meander, it took me to the next logical step: making a traditional Texas dessert but with my usual flare for health consciousness. My Texas-sized eating habits are constantly at war with my desire to stay thin, so you gotta do what you gotta do to stay looking sharp in a pair of tight jeans. Enter skinny peach cobbler:
It looks deceptively fattening, I know.
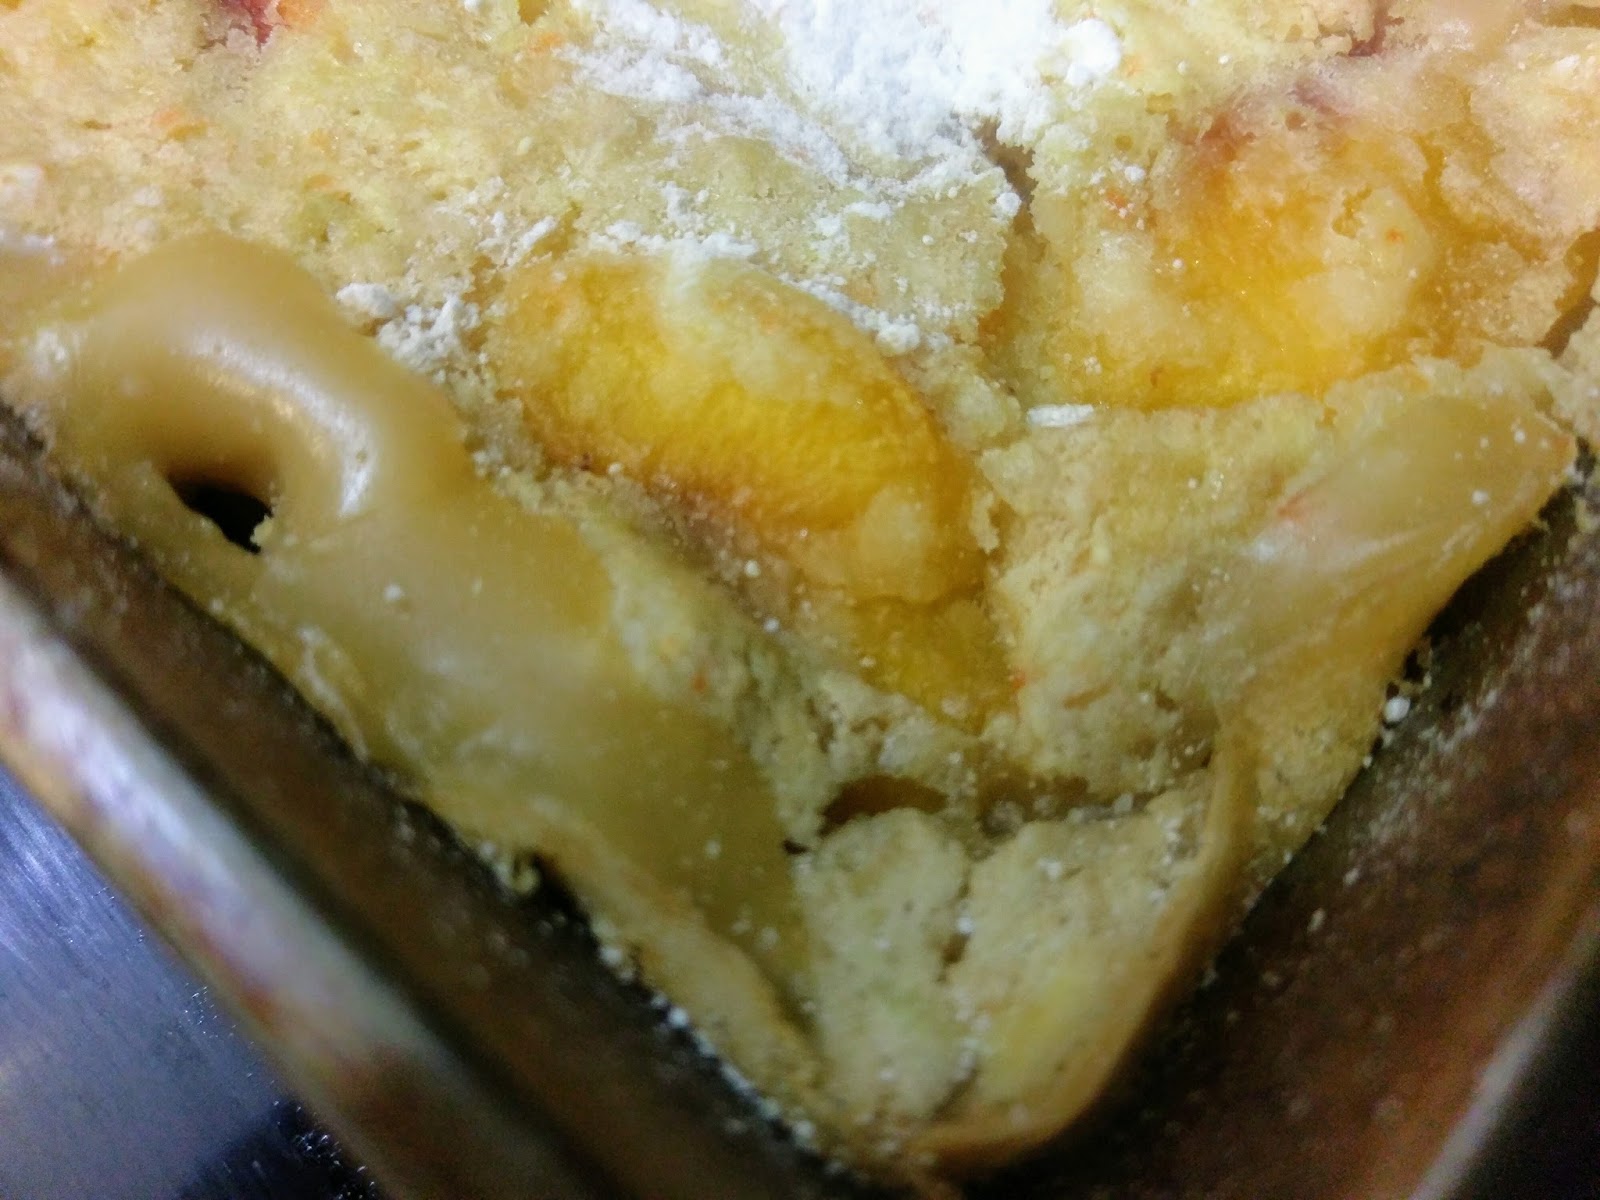
This is the lazy cook's approach to skinny cobbler. It literally takes two minutes to throw together, and then you get to reap the benefits of healthy dessert eating. This entire 9x13 pan of peach cobbler amounts to a total of 1900 calories...I'm pretty sure just looking at a normal cobbler will cost you about the same, and then you can divvy up your servings. I found 12 servings to be the perfect size since I knew we couldn't very well eat cobbler without a heaping of vanilla froyo on top of each piece, so before the addition of milky frozen goodness, each chunk of cobbler is only 158 calories. You can't even eat a bowl of cereal for 158 calories, people. This is the real deal, but thankfully, it doesn't taste like 158 calories of thin air. Oh no...peachy, vanilla, creamy...this is everything you want in a cobbler minus the muffin top. While it lacks the intensely crispy crust that results from ample amounts of butter and sugar in a regular cobbler, it's still got a nice, crumbly crust that gives way to luscious peach chunks...and it is most definitely a cure-all for a homesick Texan. The first bite was met with images of bluebonnet fields and clear blue skies. Definitely a "died and gone to Texas" moment.
With only three ingredients!!!
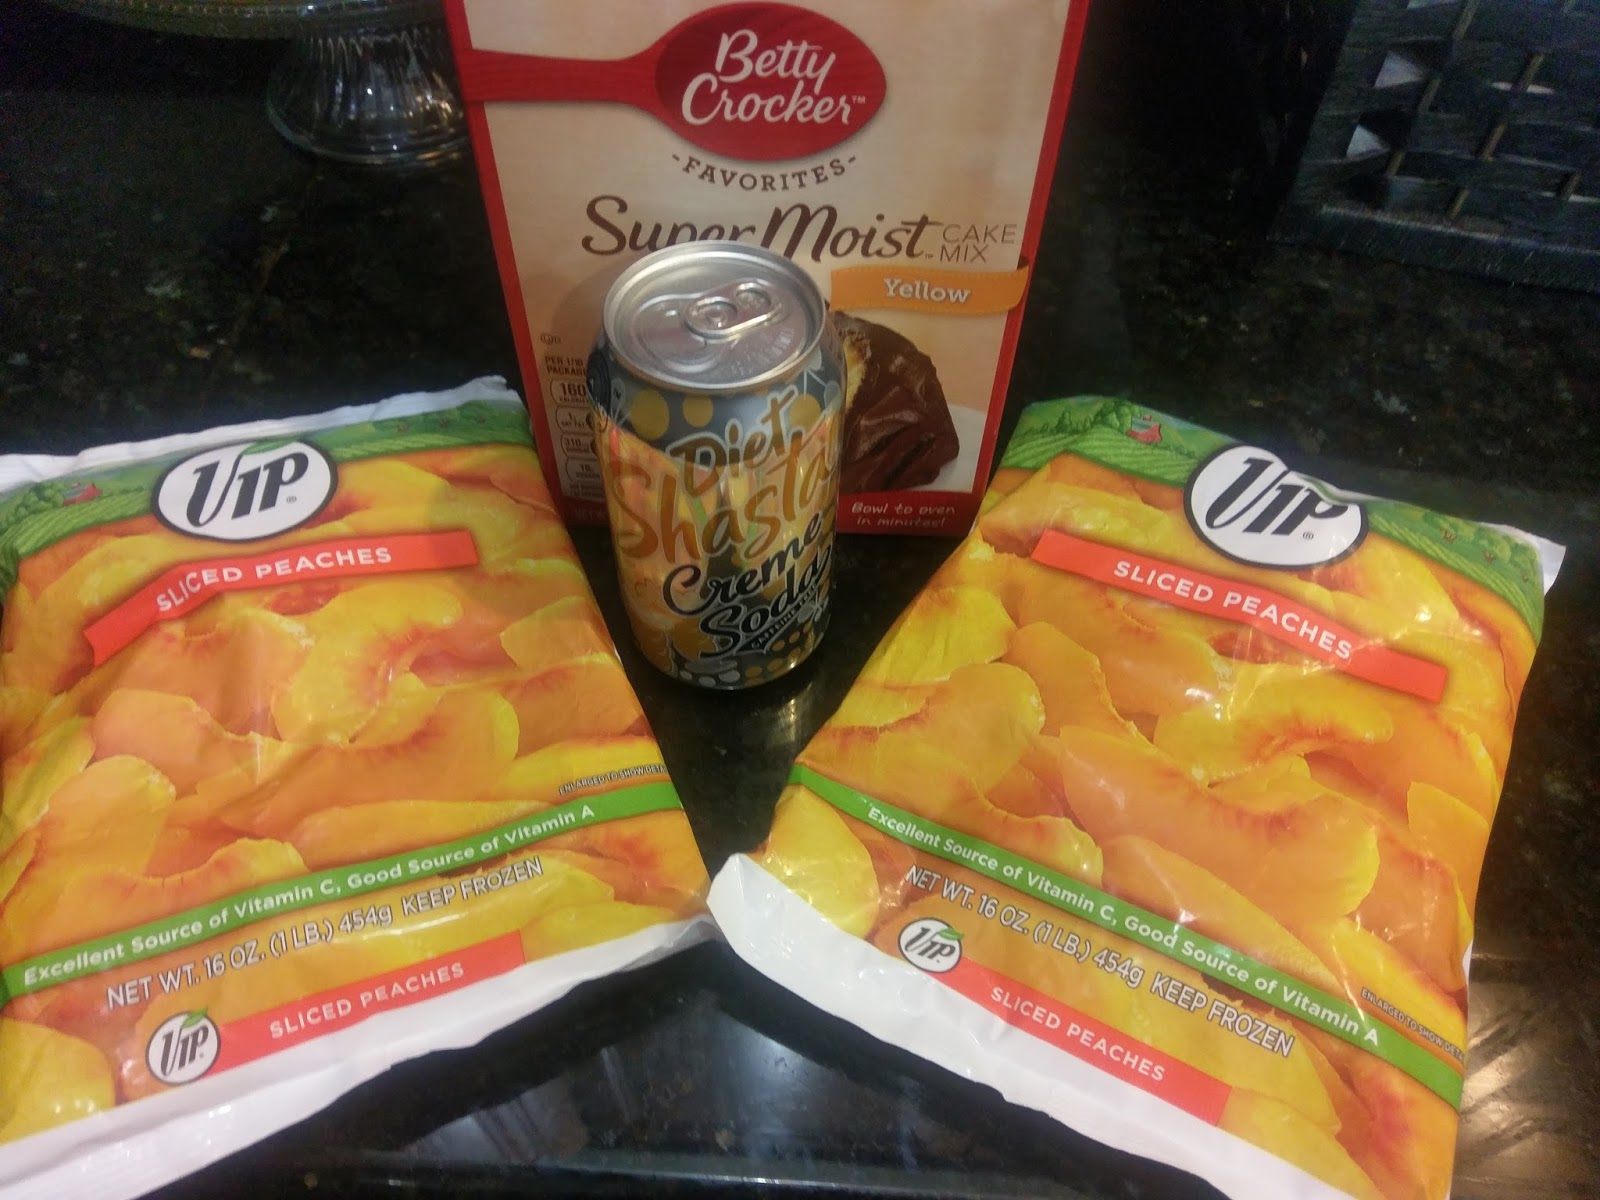
I wasn't kidding when I said it was a lazy cook's cobbler. You only need:
  • 2 16-ounce bags of frozen peaches (still frozen and not thawed)
  • 1 12-ounce can of diet creme soda or diet citrus soda
  • 1 box of yellow cake mix. You could cut calories even further by using a sugar-free cake mix.
Hold on to your butts, here comes a quick crappy photo montage:
"Movin' to the country, gonna eat a lot of peaches."
 While your oven preheats to 350, grease a 9x13 baking pan. Take both bags of frozen peaches and dump into the pan. Try to spread these out to form even layers without any empty spaces.
Don't sneeze.
I decided to be supremely lazy and dump the cake mix on top of the peaches with a few dusting motions of the open cake mix bag. Later, I decided I should have mixed together the soda and the cake mix first to ensure even baking. So don't be Kate-lazy. Mix the cake mix and the soda together in a bowl and then pour it evenly over the peaches.
See those extra white spots?
Yeah, I didn't have enough soda to cover all the cake mix, so those white spots stayed as is...dry and dusty. Take the extra thirty seconds and mix your ingredients so your cobbler looks pretty. Cover it with foil and bake for 20 minutes in the middle of your oven. Then, remove the foil and bake for 40 more minutes.
See, these white spots won't mock you and your baking abilities if you just mix...
I had some spots of dry cake mix, but Dear God, my house smelled like the inside of what I imagine Texas heaven smells like. It took the personal restraint of knowing (again, as you do when you're a Texan) that cobbler requires a 30-minute window to properly set up to keep me from taking a pint of frozen yogurt, dumping it directly on top of the pan of cobbler, and eating the entire thing in one sitting. Thank those lucky stars at night that are big and bright (Deep in the heart of Texas!) I was able to squash my ravenous hunger with that preexisting knowledge.
Because I mean, really, look at that oozy goodness.
 Take heed to my warning--you do want to let it cool and set for a bit. Cobbler should be a little messy, but it should not burn the inside of your mouth off. And while those peaches went into the oven frozen, one hour at 350 turns them to peachy molten magma.
Still weighing out whether or not the medical bills would be worth it, though.
 Once you've let your cobbler set for a half an hour, slice it up and serve! I told you, extremely lazy and easy. As lazy and easy as it is delicious and low cal. If you prefer, you could also top this with something a little healthier like fat free Cool Whip, vanilla bean Halo Top, or even a few extra slices of peaches. I have a steady supply of Kemp's frozen yogurt on hand for those days when I want to eat like a monster, but a monster with a nice physique. And as a Texan, I don't believe cobbler is really cobbler until it's topped with ice cream or frozen yogurt. Instead it's just crumbly cake with fruit. Not that that's a bad thing, it just doesn't meet the fervent criteria of proper Texan-ing.
Also, presentation is key.
I miss home a little less with each helping. I imagine if I actually ate this while standing in the state of Texas, I might have a small aneurysm experiencing so much happiness and joy all at once. But I'm stoked I tried out this lazy cobbler route because it made me realize there are actually endless possibilities for when I'm not homesick and just want a damn good crumbly cake with fruit. You could dump raspberries together with chocolate cake and Coke Zero, or cherries together with chocolate cake and Cherry Coke Zero. You could use strawberries with strawberry cake and fruity diet soda. Blueberries, raspberries, and strawberries with white cake and diet Sprite...seriously, the possibilities are limited only to the kind of cake mixes that exist in this world, so if you've ever wondered why boxed carrot cake mix exists, throw it together with some walnuts and diet creme soda and get back to me. As for now, I'm gonna enjoy this until my baking pan is licked clean. And then I'm going to gear up for one of my favorite baking months of the year: everything is literally going green for March and Saint Patrick's Day!!! Top o' the baking to ya, and 'til next time, my fellow eaters!
I may even try to make a green cobbler. Who knows.

Wednesday, February 15, 2017

Lemon is for Lovers


I know I’ve told you all plenty of times that I’m not into Valentine’s Day. So when you see that I’ve created heart-shaped cakes this week, I don’t want you to question your (or my) sanity. You see, today, February 15—the day AFTER Valentine’s Day—marks eight years since my husband and I started dating. I figured this was a fairly large deal worthy of celebrating because for eight consecutive years, I’ve thoroughly enjoyed his company and the adventure my husband brings into my life. I haven’t even liked myself for eight consecutive years, so he is owed some cake for both the putting up with and actual enjoyment of my insanity. 

I refuse to celebrate Valentine’s Day to the point where I’ve even fudged our dating anniversary date slightly to the right a few hours. How we started dating is a gaggingly romantic story, really. We happened to run into each other by complete accident on Valentine’s Day…in the same bar where we met for the first time at a friend’s going away party the previous August. He was calling me (see, so dated people still used phones for talking) as I was walking into the room; I took it as a sign considering he had moved away for pilot training several months prior and just so happened to be literally standing right in front of me. But if you ask, I’ll tell you this happened after midnight on February 15 because otherwise it sounds like a chick flick plot.

I’m not a normal woman—romance is for the birds. I mean, the moment I knew I fell in love with my husband was at a McDonald’s in Corpus Christi. I stood there, pumping ketchup into five or six tiny little cups, grumbling about the lack of space for burger dipping. I turned around to see Derek, a large drink lid in hand that he had flipped upside down, filling the giant surface area that created with ketchup. My heart skipped a beat, and my head exploded a little—I had found a logical, creative man who loved ketchup as much as I did. The rest, as they say, is history. 

Moral of the story ladies—love doesn’t always come in grand, sweeping gestures or diamond-encrusted jewelry. Don’t be mad at the man who waited to buy your flowers or chocolates until the day after Valentine’s Day when they were all on sale for dirt cheap. He could be saving up to buy something better, like a car or a house or a cruise to Alaska you’ve been begging him to go on because you crave to surround yourself with a tundra as frozen as your heart (thanks, lovey!). Instead, make him cake to let him know you get it, but you don’t have to make a big deal about it or anything. Let the sweet delicious taste flow where words would otherwise fail you…these lemon lava cakes can do just that.
I only get the warm fuzzies when cake is involved.
I have wanted to make lava cakes for ages. But surprisingly, I don't own ramekins. Not a one. Instead of buying a set, I just wanted to wait until it was appropriate to test out my four cavity heart-shaped pan I bought back in 2015 and haven't used since then when I made heart cakes (and my views on Valentine's Day very clear). Whoops. Two years I could've had ramekins or come up with an excuse to use this pan for lava cakes, but I'm stubborn and my personal symbol should probably be a stick in the mud. It's most definitely not a heart. Anyway, the pan worked OK for lava cakes, but my two 6-inch cake pans definitely worked better. So I'll use those in the future or perhaps become a real girl and buy some damn ramekins.
This is about as romantic as I get with minimal self loathing.

Y'all. These. Cakes. They aren't too terribly sweet, but the lemon ooey gooey goodness that slowly pours out of them is to die for. I'm honestly scared to make the dulce de leche lava cakes I've been crafting a recipe for because it may actually kill me. I did try to make a few adaptations to make this a healthier cake, but the calorie content still comes in a little on the high side. You must spoil yourself and the ones you love on occasion, though. This makes 4 large heart cakes (definitely cannot eat one heart alone--these babies are 2 servings per heart!) and an additional 2 individual servings for a total of 10 servings at 308 calories a piece. Adding on a few slivers of strawberries and fat free Cool Whip will only add about another 10-15 calories, but it is totally worth it. You go could extra fat kid and add a drizzle of warm lemon curd on top. Just don't accidentally eat half a jar of lemon curd if you go that route because it is dangerously enticing.
Yet it looks so unassuming in that little jar...
This is a Land O'Lakes recipe that I adapted to make heavier on the lemon flavor. To make, you will need:
  • 1 stick of cold butter
  • 1 4-ounce Baker's white chocolate bar
  • 2/3 cup flour
  • 1/2 cup powdered sugar
  • All. of. the. eggs. Seriously:
    • 4 whole eggs
    • 4 separate egg yolks
  • 3/4 cup lemon curd (I usually use Dickinson's brand, but now that I'm living in Florida, this was not a brand I could find. Apparently, Mackay's corners the panhandle market)
  • 2 heaping teaspoons of lemon zest
  • 1 teaspoon of vanilla extract (not pictured)
  • 1 1/2 teaspoons of lemon bakery emulsion. If this is not something you have, I find it at Hobby Lobby or Walmart. Also, you could try replacing this with juice from a lemon.
  • Optional toppings: Cool Whip Free, strawberries, raspberries, blueberries, lemon curd, powdered sugar, etc.
I own four sets of measuring spoons, so this was easy for me.
 Let me give you a few life-saving, patience-making tips about this recipe. You gotta move fast. So you want everything measured out and ready to roll. Once you add the chocolate and the flour, things get really thick, really fast, so having the rest of your ingredients at the ready will keep this batter from turning into concrete. Also, don't make these cakes until you're just about ready to eat them. Like, "I could go for cake in a half hour" ready. Otherwise, if you make them ahead of time and put them in the fridge or let them cool too long, you're gonna lose your ooze. No one wants that. I actually made my batter and then left it in the fridge all day until we were ready for cake. I did make all mine at once last night (and we totally ate at least one), but we'll see if I can heat them up and maintain some ooze in the microwave later. But for two people, you could just try making two ramekins at a time so the cakes are hot and fresh and save the rest in the fridge.
Such fickle, yet delicious, cake.
 If you're going to make these right away, preheat your oven to 425 and grease the bottom and sides of your pans or ramekins. Get a medium bowl and break up the chocolate bar and cube the cold butter. Melt at 30 second intervals, stirring between each session, until everything is fully melted. This took me about 2 minutes total. While the chocolate and butter are melting, measure out the rest of your ingredients and gather a large bowl. Dump the flour and sugar into it. Once the chocolate is done, let it cool off for a few minutes (hot batter + cold eggs = breakfast, not cake). Dump the melted chocolate and butter in with the flour and sugar mixture and whisk well. Once this stiffens up, dump in the lemon curd, lemon zest, extract, emulsion/juice, and all the eggs and egg yolks. Whisk until smooth and runny like it is above.
Literally the worst impulse purchase I've ever made. Stupid heart pan.
 Once you're ready to bake, fill your ramekins or pans 2/3 full. I was able to place a little less than a cup of batter into each cavity and then each small baking pan. Since I wasn't using ramekins, I literally stood in front of my oven and watched cakes bake to ensure they weren't going for too little or too long. I will now no longer use the phrase "like watching paint dry," but instead, "like watching cakes bake." I'm almost positive that would cure even a severe case of insomnia. If you use ramekins or small pans, place them onto a baking sheet before they go in the oven. Cooking time will vary from 12-18 minutes...the key to knowing when these are done is in the edges. Once the edges of the cakes start to turn golden, they're pretty much there. As long as the tops are not completely runny but instead slightly jiggly, your cakes are complete.
See, jiggly.
 I used way too much Pam and my edges got super dark because of it...but live and learn (or throw away the heart pan), I suppose. I ended up baking these for 16 minutes, but to be honest, I should have pulled them out at 14 minutes. I was just nervous the tops weren't set enough, and something between the 14 to 15 minute mark happened (I probably fell into a brief coma or something shiny distracted me), and by the time minute 16 hit, they were cooked a little too long.
Nothing like the sweaty terror of trying to remove four cakes from a pan at the same time.
 Let these cool in the pan for 10 minutes before you even think about looking at them, let alone removing them. When 10 minutes have passed, use an angled spatula or a butter knife and run it along the edges of the pan or ramekins. Once you can successfully wiggle these away from the edges of the pan, they are ready to come out. I placed a towel on top of my cooling rack and then a sheet of Parchment paper on top of the towel to catch any leakage (such appetizing word choice). I then placed this set up on top of the pan, and slowly inverted until the rack was on the bottom and the pan was upside down on top. Thankfully, I didn't pass out while I held my breath the entire time, and all the cakes came out without issue. This would be way easier to do with individual servings. When my smaller pans were done in the oven, each was easy to flip over and remove the cake from.
Slightly burnt, like me after five minutes outside.
Like I said, for my oven, 16 minutes was literally just a minute or two too long. So they were a little dark, but what had me worries was whether or not they'd have any molten lemon lava inside because of it. Then I would have had to come up with an entirely different blog or eaten all 10 servings in a quiet, social media-free zone. I let the cakes cool for about 20 minutes before adding my toppings. If you're going topping free or using something simple like additional lemon curd and powdered sugar, by all means, eat fresh from the oven. Since I was using Cool Whip, I didn't want it to get melty and weird. For my garnish and decorations, I used an Ateco 879 tip and pipped a mound of Cool Whip Free on top of a few cakes. Then I garnished with thinly sliced strawberries. And then, I prayed for the first time in my life that hot lava would pour out of something inside of my very own home. Dante's Peak pretty much ruined volcanoes for me...I see the words "magma," "eruption," or "molten," and if they aren't immediately preceded or followed by the words "cake" or "chocolate," I get a little twitchy and panicked.
Literally the only time I've ever been happy to see lava.
At first, there was only a small ooze. I thought I had ruined them for sure. Even if I had, at least the screw up was a damn tasty one. But the further in we excavated with our forks, the more lava kept pouring out:
This is still the only lava I want to come this close to.
And then there was lava all over the plate. And we licked up every last bit. Best experience I've ever had with lava. Chili's molten lava cakes are pretty good, but last time I checked (which now that we don't live in Clovis where this was our only dining option, is never), they weren't offering me a lemon version. While I'm okay with chocolate molten lava, I wasn't making these cakes for me (okay, so a little was for me); I was making them for my husband--my devout sour dessert lover. So much so that I let him have the last bite. Of dessert. Willingly. Because this is what you do when you're incapable of public displays of affection or showing romance worthy of a Shakespearean sonnet. You bake. And you bake what you know your loved one likes best. And you let said loved one have the last bite. Because Lord knows, without them, you'd be a ship in the night with 10 servings of lemon lava cakes to eat all by yourself, and you're not familiar with the idea of portion control, so there goes at least 4 servings in a single sitting. Basically, you'd be a giant disaster of a human being. So bake cakes for the person you love that accepts you in all of your disastrous, somehow endearing to them, glory. Remember, flowers and diamonds aren't edible, friends. 'Til next time, my fellow eaters!
Something tells me no one ever looked at Mount Vesuvius this longingly.