Tuesday, June 16, 2015

It Was a Dark and Chocolatey Cake...

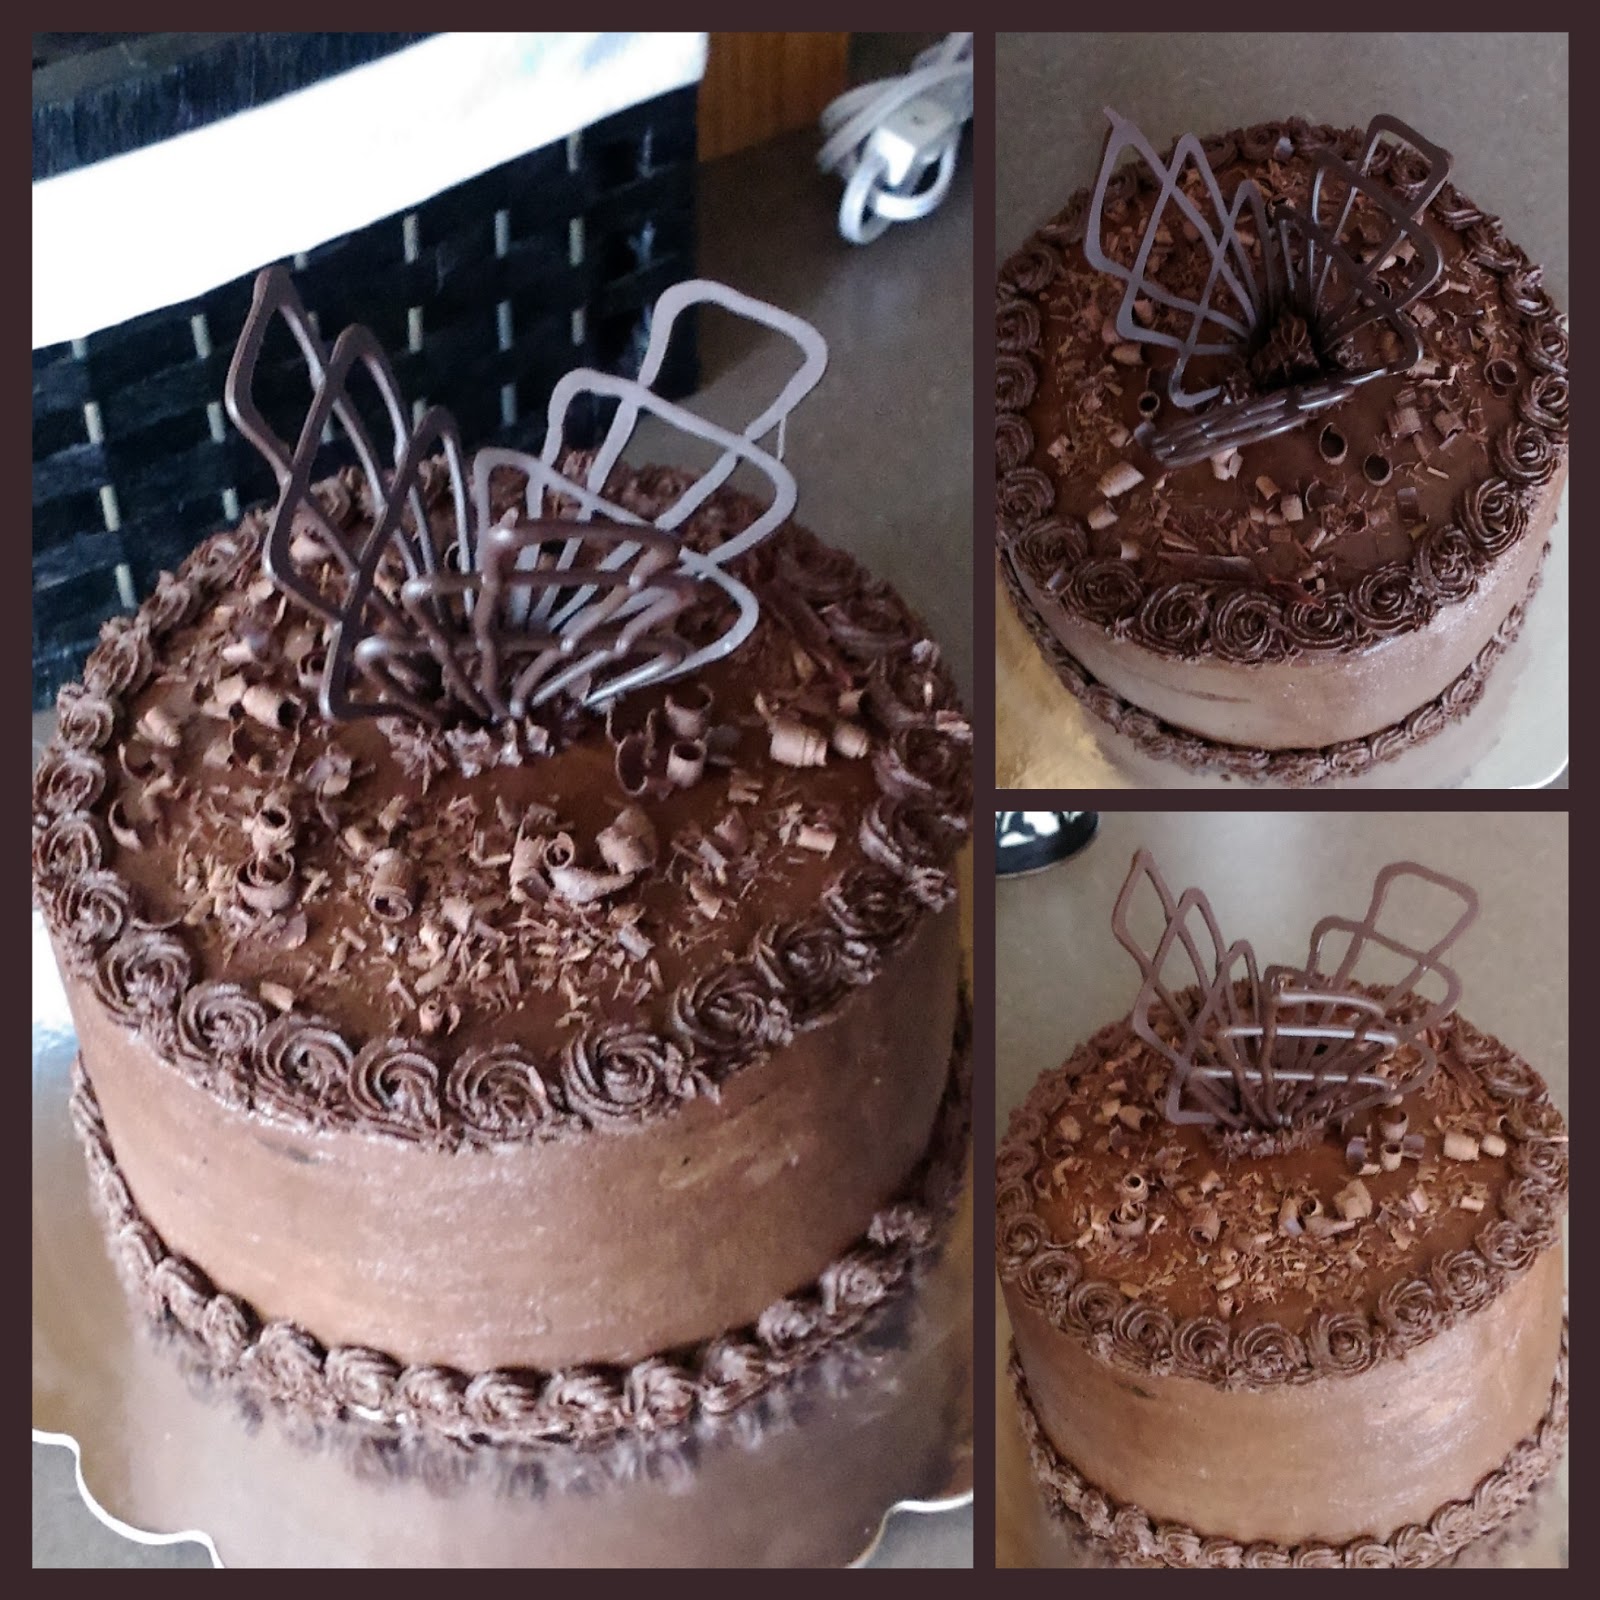
...and isn't that how the good ones always start out? This past weekend my sister, brother-in-law, and niece came out for a visit. Since it was halfway between my sister's and her husband's birthday, I decided to make a chocolate cake of epic proportions to celebrate them both. I also hope that if anyone pities us enough to come visit and make the long, flat, arduous drive to Clovis, they'll only remember how great my cakes taste and forget about the fact that our two main attractions are a small zoo and a Chili's. I wanted to make a dark chocolate fudge cake because when I see chocolate I always ask myself, "How much darker could this be? And the answer is none" (Bonus points for understanding the Spinal Tap reference). Most everyone I know is a huge fan of chocolate, but my husband is not. While he has a million qualities I adore (hello sense of humor, swimmer's build, and charming smile that gets him just about anything), I am slightly perturbed that when he sees a chocolate cake his first instinct isn't to grab a shovel or just dive headfirst into it, but instead to inquire on the status of other dessert selections. I decided I didn't want to be left with half a cake all to myself when my family went back to civilization, so instead of going full dark chocolate fudge from top to bottom, I made the frosting a simple chocolate buttercream so it wouldn't be too chocolatey for Derek to eat. I mean, I did just get a new elliptical, but I had a horrible mental image of me eating half a cake while using it, which totally defeats the purpose...
Heeeelllooooo, gorgeous.

I'm really glad I made the alteration because the dark chocolate is complimented so well by the lighter buttercream...what a happy accident that turned out to be that I will still take credit for, a-thank-you. I know what you're thinking...'Is that a chocolate cake with chocolate frosting with chocolate curls and chocolate filigree? Is she insane?' Short answer: Yes. Yes I am. And it is this kind of crazy that just so happens to translate into evil chocolatey genius territory. If you like chocolate even remotely, this will turn you into a full-fledged chocoholic. Out of all of the -oholics, this is probably the least destructive, so just hop on that elliptical while someone dangles a piece of cake in front of you. Let me break down the cake recipe, frosting recipe, how to create simple chocolate filigree, and chocolate curls. Onward to tastiness!
Sour cream...I don't know how you do it, but you make the best cakes possible.
I came across about a thousand different fudge cake recipes and kind of created an amalgamation of loads of them. The ingredients aren't too taxing, and throwing the cake together in your stand mixer is a complete breeze. You need:
  • 3 cups of cake flour
  • 1 cup of Hershey's Special Dark Cocoa 
  • 2 1/2 cups of sugar
  • 1 HEAPING tablespoon of baking soda (or one TBS and one TSP)
  • 1 1/3 cup of veggie oil 
  • 1 cup of heavy cream or buttermilk depending on your taste preference. The heavy cream will yield an intensely rich taste, but I opt for buttermilk to compliment the sour cream
  • 1 cup of boiling water
  • 1 cup of sour cream
  • 4 eggs 
  • 2 tsp of vanilla extract 
Start by preheating the oven to 350 and greasing two 8-inch or 9-inch rounds. I used 8-inch rounds to yield a very tall cake. I was going for a chocolate tower effect, if you will. My favorite part about this cake is you kind of do things backwards, but this means less dishes! Dump the flour, cocoa, sugar, and baking soda into a stand mixer bowl and mix together with a spatula until fully blended. Then add in the buttermilk/heavy cream and blend slowly. Scrape the bowl then add in the vegetable oil and blend for a minute on medium speed. While you are mixing in the liquids to your dry mix, set up a small pot and boil the water. Once boiling and your other liquids are incorporated to your dry mix, very, very slowly add a little of the water to your bowl. Mix slowly or you're gonna be slinging hot water around at about boob height in your kitchen which could lead to a disaster and a really not fun story to tell the ER doctor (thankfully not speaking from experience). Once all the hot water has been added, let the cake mix rest for just a moment so it isn't super hot (I waited 5 minutes). This way you won't curdle your sour cream and scramble your eggs because the mix is too hot. Add in the sour cream and extract and mix well. Finish off by adding one egg at a time to the mix and blending well. Pour into your greased pans and bake for 30 minutes or until a toothpick comes out of the cake mostly clean.
Don't forget to smack the pans on the counter. This is a very bubbly cake mix, so you want to knock out as many bubbles as you can to keep air out of the cake.
Heaven must look similar.
Let your cakes cool on a cooling rack on top of some kitchen towels until room temp. You can always place into the fridge or freezer to speed this process up, but I used the time to come up with a filigree design and place my plan into action. To make a chocolate filigree, you only need a few simple ingredients:
  • Parchment/wax paper with your design drawn on it
  • Chocolate melts or chocolate chips melted down (I used half a bag of melts)
  • A plastic baggy with a small bit of the corner trimmed or a piping bag fitted with a round tip (I used a #5 tip)
Remember, when working with melted chocolate, there is a golden window of opportunity when the melted chocolate has firmed up enough that you can have great control over it before it gets to hard to pipe with. I melt my chocolate down and load up my piping bag then let it rest for 5 minutes before piping.
I drew a simple design on my paper then flipped it over.

Then all I needed to do was trace over the design with my piping bag full of chocolate. Make as many or as few filigrees as you like. I made 8 with the intention of using 3 and the knowledge of knowing my clumsy hands would break at least 2 while assembling onto my cake and the hope of having an few extras for snacking. Leave the filigrees alone after piping for about 15 minutes. Then use a spatula to place on a plate or tray and put into the fridge to keep cool until you're ready to use.
Chocolate curls are cute and fun, like me after a glass of wine. To make you just need a chocolate bar, baking bar, whatever...chocolate in some bar form and a vegetable peeler. I made short and long curls by peeling the short and long edges of the baking bar respectively. Put more pressure onto the bar to make curls that have more loops. I then placed these into the fridge to chill until I was ready to use them.
The makings of greatness.
Buttercream + chocolate = a marriage of tasty convenience. When your cake is almost cool, begin making your frosting. Gather up:
  • 1 cup of Crisco/shortnening
  • 1/2 cup of softened butter (1 stick)
  • 1/2 cup of Hershey's Cocoa Powder
  • 1/4 cup of Hershey's Special Dark Cocoa Powder (if you want an even lighter chocolate flavor, omit this and use 3/4 cup of the regular powder instead)
  • 2 tsp vanilla extract
  • 6-7 cups of powdered sugar
  • 6-8 tablespoons of milk or heavy cream (heavy cream yields a richer frosting with more flavor)
 Start by creaming together the Crisco and butter for 3 minutes until fluffy. Add in the cocoa powders and vanilla extract and slowly blend together. Add in two cups of powdered sugar, blend on low and then add in two tablespoons of heavy cream/milk. Repeat this until you've mixed in all 6 cups of sugar and all 6 tablespoons of milk/cream. If you want a stiff consistency of frosting, stop here. If you want something you can also decorate/pipe with later, add in the extra cup of sugar and 2 more tablespoons of milk/cream.

What a tall drink of water. Or cake.
 Assemble the cake by slathering a nice layer of frosting on the bottom layer and affixing the top layer to that. Go ahead and crumb coat so that the dark chocolate cake is mostly hidden:
Like so.
Stick in the freezer for 30 minutes to set, then come back in and put a final layer of frosting on top of your crumb coat. Try to get it as smooth as possible, but know you can smooth things out later with a Viva paper towel. Place back in to the freezer for another half an hour and then smooth out any unevenness with the paper towel trick. 
I wanted a rosette border on top and bottom of the cake, so I used a #18 tip on a bag of the chocolate buttercream and started my border. I simply piped a bit of frosting out in the center of my rosette and swirled around to the left until I had come all the way back around to my starting point and stopped piping and pulled the tip away slowly.
And repeated until the bottom was bordered.
I did the rosettes on the top of the cake a bit larger, and at the ending point, I left enough space to pipe a small star and jazz things up a bit. Gorgeous! You could stop there, but then you'd have a lot of filigree for nothing.
Still edible, but prettier on the cake than in the fridge.
I needed a platform to place the filigree into, so I piped a large mound of frosting on the middle of the cake. Then I inserted three of the filigrees into the mound, only breaking one! A miracle! But then I had four leftover filigrees, which even by my standards was a few too many. To finish off, I took my piping bag (still with the #18 tip) and piped small stars around the filigree's base.
Like a filigree graveyard.
I finished off the cake by sprinkling the chocolate curls on the top and around the filigree. This is a seriously awesome-looking cake that does take a small amount of work to bake, but the decorating is so unbelievably easy while it looks unbelievably intricate and hard. So we'll keep that between us because you can totally handle this and make it your own. If my clumsy left-handed self can do it, anyone can. I'm the poster child of enlightening self-deprecation.
You get a filigree! And you get a filigree! Everyone gets a filigree!
Mmm..words cannot really express how this combo of dark chocolate fudge cake and light, airy chocolate buttercream just tastes so right. But, yeah, this cake was extremely tall on its own and adding the filigree on top made it so tall I couldn't use a cover on my cake safe. It was like the supermodel of cake that had legs (or in this case, filigree) for days. Due to this I kept it in the beer fridge until my family arrived and could help me eat this giant, gorgeous tower of cake. Know what goes really well with dark chocolate fudge cake? Beer. So it was almost fortuitous that the cake ended up in the garage beer fridge anyway. As for how my non-chocoholic husband felt about it? Well, we watched the Game of Thrones finale last night, and Derek was either eating his feelings or just that interested in seeing what this cake tasted like, so we each had a piece to stifle the pain of being a fan of this show. Valar morghulis, I suppose. That means "always eat the cake" if you're not a GOT viewer...'Til next time, my fellow eaters!
You make Jon Snow's death a little less painful, chocolate cake tower.

Wednesday, June 3, 2015

Toffee S'mores Bars: Because You Don't Have to Be the Only Thing Roasting This Summer

So June 1 came, and the second it did, Mother Nature hit preheat on her oven. Seriously, we spent all day Sunday sitting on our back porch enjoying a cool breeze, cooler adult beverages, and a couple good books. Come Monday morning, I was sweating like a hooker in church when I walked the dogs at 8 in the morning. Summer is here. My least favorite of the seasons, especially since the closest body of water we had decided it didn't want to pay rent for the month of June and totally dried up in a day thanks to the heat. Farewell, Predator Pond. It's also never really made sense to me that summer is a big season for campfires and bonfires in the later evening. I guess when you spend all day roasting in the heat yourself, you just really need to set something else on fire so you can spread the pain. I guess the one potentially good thing that could come from a backyard fire pit extravaganza is that you accidentally set your yard on fire, in which case, firetruck! Those babies have a hose on them that could turn your entire backyard into one glorious slip-n-slide. I can get behind the backyard fire pit for one reason: S'mores. I've already regaled you with how to make cupcake S'mores, but I needed some roasted marshmallows to help me deal with this sweltering grossness, so I came up with an idea for some deluxe Toffee S'mores bars so I could take the sweetness with me anywhere I wanted without making a mess and bringing ants along with me.
"Hello..is it me your looking S'mores?"
 Ooey. Gooey. Sweet. Salty. In short: Amazing. These are the best part of camping without actually having to be outside...in nature. She's a cruel beast, but these S'mores toffee bars can take the sting out of just about anything. The added bonus is that they are unbelievably easy to make. Seriously...the hardest part about all of this was waiting for them to cool so I could cut them into bars. So if you'd like the summertime taste without the summertime heat, these are for you. If you're a crazy person who loves the summertime heat, I suppose you can still eat these, too, just know I think you're a sweaty weirdo.
I think these are even the simplest ingredients I've blogged about in ages as well.
If you keep chocolate chips and marshmallows on hand during the months of June-August, you already have everything you need to make these bars waiting for you in your pantry. How nice of them.

For the bars:
  • 2 cups of flour
  • 1 cup of brown sugar
  • 1/2 cup of butter
For the toffee:
  • 2/3 cup of butter
  • 1/3 cup of brown sugar
For the topping:
  • 1-10 ounce bag of mini marshmallows 
  • 1-12 ounce bag of chocolate chips
Now be prepared for instructions so easy I'm fairly certain a well-trained dog could follow them. I wouldn't let my dogs make these because Freyja is a rather charming idiot and Hank a rather charming glutton (plus, where would that leave me, the baker?!), but you may have more luck with your dogs.
If you want thin bars, line a 9x13 pan with foil and spray the foil with non-stick spray. If you want really thick bars, place these in an 8x8 with foil and spray. Preheat the oven to 350.
Nuke your butter in the microwave for 20 seconds. You want it goopy, but not melted. Mix it in with 2 cups of flour and 1 cup of packed brown sugar. Take two forks or a pastry cutter (I've yet to meet anyone that actually owns a pastry cutter) and blend all the ingredients together. This should form something with consistency similar to Gak. You're welcome for the 90s reference.

Take the edible Gak and press it into your pan. I took a handful at a time and pressed it firmly into my pan until the pan was full. Pay close attention to the edges- be sure to press these areas down firmly as well so your edge pieces don't crumble like a dainty flower in a storm...or me in over 80 degree weather.
Now, let's make some toffee. Once you realize how easy this is, you're going to put toffee on EVERYTHING. I just wanted to eat it straight out of the saucepan. So, on medium-high heat, place 2/3 cup of butter (this is 10 1/2 tablespoons, let me save you the Google search) and 1/3 cup of packed brown sugar and melt together in a small saucepan. Keep mixing thoroughly until it begins to boil. Once boiling, stir like hell for one minute and then remove from heat. You need to use this stuff right away or it will be thicker than syrup and impossible to spread, albeit still delectable, so have your crust at the ready.
Pour your toffee on top of your crust. I moved my pan back and forth to get an even coverage. Now place on the top oven rack and bake for 17 minutes.
Not gonna lie, ate quite a few marshmallows while waiting for this crust to come out of the oven. Your entire house will smell how I imagine the inside of the Keebler Elf's tree house must smell, and it will make you hungry. But once the 17 minutes has passed and your toffee is nice and bubbly, things get even better.
Spread your entire (what's left of it after snacking anyway) bag of chocolate chips on top of your toffee crust. Place back into the oven at 350 for 3 minutes.
One your chocolate chips are melted, take a spatula and spread them evenly over the crust. If you don't like marshmallows, you could always call it a day here or top with crushed walnuts and still have an amazing dessert. But when it's so hot outside I could bake cookies on the dashboard of my car, I need roasted marshmallows on top of this chocolate to make my soul stop hurting. Sweating like a pig doesn't seem so bad when S'mores are involved.
Top the chocolate layer with your marshmallows. Doesn't have to be perfect because these will spread out and get puffy as they roast. Marshmallows, what can't you do? Stick this under your broiler for 2-3 minutes depending on your roasted marshmallow preference.
This was a full two minutes under the broiler, and it was perfect. Mouth watering yet? If it isn't, it's probably just because it's so damn hot outside your body refuses to use any more moisture than necessary.

Let cool in your pan until room temp. I placed in the fridge for 1 hour before removing from the pan, and then I waited another hour before removing the foil from the sides and cutting into bars.
Once slicing, enjoy a bar or two. I mean, I'd say you (or your dog) earned it after making them, but they're just so damn easy to put together that this isn't one of those moments resulting in hard work earning a reward. Instead it's a chance to eat something so delicious it makes you forget you may or may not be sweating to death. I suppose that's the magic of the S'mores bar--making summer tolerable since some Girl Scout decided she was tired of eating twigs and berries on a camp out and went with it. God Bless her...and whoever came up with toffee, but I'm too lazy to look that up because I'm hungry and I hear my pan of bars calling my name. Maybe the heat is making me delirious, y'all...'Til next time, my fellow eaters!
I can and will have S'more. I promise I'm done with my terrible puns now.

Tuesday, May 26, 2015

Ace of Cakes...Seriously.

I hate humidity. I hate it more than slow walkers, asking people for favors, and not being able to eat Blue Bell ice cream with the cobbler I made a few days ago. I talk my fair share of trash about Clovis, but usually our humidity levels are so low we all shed our skin like snakes every season to deal. Lately, however, we have gotten more rain than this city has seen in years. Almost 8 inches since the beginning of May! I mean, things are green, my predator pond is back in full swing and has triple the water of last year, but the mosquitoes and humidity are now rampant. I don't like stepping out of a shower only to sweat through my towel and need another one before I even finish drying my hair. Granted, I probably have some sort of sweat gland cancer considering I sweat like a football team in sauna, but somehow it doesn't bother me so much when summertime isn't humid. Aside from my hair looking like a wilted dandelion and my excessive sweating issues, humidity is hard on way more than my petty vanity and other people's sense of smell--humidity is hard on baking. I was commissioned to make an ace of spades birthday cake for a friend's party last weekend, and the 95 percent humidity nearly killed my frosting dreams. I realize if we ever move somewhere with regularly high humidity that I may not be able to frost without the use of fondant, and that makes me incredibly sad. I mean, I'm not so good with the emotions, but that realization definitely didn't give me the warm fuzzies inside.
But this cake certainly did.
I used a few new techniques in creating this cake: buttercream transfer and stenciling, but I used the Guinness chocolate cake with Baileys frosting recipe just doubled to make a 9x13 cake. I wanted to make the whole thing look like an actual (albeit edible) playing card, complete with that Bicycle Playing Card back look on the sides. The humidity almost beat my dreams, but after a few meltdowns and tantrums and threats of never making another cake, I managed to pull myself together and soldier on. And it only took one glass of wine! I mean, really, like I'd never make another cake...if I had a piece of actual cake for every time I've said that I'd have like five cakes all made by me anyway. So let's talk about this buttercream transfer business because it will totally change the cake game for you, especially if you feel like fondant is the only way you can do cool cake toppers. Be prepared, as I am about to take you through a crappy photo montage to the max.
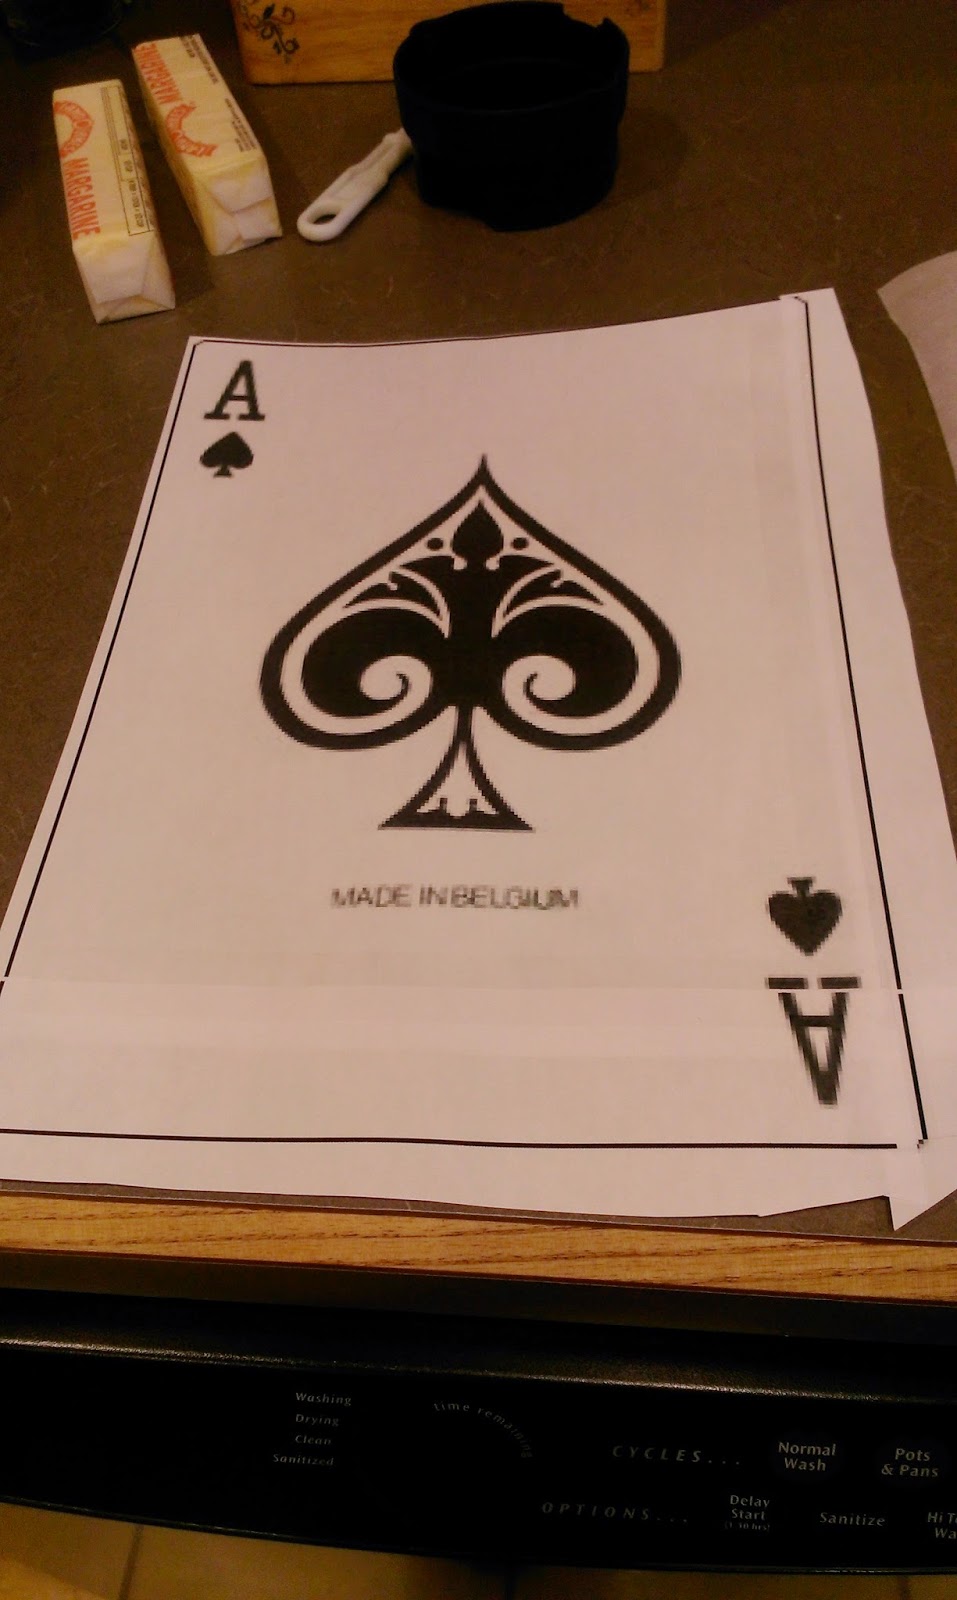
Start by printing out whatever image you want to appear on the top of your cake. I adjusted the printing size to 8 1/2 by 12 1/2 inches because I initially planned on having a small border around the cake top. But apparently my 9x13 pan is actually only an 8x12, so I had to scrap that idea entirely. No idea how the hell that happened since the pan itself really does measure 9x13.
Then take some Parchment paper and place it on top of your printed image Trace the image with a Sharpie.

So much Sharpie on my left hand after this.
Take your tracing and place it face down on a clear cutting board or plexiglass. Be sure to tape all the edges down.
Drink Baileys as needed.
I made some alterations to my Baileys buttercream so that I could make it as white as possible for the playing card top. It was still deeeelissshhh:
  • 1 stick of room temp butter
  • 1 1/2 cups of Crisco
  • 6 cups of powdered sugar
  • 1 tablespoon of CLEAR vanilla extract
  • 3-4 tablespoons of Baileys
This does make quite a bit of frosting, but I used it all to make my buttercream transfer PLUS another batch to crumb coat and frost the sides of my cake. Combine the Crisco and butter for 3 minutes in a stand mixer, then add in the extract and 1 tbs of Bailey's. Add in three cups of powdered sugar and mix on low, scraping the bowl as needed. Add in 2-3 more tbs of Baileys depending on consistency preference and three more cups of sugar. It is easier (and boozier!) to add in 3 tbs at this point to make piping with the buttercream turn out better for your transfer. 
You will need varying sizes of round tips depending on what kind of image you are piping. I used a 3, 5, and 12 Wilton tip. If you need to dye your frosting different colors, simply take a few small bowls and dye away. I like using Wilton's gel dye, as it really gives a rich color without a weird taste like Americolor dye can. Fit your tips to piping bags and load up with whatever color you plan on outlining your image with.
I needed to outline the spade and smaller details in black, so I loaded a piping bag fitted with a 5 tip and outlined the A, small spade, and large spade.

Buttercream is quite malleable, so if you look under your glass cutting  board and see spaces or small holes in your outlines, take a paintbrush and lightly push your frosting in and down until the light or holes aren't noticeable when you check from the underside of the cutting board.
Once you've got all your outlining done, place the cutting board into the freezer for at least a half an hour to set. I waited a FULL hour because I did not want there to be a remote chance that my black frosting would melt down and stain the white frosting later.

After my first deep freeze, I went back in and filled in the A, little spade, and larger spade. If you have multiple colors in your image, fill them in one at a time with a freeze between each color so nothing runs. Again, CHECK your work frequently from the other side of the cutting board. If you see light poking through, uneven lines, etc. fix it with a little paintbrush. I'm not going to lie to you, this is insanely time consuming, but I accept nothing less than perfection. If I had a ruler, I'd snap you on the wrist with it right now. Ice your wrist while your transfer is back in the freezer for another 30 minutes to an hour to let things set.
I fitted a 3 tip with plain white Baileys frosting and came back in and filled in the large spade, and with a 12 tip I outlined around the edge of the card before switching back to the 3 tip to fill in the A and little spade. Of course, things went back into the freezer after a quick quality check from underneath the cutting board and necessary adjustments with my paintbrush.
Now, once you've filled in all your colors, you want to give your transfer a background. Fill it in with whatever color you want to match the rest of your frosted cake. Clearly I needed to use white to give my playing card a white background. I piped back and forth across the card and OVER the top of all my previous work using a 12 tip. I came back in with a larger paintbrush and pressed things flat.
To finish up, smooth out your background with a small angled spatula. You want an even, flat back so it fits smoothly on top of your cake. Place in the freezer for AT LEAST two hours before transferring to your cake. I did my transfer a full day before I made my cake so that it could sit in the freezer overnight.
I told you it wasn't easy, but it is possible. Anything worth doing is worth doing well, or as I call it, whole-assed. Half-assing your transfer is going to make for one sad cake. Sad cake can still be eaten, but you will taste it's tears and heartbreak which taints the experience. Or something. Definitely give yourself a day or two ahead of time to make your transfer. Now, on to the much simpler stenciling--especially if you live somewhere without soul crushing humidity!
Before you stencil, make sure you've crumb coated your entire cake. Freeze the cake for 30 minutes, and then frost your top layer of frosting. The top of the cake doesn't need a final layer of frosting because it is getting the transfer. Not pictured because I was hungry for lunch: Place back in the freezer to set for 30 minutes and smooth out the sides with the Viva paper towel technique.
You can find a stencil for just about anything on Amazon, just search for "cake stencils." Yes, supremely easy compared to what we just went through with the transfer, thank the cake gods. Whatever color you want your stenciling to turn out, head to Walmart, Michael's (hate you if you have one!), HobLob, etc. and get a can of Wilton color mist. My husband picked up two for me just in case (but mostly to prevent another meltdown if I ran out. Thanks, hun.).

Your buttercream should be very cold for this so the stencil doesn't peel your frosting away. Simply place up against the side of your cake and press in gently so all the little nooks and crannies are sprayed evenly.
Then spray! I covered myself and most of my kitchen in blue, but most importantly, I covered the sides of the cake! Hooray! Once done spraying, gently pull away the stencil and rinse it off with water. Color mist's mortal enemy is water (and subsequently humidity), so it will come off of you, your kitchen, and your stencil quite easily. Be sure to thoroughly dry the stencil before repeating on all sides of your cake.
Place your stenciled cake back in the freezer for an hour or two to firm up the color mist. This is where I lost my mind. It was so humid my cake started sweating if it was left out for more than five minutes and ended up looking like a crying teenage girl wearing blue eyeliner (unclear if she's crying because she couldn't find the right shade of eyeliner or Manic Panic hair dye). This meant I needed an extra set of hands and more wine- stat! To finish the cake in a quick manner. Carefully and oh so gently, we took the buttercream transfer from the freezer and removed it from the cutting board. Using all four of our arms (not a typo!), we flipped the transfer over and lowered it on to the cake before removing the Parchment paper.
I would've lit my house on fire if this had broken in it's final stages.
Upon peeling off the Parchment paper, you will have lines running across your cake giving it that Crow's Feet look we all try to Botox away. Don't worry- if you followed the frosting recipe above, you have a crusting buttercream on your hands and can use a Viva paper towel to smooth these lines and wrinkles away. Wish this worked on my face, too.
Ahh, Botox cake.
I had to keep taking breaks to put the cake away so it would stop crying. I may have even been crying in there once or twice. But thankfully, humidity be damned, this cake turned out almost exactly as I had pictured it in my head....minus the border because  my transfer flattened out significantly after the paper towel trick, so I had no room for one. I simply smoothed the sides of the buttercream transfer for a finished edge.
I believe this cake is aces...
Y'all, this cake was a HIT. Worth the existential crises, back-aching work, and everything. The birthday party had a poker theme, and this confection literally took the cake...as did everyone else. I've never had people take SECONDS of my cake, but they did, and they did with frequency. I was told by several guests that this was the best chocolate cake they'd ever had in their life (and naturally I agreed- I just didn't realize how big of  gold mine I've been sitting on since St. Patrick's Day). Basically, what I'm saying is, make the damn chocolate cake and change your life already. If you live in sweltering humidity, forgo the pretty frosting and just eat this by the fistful. 'Til next time, my fellow eaters!
I don't have a poker face, but I do have a cake face. As in, my face was covered in it after I finished my piece.

Monday, May 11, 2015

My Sopapilla Awakening


When I was a child, I was an extremely picky eater. When we went to places like the Olive Garden, a Japanese steakhouse, or even a sub-par fast food join in my eyes, my parents always had to bring in a McDonald's Happy Meal for me. I would eat most things my mother made at home, except green beans. She would regularly tell me I wasn't getting dessert until I finished them, so I would take ten minutes to eat two green beans while hiding the rest under my chair. By the time she had realized what happened, I had licked the plate clean and fled the dining room...if I had a dog as a young child, I probably could've gotten away with this more than twice. I was also a painfully shy child, and if I wasn't related to you, I hid behind the nearest parent while they conversed with you. In all honesty, I acted much like a feral cat as a child where food and strangers were involved- when no one was looking, I might creep up, take a tiny bite, and run away until the strangers left or come back for more bites if I actually liked the food (I also became very good at hiding under tables due to this). When we would stay with my dad on weekends, he would go through his regular rotation of things I found acceptable to eat- fish sticks, hot dogs, sandwiches, and macaroni and cheese. But if it was a long weekend, my dad generally tried to avoid feeding my sister and me macaroni and cheese for breakfast, lunch, and dinner (4-year-old me and 28 year-old-me still think of this as the Holy Grail of menu planning), so we would go out to eat at one of the few places I found tolerable- Shakey's Pizza or El Chico's. I was always OK with pizza because I saw the merits of putting tons of cheese on top of bread and heating it up, and I liked El Chico's because they had curly fries and Jello (Hindsight- what the hell kind of Mexican restaurant is this?). Since I was too shy to talk to servers, my sister always ordered me the same thing I wanted, but she and my dad always tried to get me to take a few bites of their food or dessert...Jello couldn't sustain me forever, after all. On probably the fiftieth request, I finally caved in and tried a little bit of a sopapilla. The second it hit my tongue, I am positive my pupils dilated and my quest to eat everything sugary-sweet began. The sopapilla actually opened me up to trying other "Mexican" food like Taco Bell, and I consider it a gateway into not being afraid to embrace the better TexMex cuisine I have become so obsessed with. So when one of D's friends hosted a belated Cinco de Mayo party (aptly titled Ocho de Mayo as it was hosted on May 8), I knew I had to bring my sopapilla cheesecake bars to try to enlighten as many people as possible.

Te amo. Te amo mucho.
I adore these. Know who else adored these? The entire party. I made a whole sopapilla cheesecake and ended up cutting the bars to half the size above to make more bars for people. The whole tray was almost entirely demolished before dinner was even served. After dinner, well, I took an empty plate home two hours after I had arrived. To say these were a hit is like saying people like free stuff- it's just a damn fact. But what's best about these? It's a Pillsbury recipe I tinkered around with, and it only takes like fifteen minutes to make. SO SIMPLE that you too can be the life of the fiesta, or just make your family love you that much more.
Make sure you get original crescent rolls and not garlic butter crescents....

You are a mere few ingredients and simple steps away from a sopapilla awakening, my dear friend. Here's what you need:
  • 2 rolls of original or reduced fat crescent rolls (you can also just get the crescent sheets, which would be way easier, but the commissary didn't have any- whomp, whomp)
  • 2 8 ounce blocks of cream cheese (you can use reduced fat cream cheese, but...real cream cheese is just where it's at with cheesecake)
  • 1 cup of sugar
  • 1 teaspoon of vanilla
  • 1/4 cup of melted butter
  • Cinnamon and sugar mixed together for topping (I used 3 tablespoons sugar to 3/4 tablespoon of cinnamon)
Lightly grease a 9x13 pan and preheat the oven to 350. Take one tube of crescents and press them into the pan. Make sure you've pressed the seams together if you're using the rolls and not just the crescent sheet.
Mix together the cream cheese, sugar, and vanilla in a stand mixer. Spread it on top of the first layer of crescents until everything is covered evenly. Doesn't have to be perfect, but somewhat level is a good goal to aim for.

Roll out some Parchment paper or flour your counter top and open up the second tube of crescents. Even things out and pinch together the seams before transferring to the top of the cheesecake mix.
Ahem, rotate your computer screen, and then use your hands to continue to pinch together the seams in any areas that came loose while transferring.
Place the melted butter in one bowl and the cinnamon sugar in another.
This right here- you will hear angels singing. Spread the melted butter as evenly as you can on top of the top crescent sheet, and then sprinkle the cinnamon sugar on top. I used a spoon and flung the mix on top of the butter. Certainly doesn't have to be perfect because it is gonna look good no matter what after you bake it at 350 for 25 minutes.
Told you so. Now let your cheesecake set in the fridge for a few hours or the freezer for one so you can cut them into bars.
I think this initially made 12 pretty decently large bars, but I did end up cutting everything in half and some into quarters again to feed the masses. You can keep these chilling in the fridge for as long as they last, but when you have them out on a table for people to eat, they will be gone before the cheesecake can even get to room temp. I promise.
My tribute to the greatness that is the sopapilla- 5 easy ingredients and 15 minutes of prep work. And there you have it- how one tiny little delicious piece of sugary-fried dessert took me from only being able to eat at McDonald's to experiencing what places other than the Golden Arches had to offer. I'd like to think that thanks to the sopapilla, I learned I could be a much braver little girl and not a feral kid cat. It took a few years, but I began eating most things or at least was not afraid to try them, and at the age of 9 or 10, I finally started speaking up and placing my own orders at restaurants instead of having my sister do it for me. I found my voice after that...and have not stopped talking since. 'Til next time, my fellow eaters!
Thanks for the delicious cinnamon-sugar and sometimes honey-laden memories, sopapilla cheesecake bars.